Overview
Uploading the bill is mandatory to avail the fuel and travel reimbursement benefits. Zeta team verifies the Fuel and Travel bills and approves the amount post successful verification. The approved amount gets deducted from your Fuel and Travel Card and transferred to the Cash Card.
Uploading functionality appears only when your HR grants reimbursement against Fuel and travel expenditures by uploading the legitimate bills.
Note that the unused fuel and travel card amount would be credited to your account after tax deduction based on your income tax bracket by end of every financial year by your employer.
Successful Bill Upload Tips
Ensure that you upload a legible bill to avoid any rejection of the fuel and travel claim.
Ensure to claim only against fuel and travel purchase to avoid rejection.
Ensure that you claim does not exceed the fuel and travel card balance, else you will receive an insufficient balance error.
Using Zeta App
Multi-Bill Upload
Multi-Bill Upload allows users to claim multiple bills of a product type together instead of a single bill, thereby reducing users' time and effort, by avoiding the repetitive process of uploading bill from start to end for each and every bill claim.
Features:
Multiple claims: Up to 10 claims of a product type can now be uploaded together.
Auto-saving: In the event of user clicking the back button during uploading process, Auto-save feature saves the details of the claims for 30 mins, if user has uploaded an image.
Linking transactions: User has option to link his bill with any previous transaction done through the specific benefit card.
Partial submission of bills: Failure in uploading of one bill does not affect the upload of other claims. User is displayed proper status of all these claims after upload.
Follow the below steps to upload your bills:
Open the Zeta app interface in your smart phone.
From the Home tab, navigate to the cards section. Select Fuel Card from your list of benefit cards and tap it to view the Upload bills option.
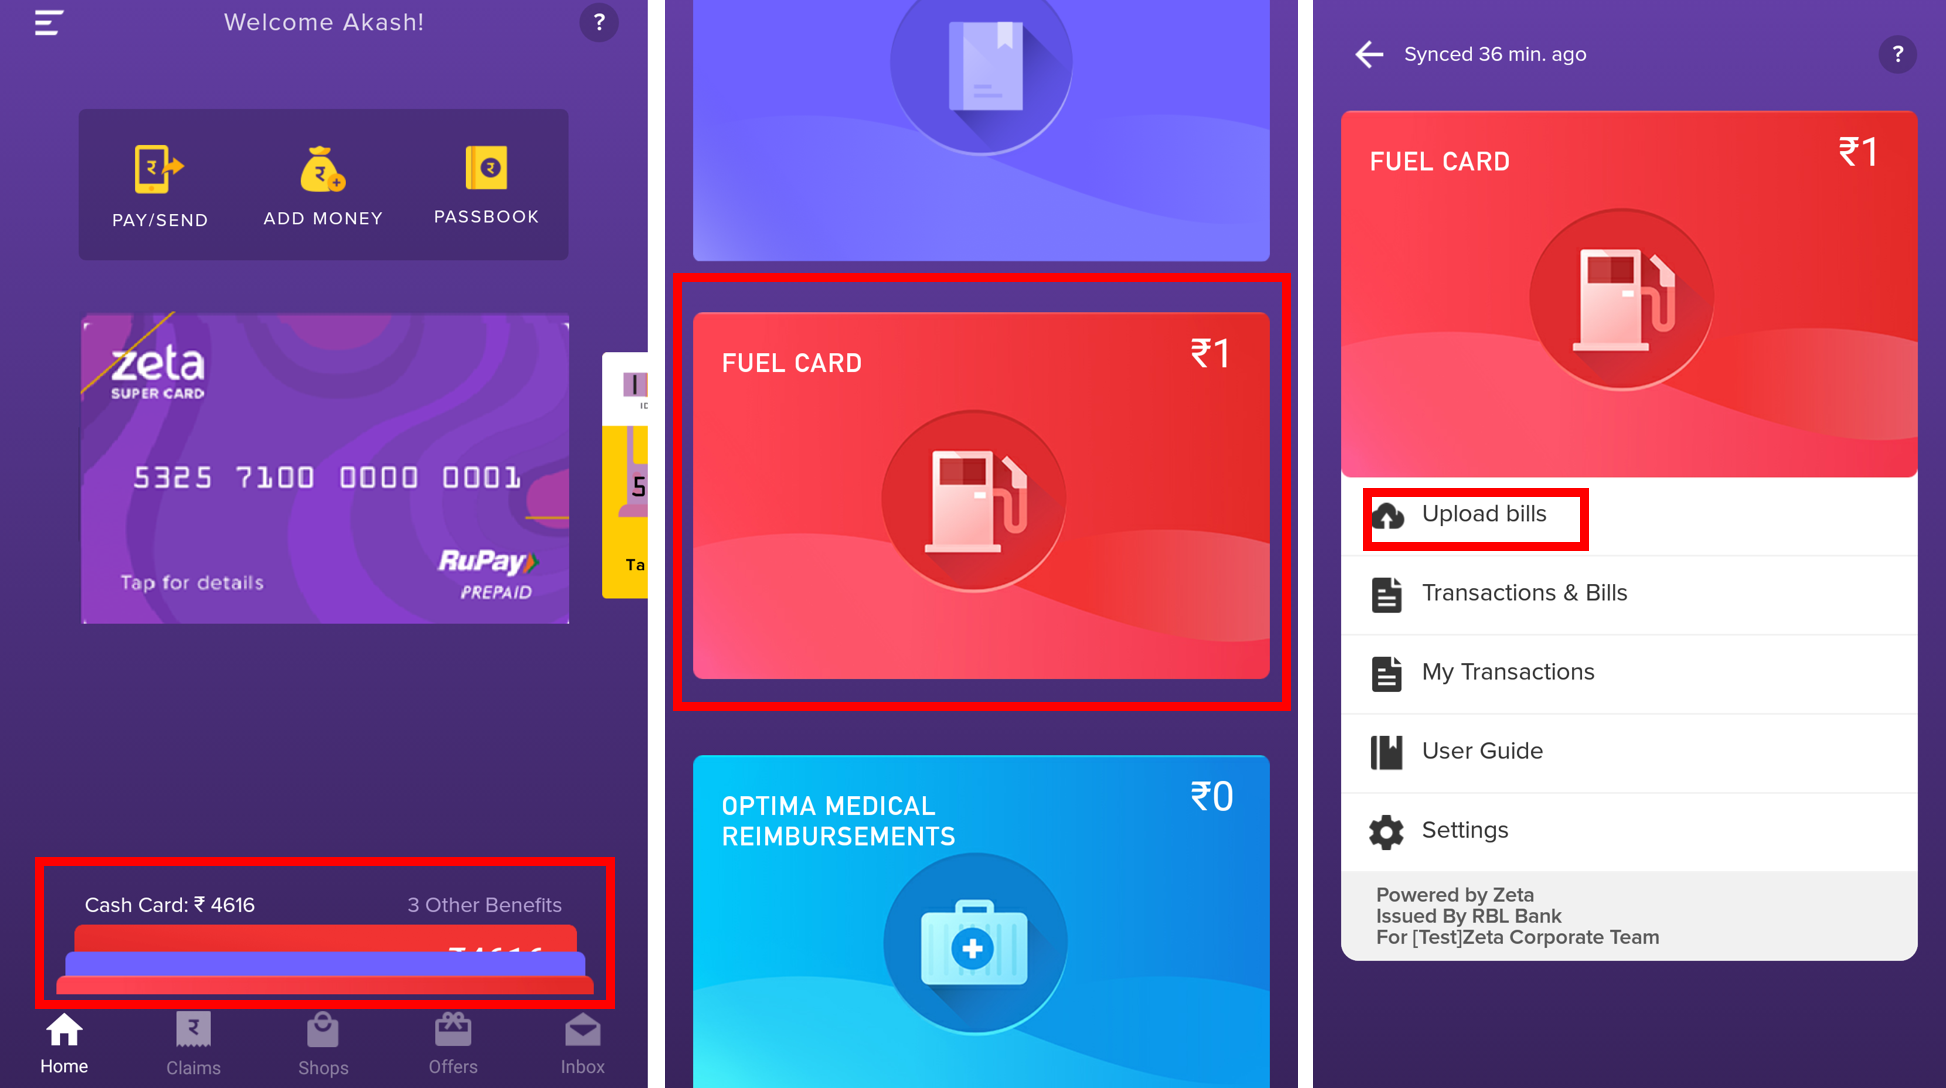
- Enter the amount to be claimed in the space provided and attach the bill by clicking + symbol. In case of a longer bill, click on the + symbol again to upload the remaining part of the bill picture.
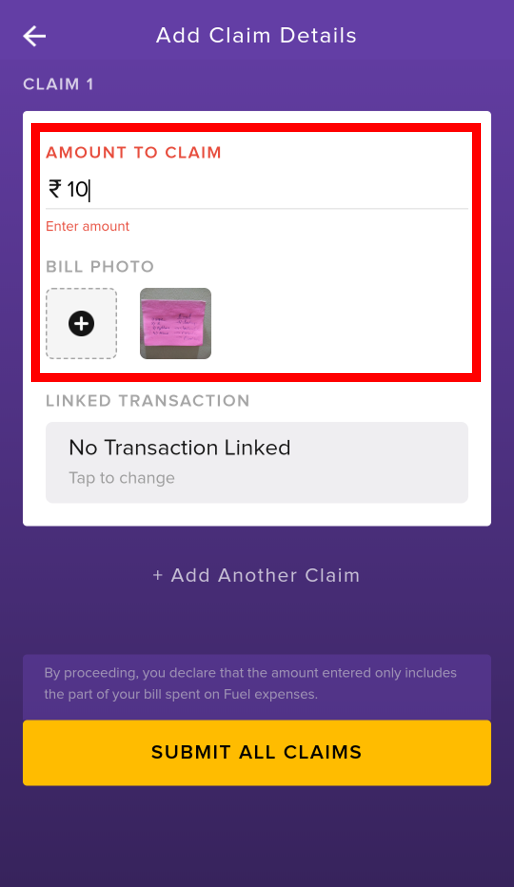
Also, mention whether you paid for the claim using Zeta or without using Zeta under LINKED TRANSACTIONS.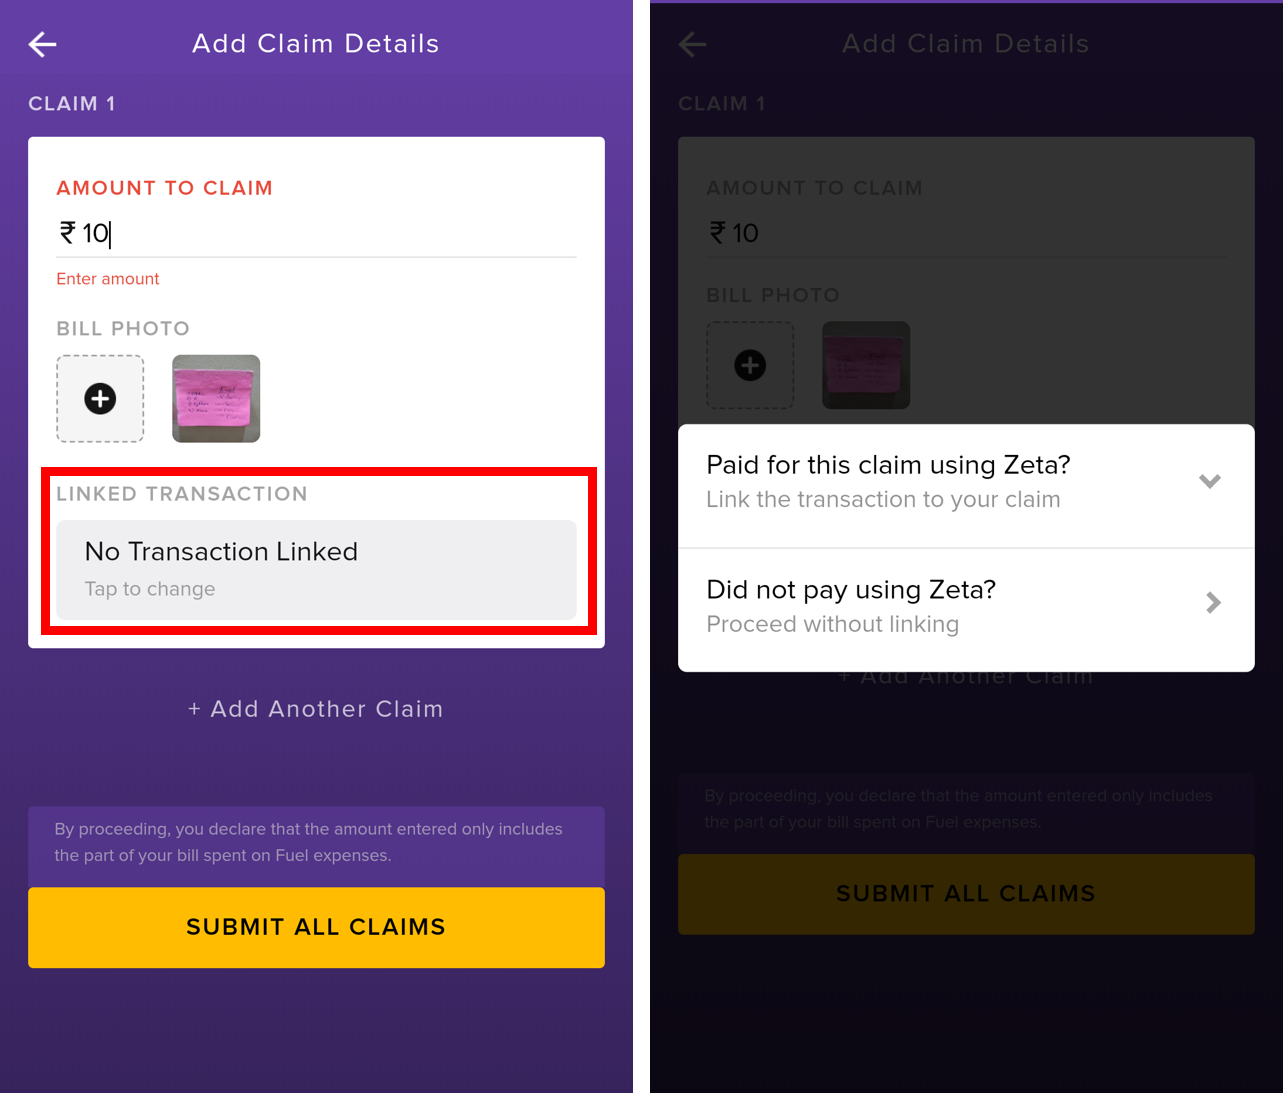
Click +Add Another Claim to upload the next bill in case of multiple bill claims and click SUBMIT ALL CLAIMS to successfully submit the claim.
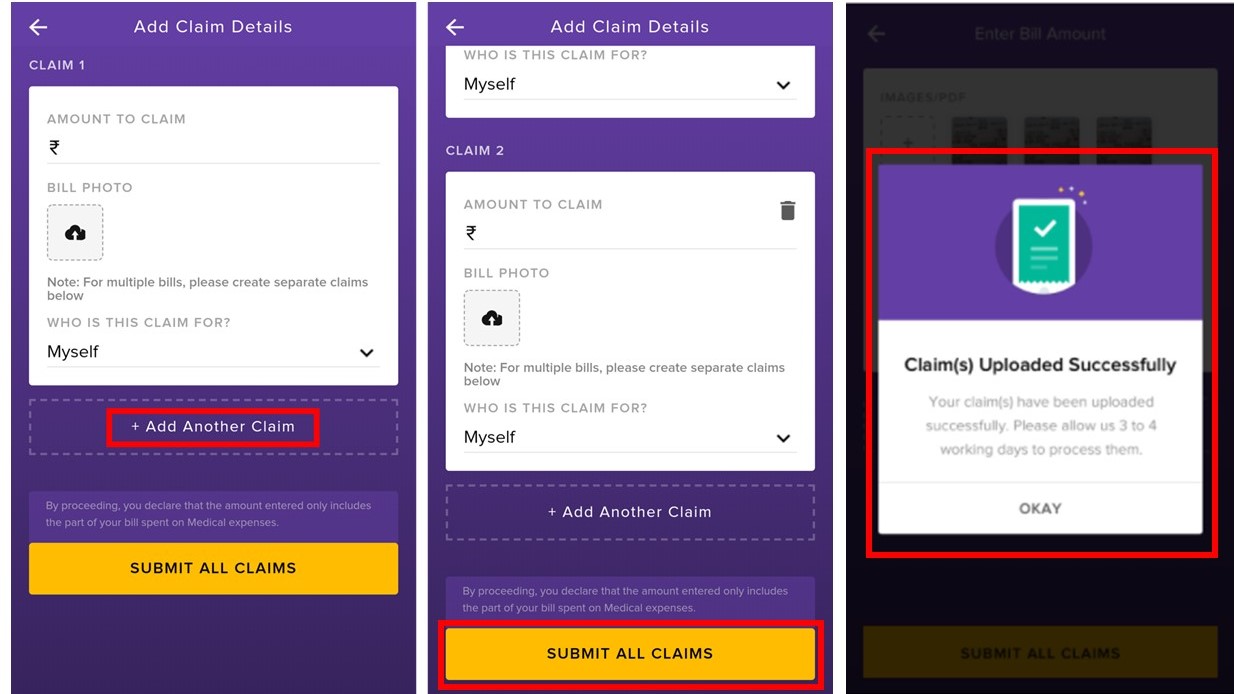
- Once claim(s) are uploaded successfully, you receive a message that your claims have been uploaded and 3-4 working days are required to process them.
Using Zeta Web Console
- Go to www.zeta.in and hover the mouse pointer over the “SIGNUP/LOGIN” tab. The employer/employee signup or login screen appears.
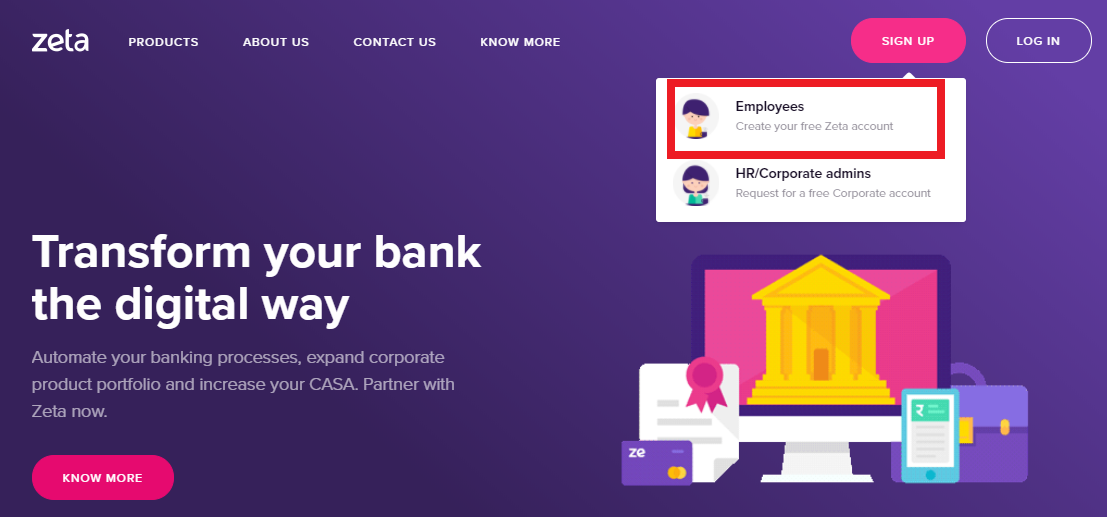
- Navigate to Employees option to log into Zeta Web Console.
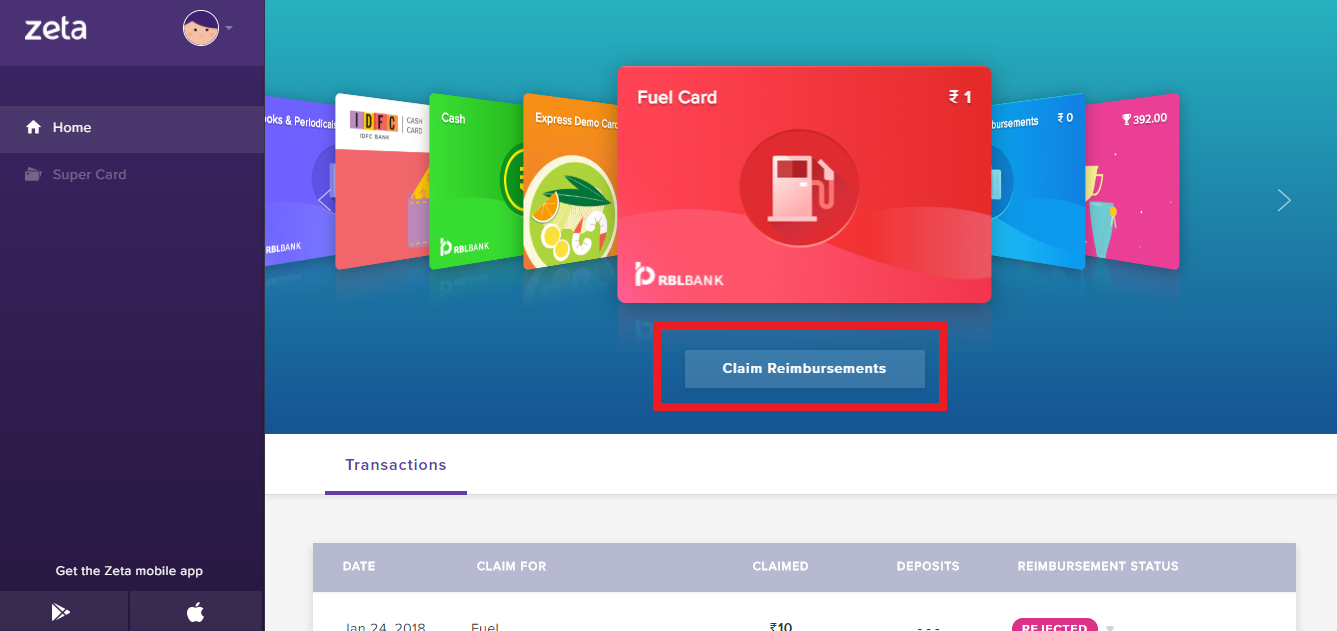
- On the Home screen of Zeta on Web console, navigate to Fuel Card in the list of benefit cards and click Claim Reimbursement.
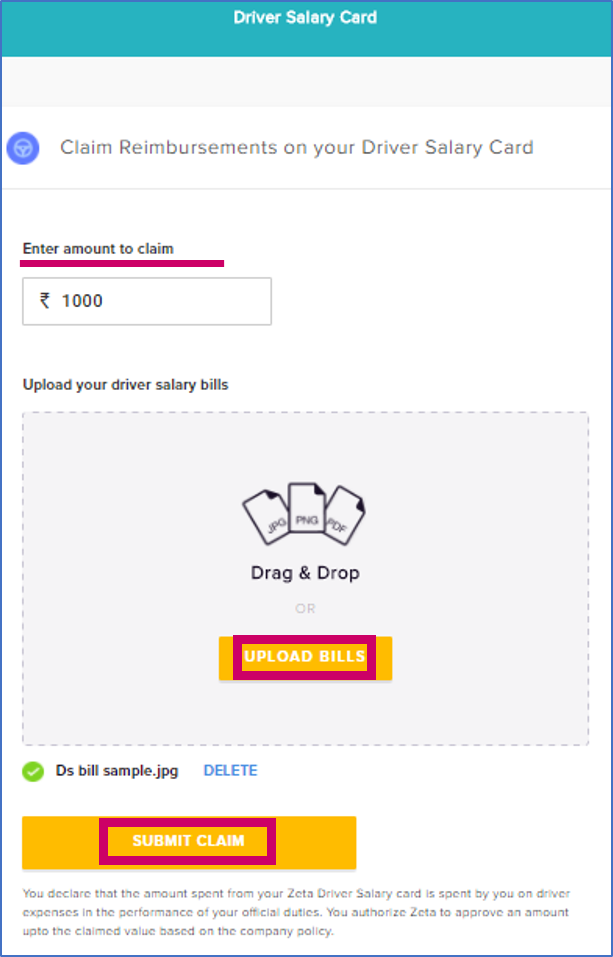
- Perform the following task on this screen:
- Enter amount: Enter the correct amount in Enter amount to claim field as part of the driver salary that you want to claim.
- Upload bills: Click Upload Bills and browse to the image folder to upload the driver salary bill. Note that you can delete and upload the bill again in case of any discrepancy.
- Submit for review: Finally, click Submit Claim to save the entries for verification by Zeta team.
You’ve completed uploading the billing process using Zeta Web Console. You'll get a SMS notification and inbox card on the statuses of your transaction. You can see the inbox card details in your Zeta app under the Inbox tab.