Manage Companies
To View Your Companies
Log into the Zeta Optima platform
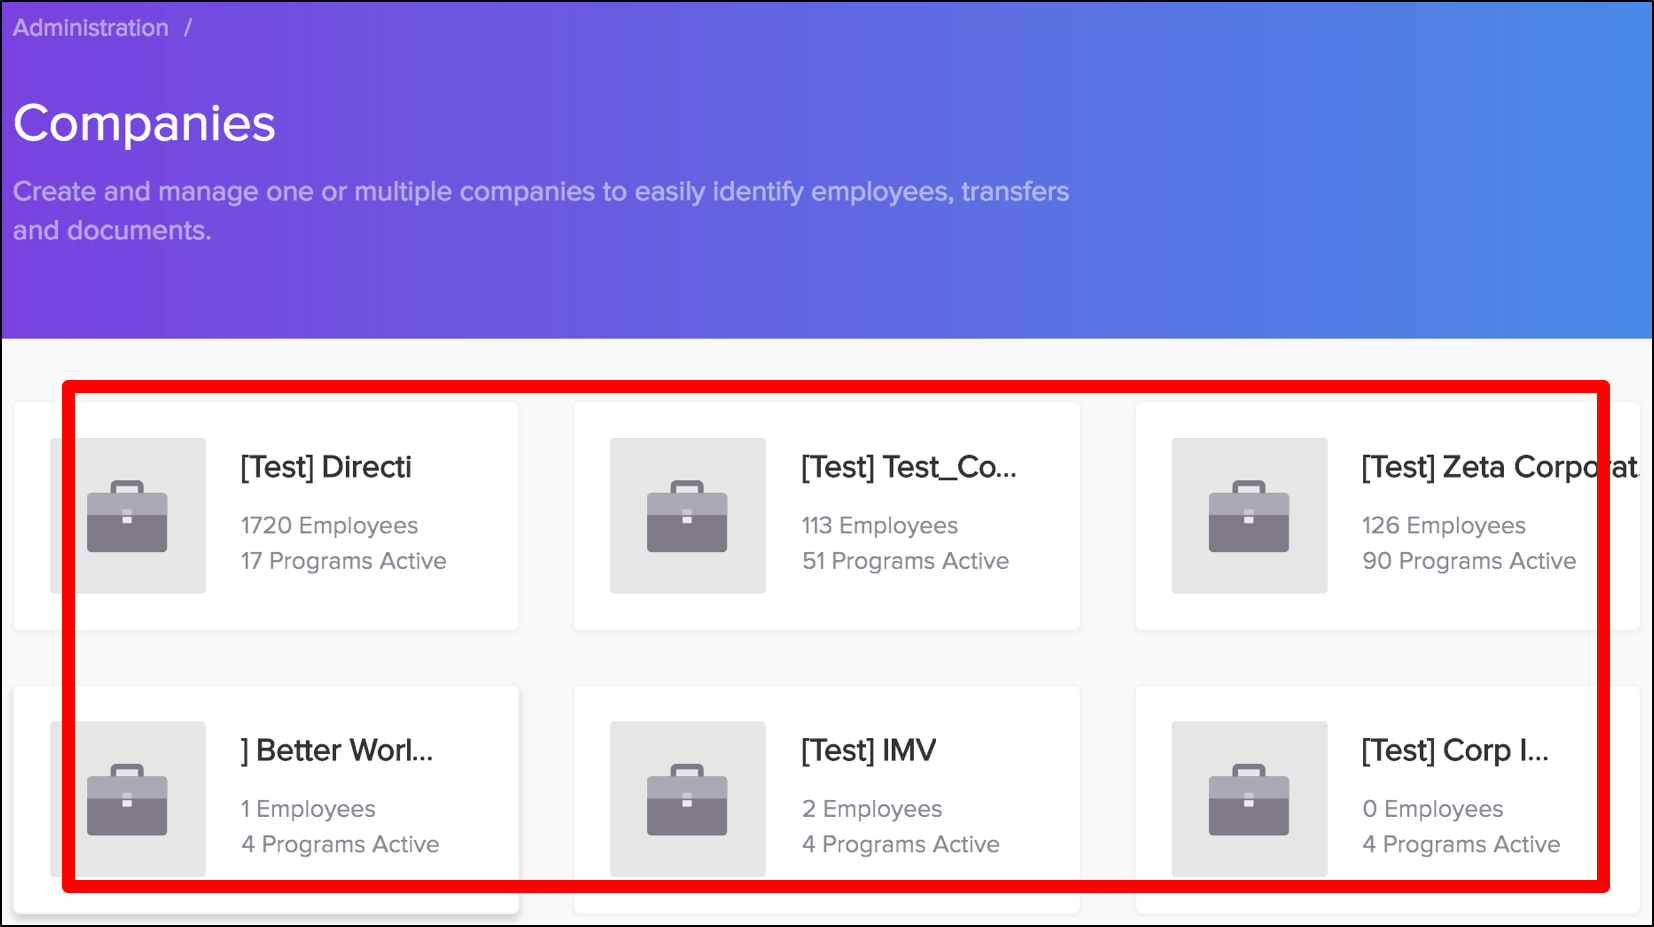
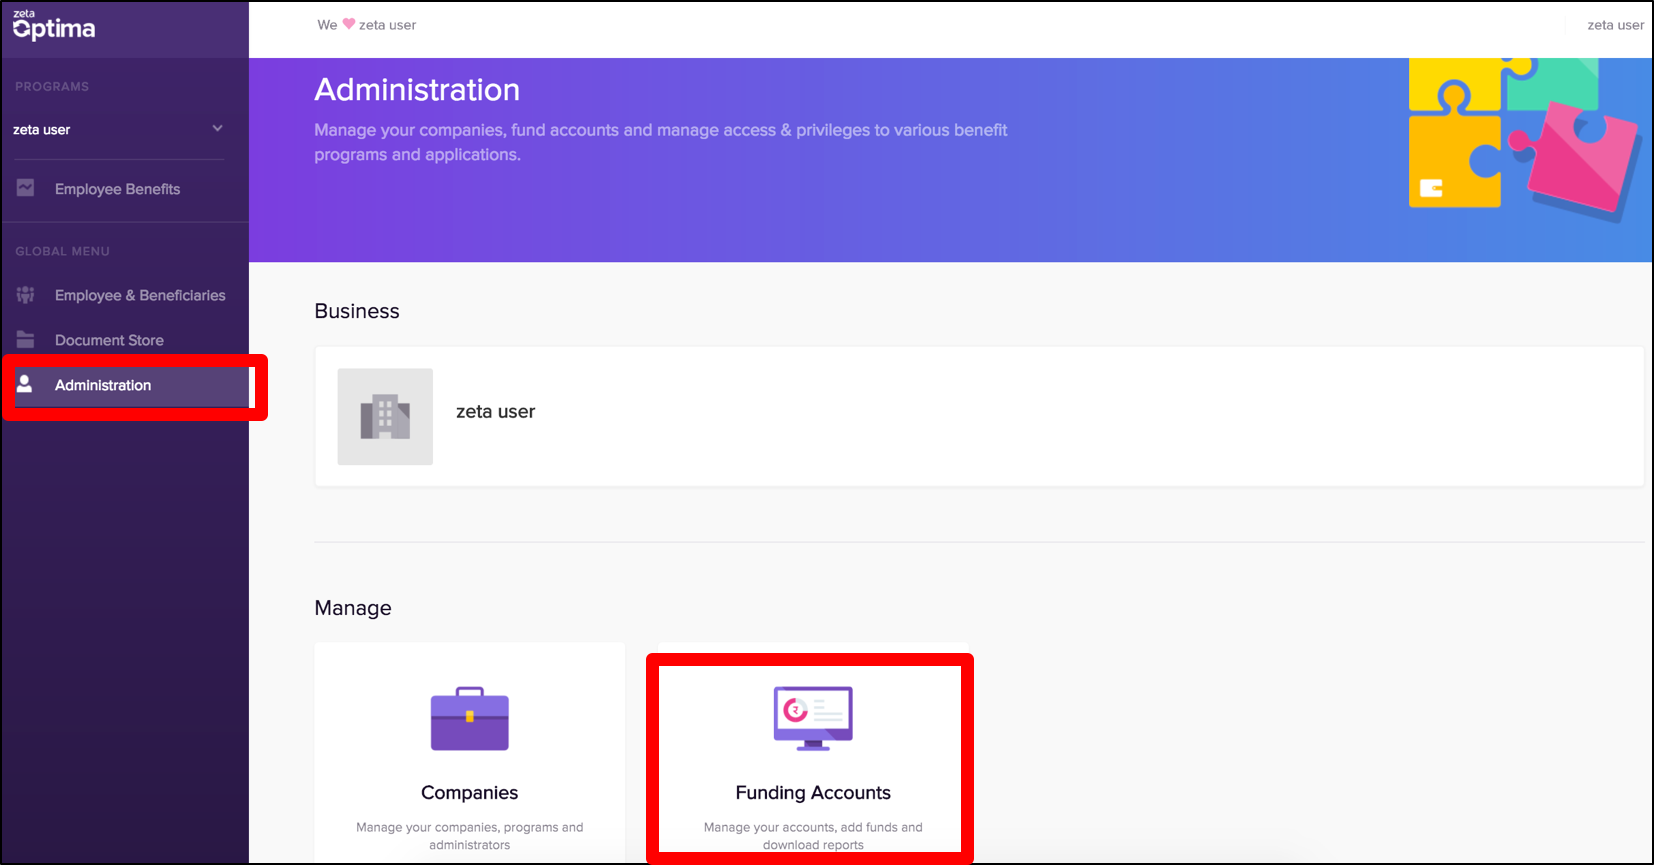
From the right navigation space, go to Administration > Companies under global menu. The company page opens.
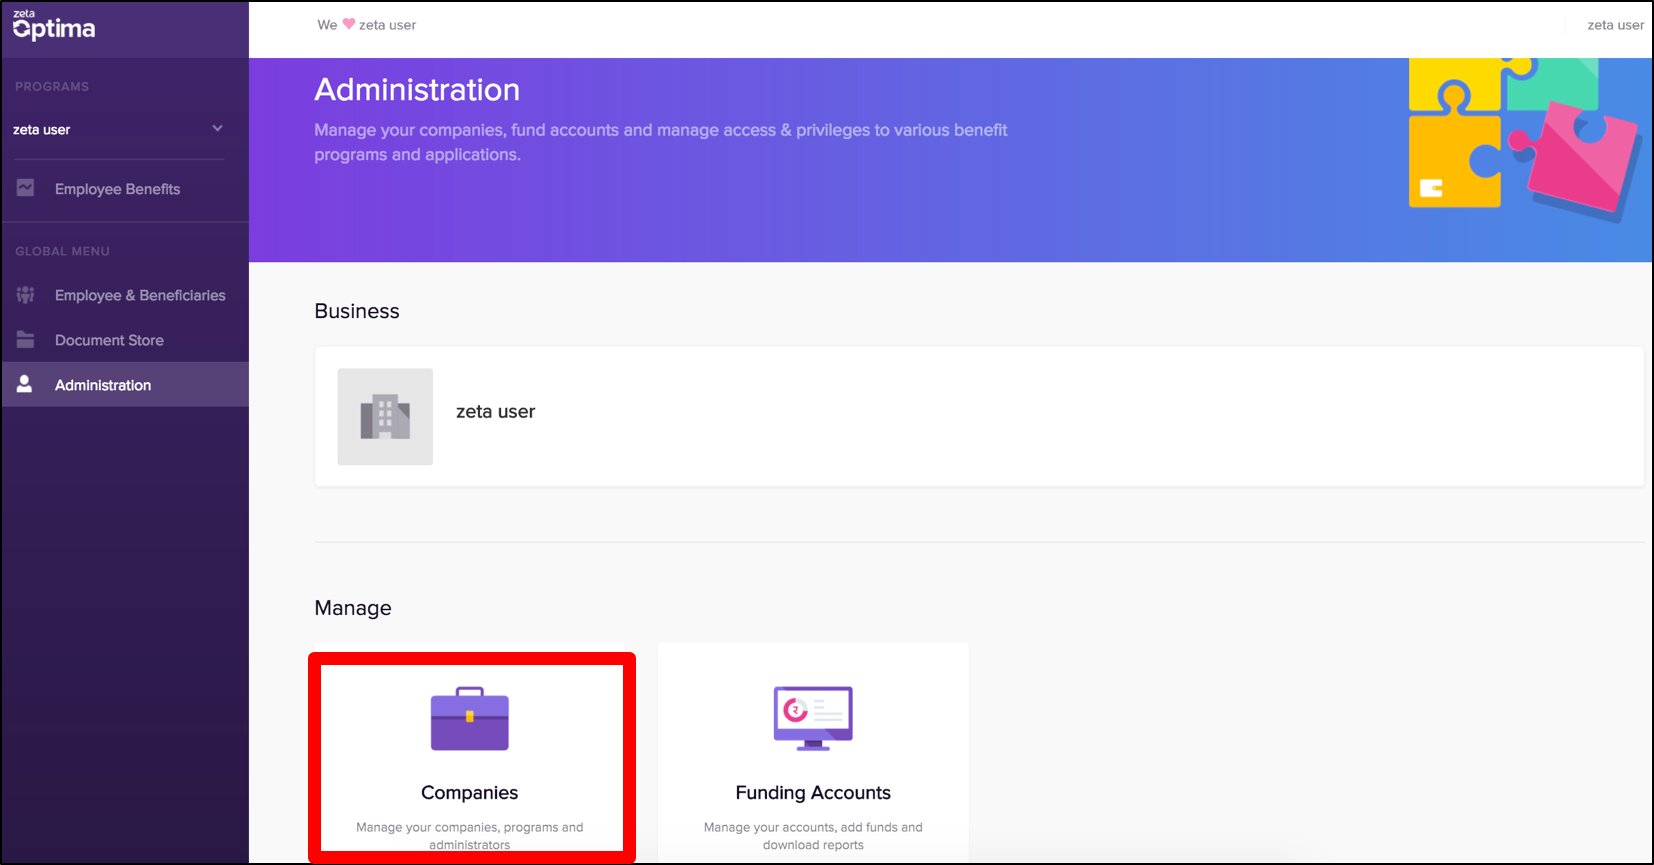
- View your companies with active programs and associated employees under your organization as seen in the image below.
Feature Update
Adding companies is in WIP and soon be added in next sprint. Contact Zeta to add more companies for now.
To View Programs under a Company
Log into the Zeta Optima platform
From the right navigation space, go to Administration > Companies under global menu. The company page opens.

- Click a company to view the associated active programs under the company. This also displays a
 option to setup a new program under the selected company. On selecting these options, you will be redirected to Employee Benefits section to initiate a new benefit transfer or set up a new benefit program.
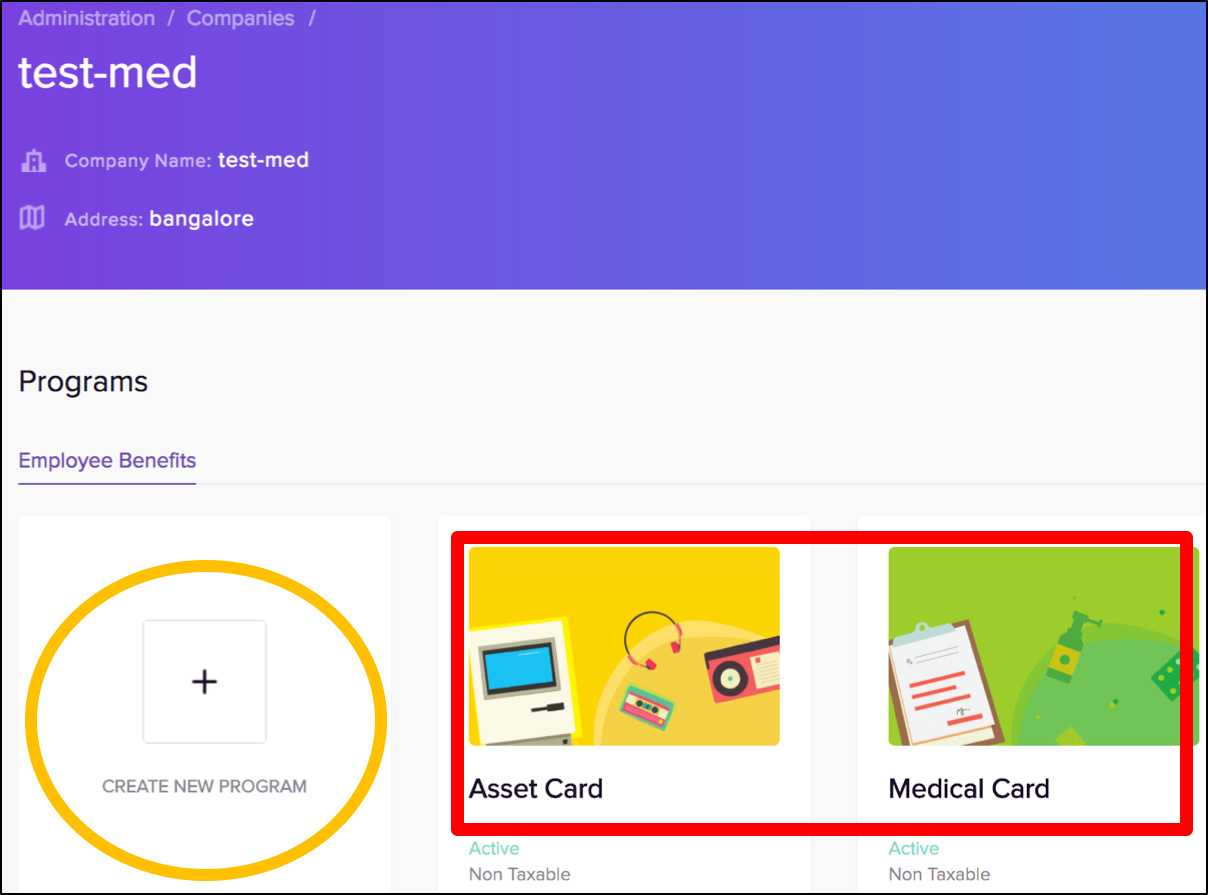
Manage Funds
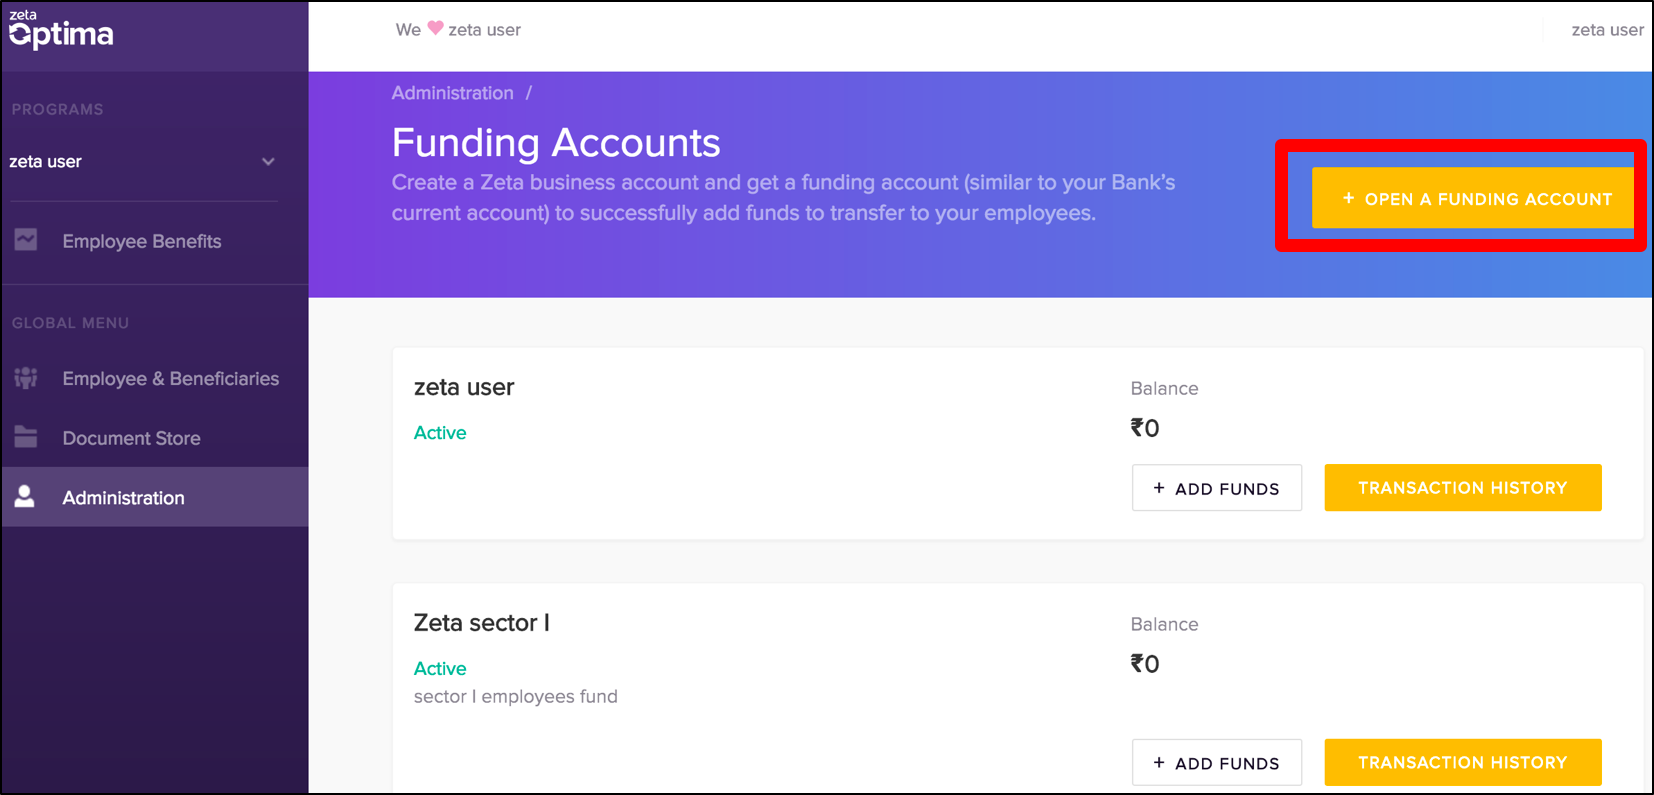
In principle, like companies you can have multiple legal funding accounts to manage employees fund transfers. But unlike companies, you need to create a funding account to successfully add funds to transfer to your employees. For instance, the screen below shows two funding accounts for your use.
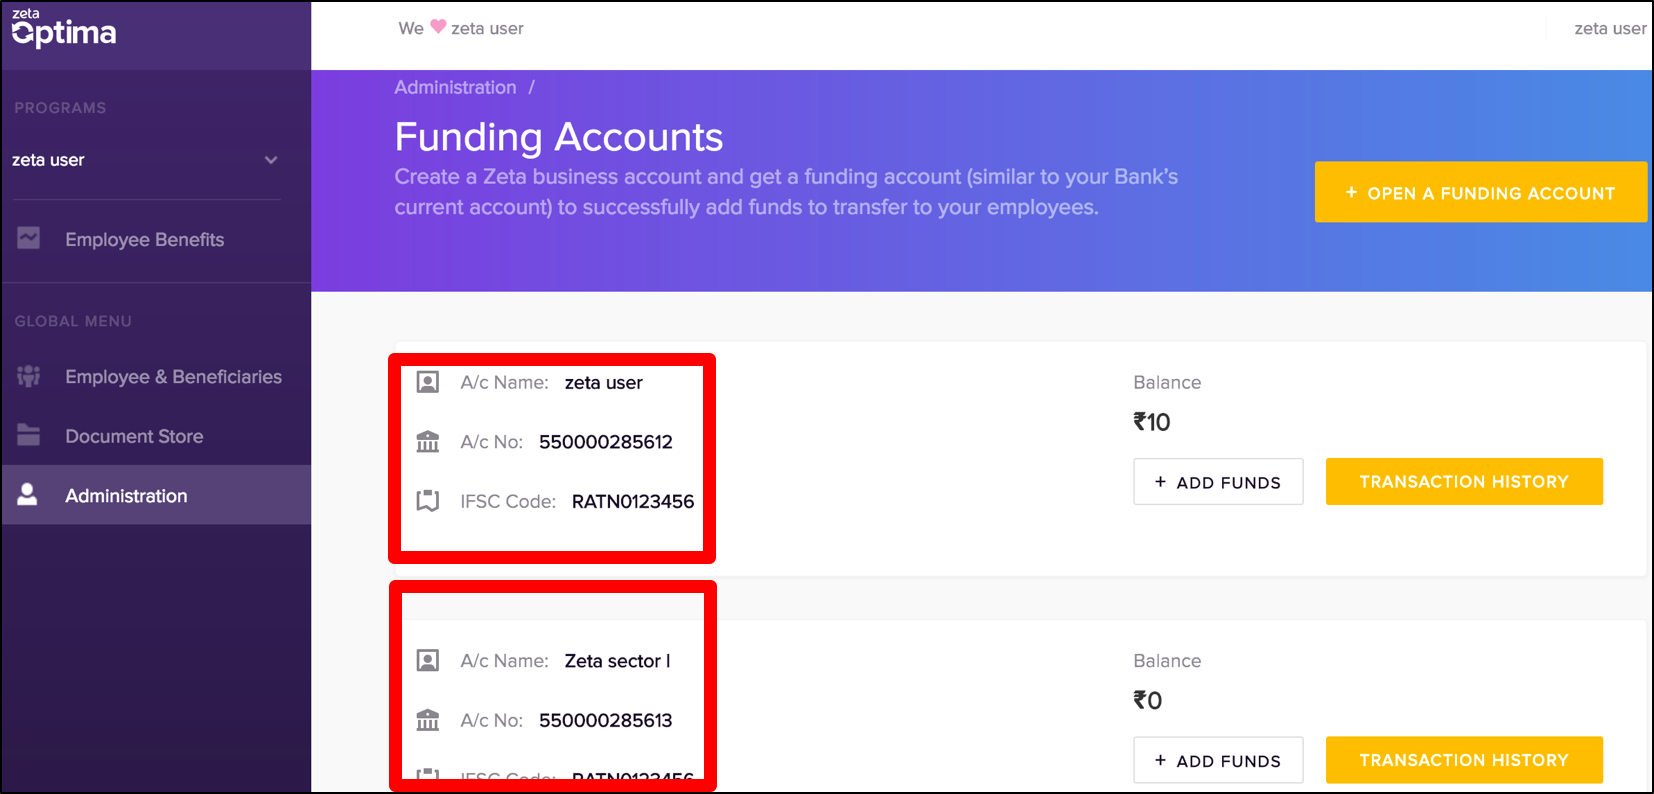
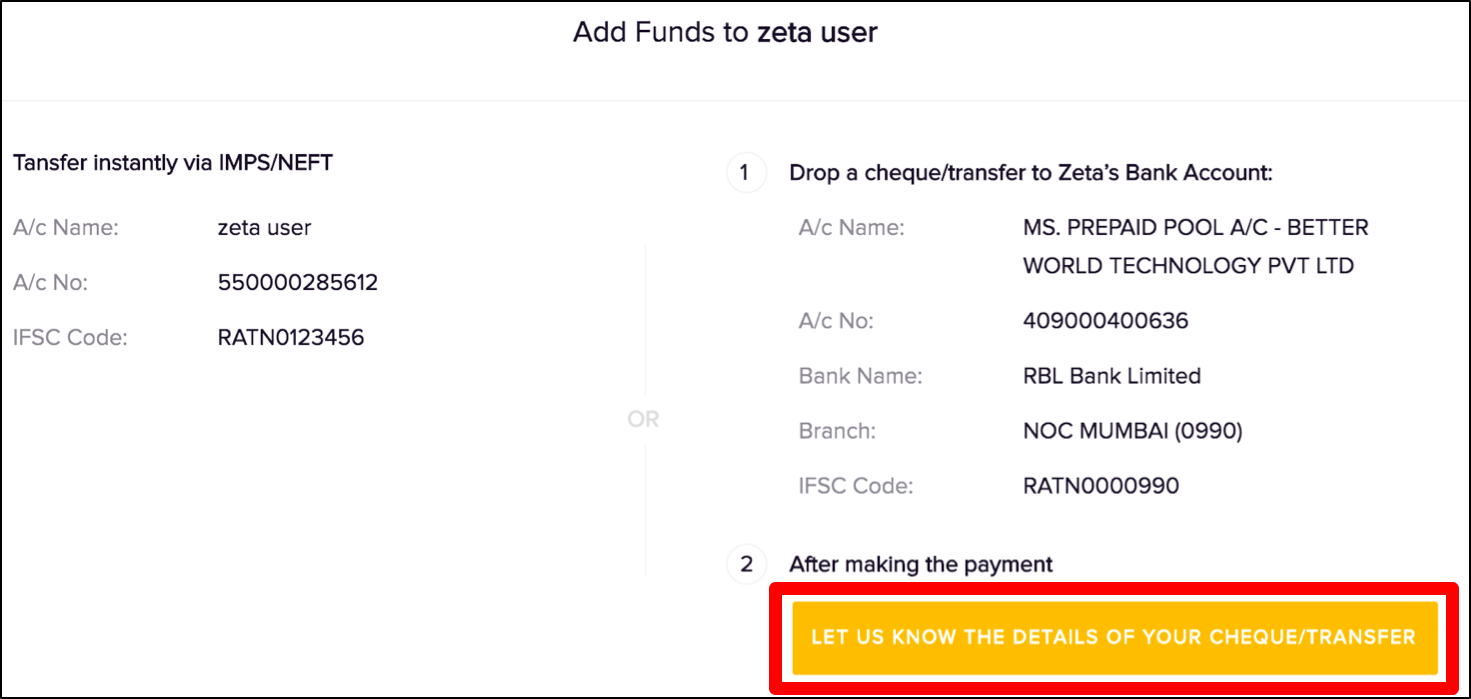
You can initiate online NEFT/IMPS/RTGS transfer or cheque payment towards Zeta bank account. The Zeta onboarding/sales team will share the bank details. Alternately, you may find Zeta bank details under ![]() Add Funds option in the above screen.
Add Funds option in the above screen.
Funding Account
Zeta Optima interface provides you a quick and secure means to open a Zeta funding account and then add fund transfer details such as NEFT/IMPS/RTGS reference or cheque number to the funding account. Create funding accounts as many as you want based on the requirements.
To Open a Fund Account
Log into the Zeta Optima platform
From the right navigation space, go to Administration > Funding Accounts under global menu.
- In the "Funding Accounts" page, click Open a Funding Account option
- Specify the account name of your choice and optionally, add description to your account
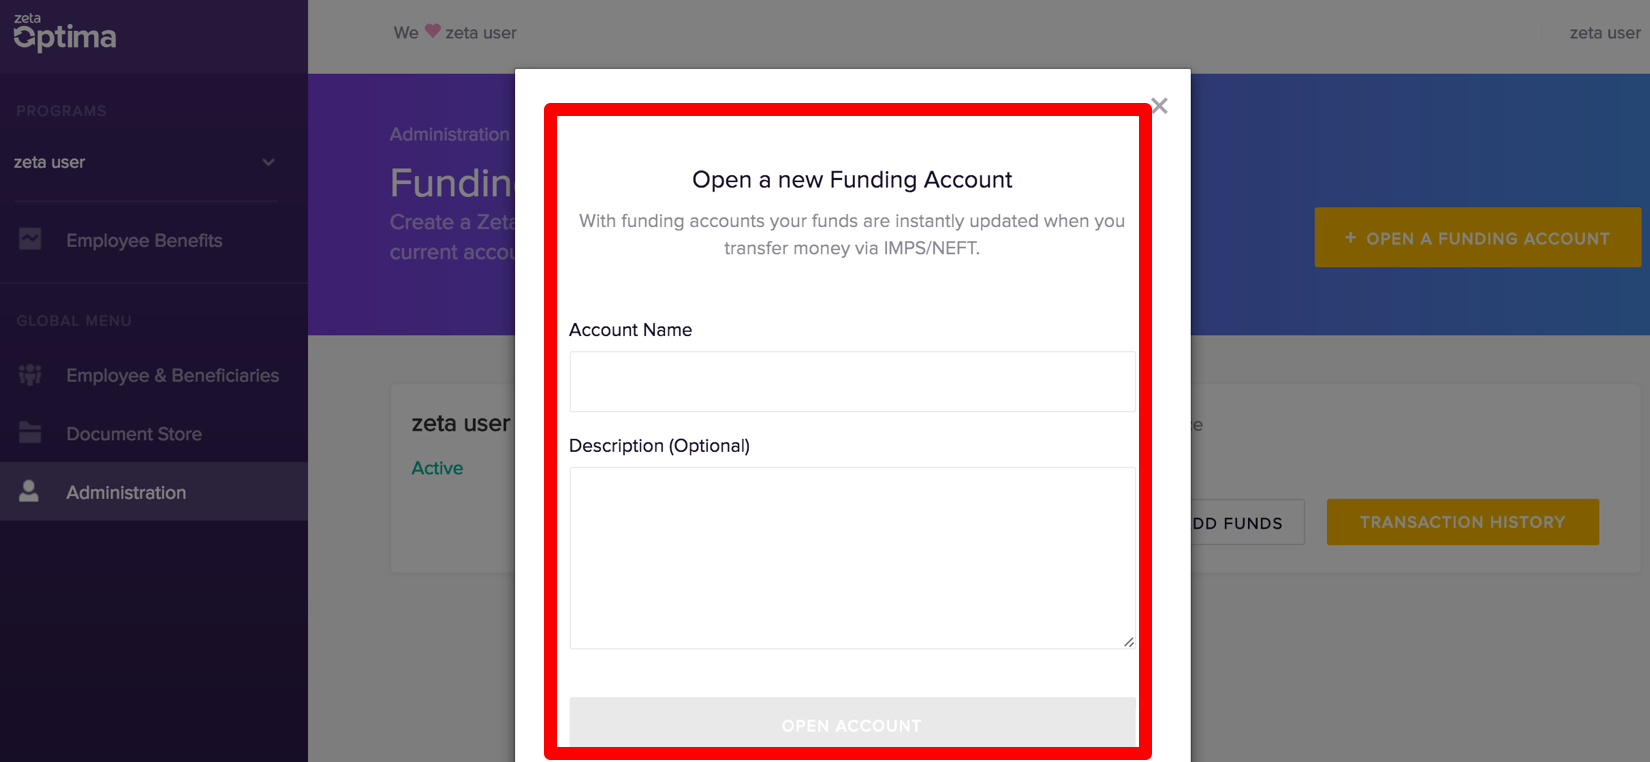
- Finally, click Open Account to create a new funding account
To Add Fund Details
Log into the Zeta Optima platform
From the right navigation space, go to Administration > Funding Accounts under global menu.
In the "Funding Accounts" page, click
Add Funds against a fund account where you want to add the fund transfer details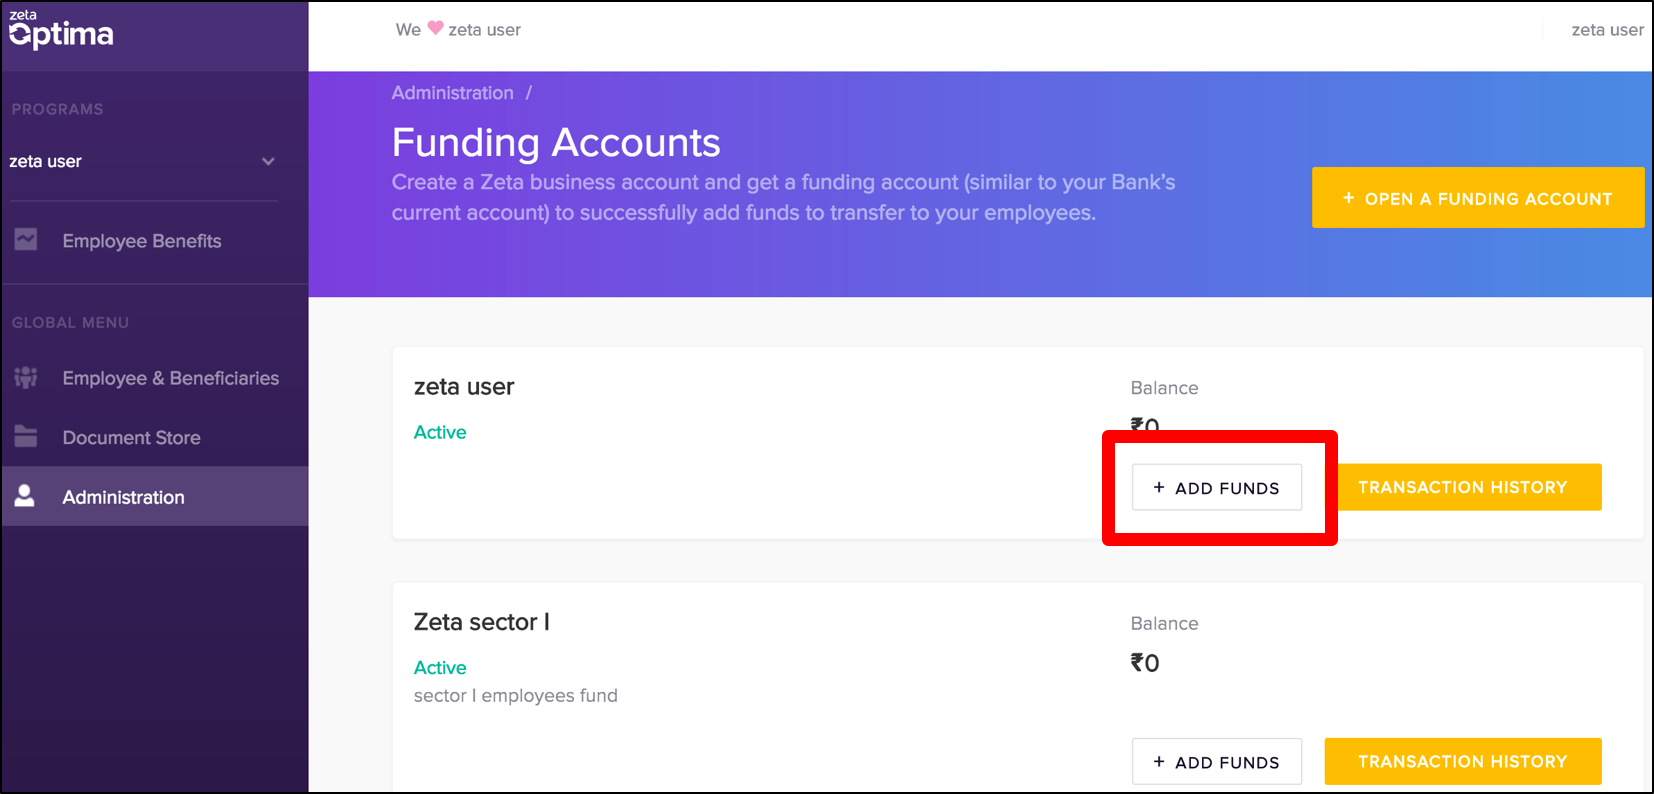
In the “Add Funds to (account name)” screen, select option 2 to enter you payment details such as transaction type as NEFT/IMPS/RTGS or CHEQUE.
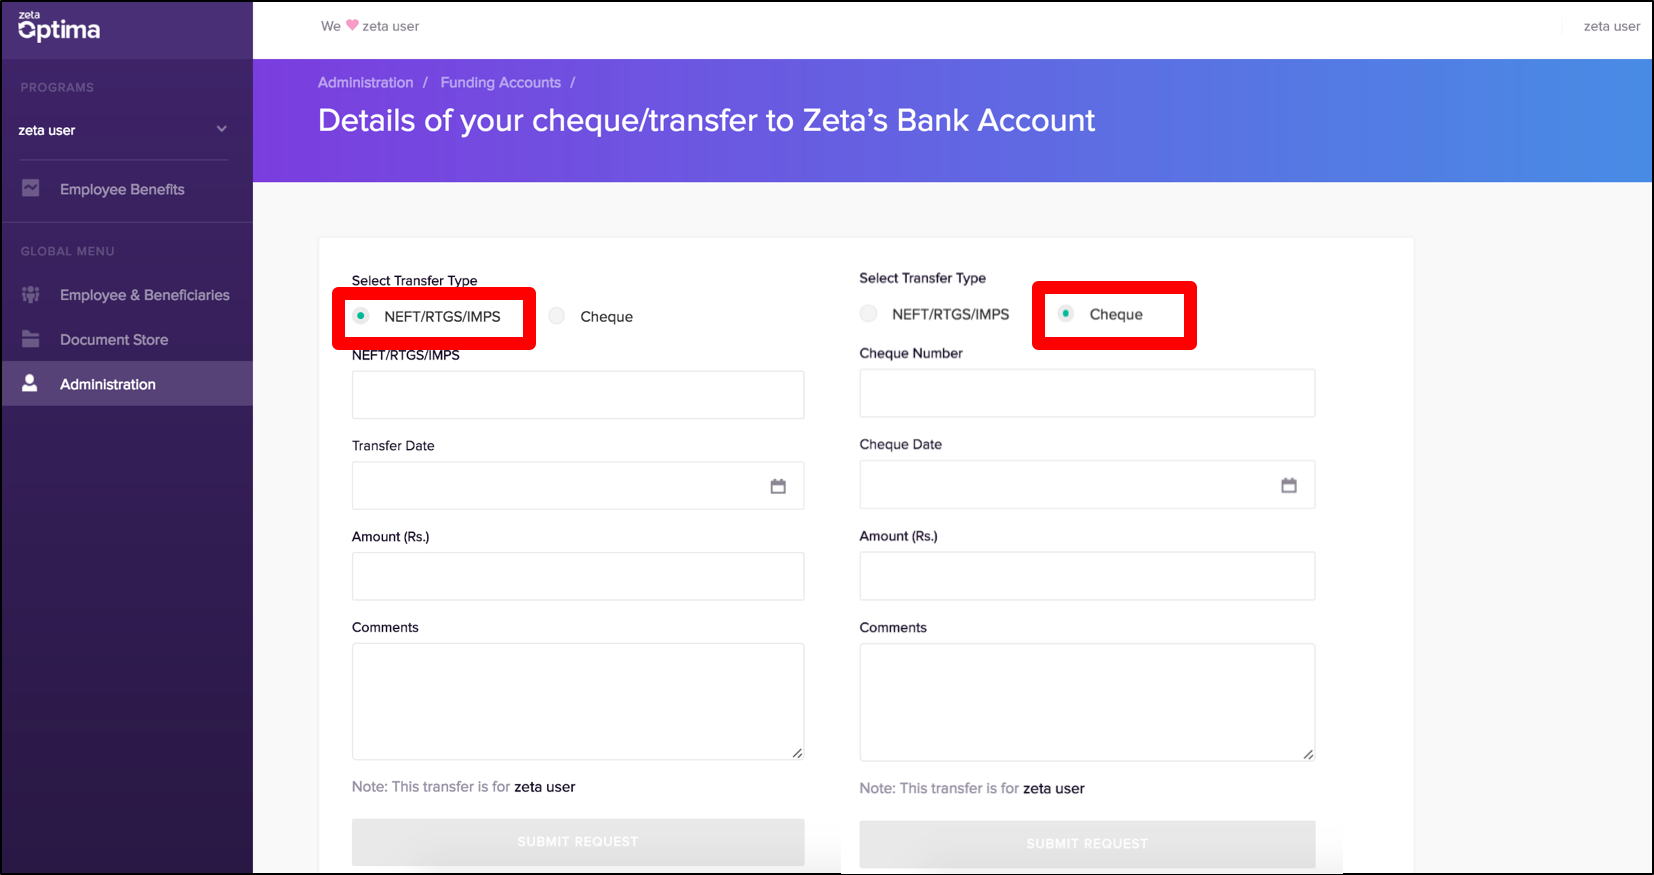
If selected NEFT/RTGS/IMPS, configure the following:
NEFT/RTGS/IMPS Number
Enter the NEFT/RTGS/IMPS reference number that you’d see post fund transfer or receive via SMS notification
Transfer Date
Enter the date of the online transfer
Amount
Enter the transfer amount in rupees
Comments Enter useful remarks for internal use If selected CHEQUE, configure the following:
Cheque Number
Enter the cheque number that you’d see on the cheque leaflet
Cheque Date
Enter the date of the issued cheque
Amount
Enter the transfer amount in rupees`
Comments Enter remarks for useful information
In both cases, click Submit Request once you’ve entered the fund transfer details. Once approved, you can view the details under Fund Addition tab (see next section).
Viewing Fund Details
You can view the following options under Funding Accounts option:
Available Balance | Gives a quick view of available balance in your funding account. |
Fund Addition History | Gives a quick view of all fund request that are added to your funding account. |
| Account Statement | Gives a detailed view of all order transactions including debited, credited or revoked in one page. |
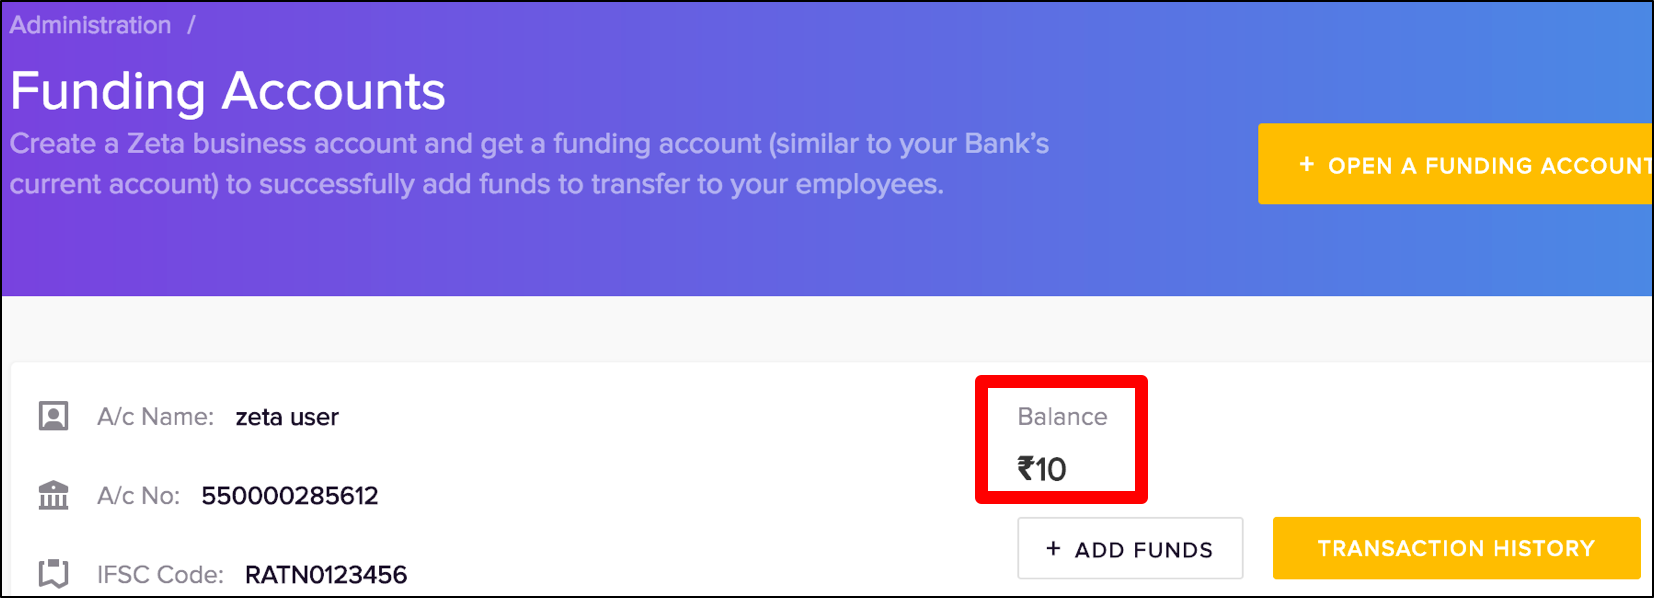
To View Available Balance
Log into the Zeta Optima platform
From the right navigation space, go to Administration > Funding Accounts under global menu.
In the "Funding Accounts" page, view the available balance in the individual accounts as seen below.
To View Fund Addition History
Log into the Zeta Optima platform
From the right navigation space, go to Administration > Funding Accounts under global menu.
In the "Funding Accounts" page, click Transaction History next to add fund option.
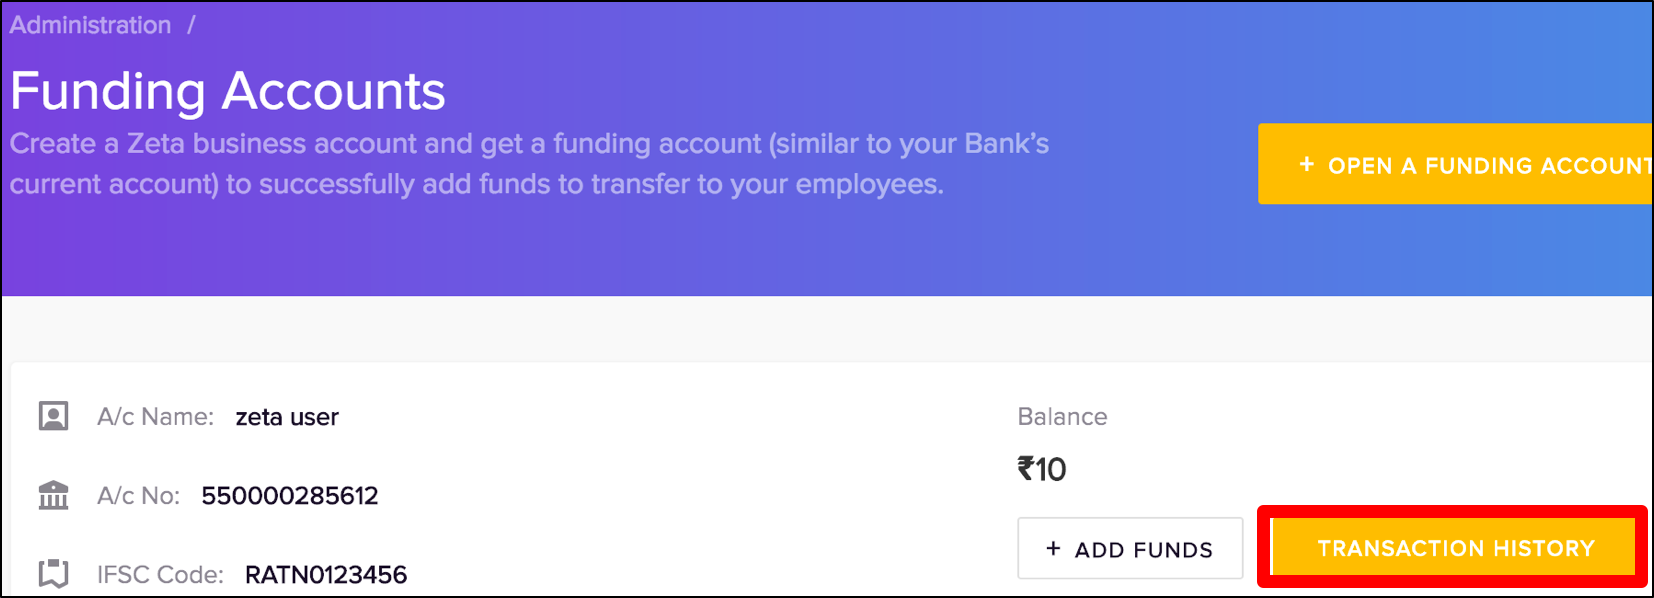
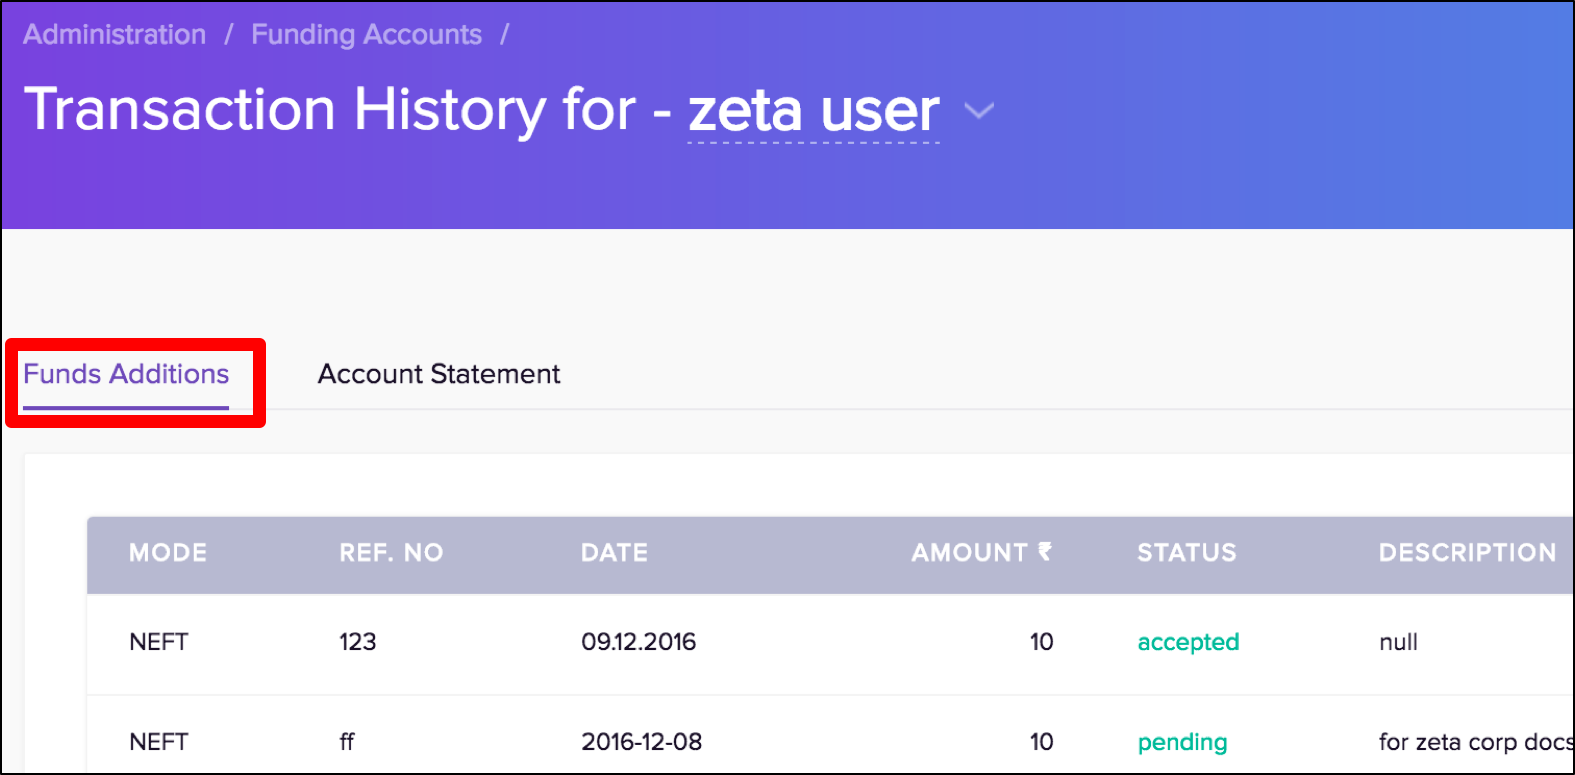
Click Funds Additions tab to view the fund transfer detail. On this page, you can see all accepted or pending funds initiated via NEFT/RTGS/IMPS or cheque transfer.
To View Account Statement
Log into the Zeta Optima platform
From the right navigation space, go to Administration > Funding Accounts under global menu.
In the "Funding Accounts" page, click Transaction History next to add fund option.
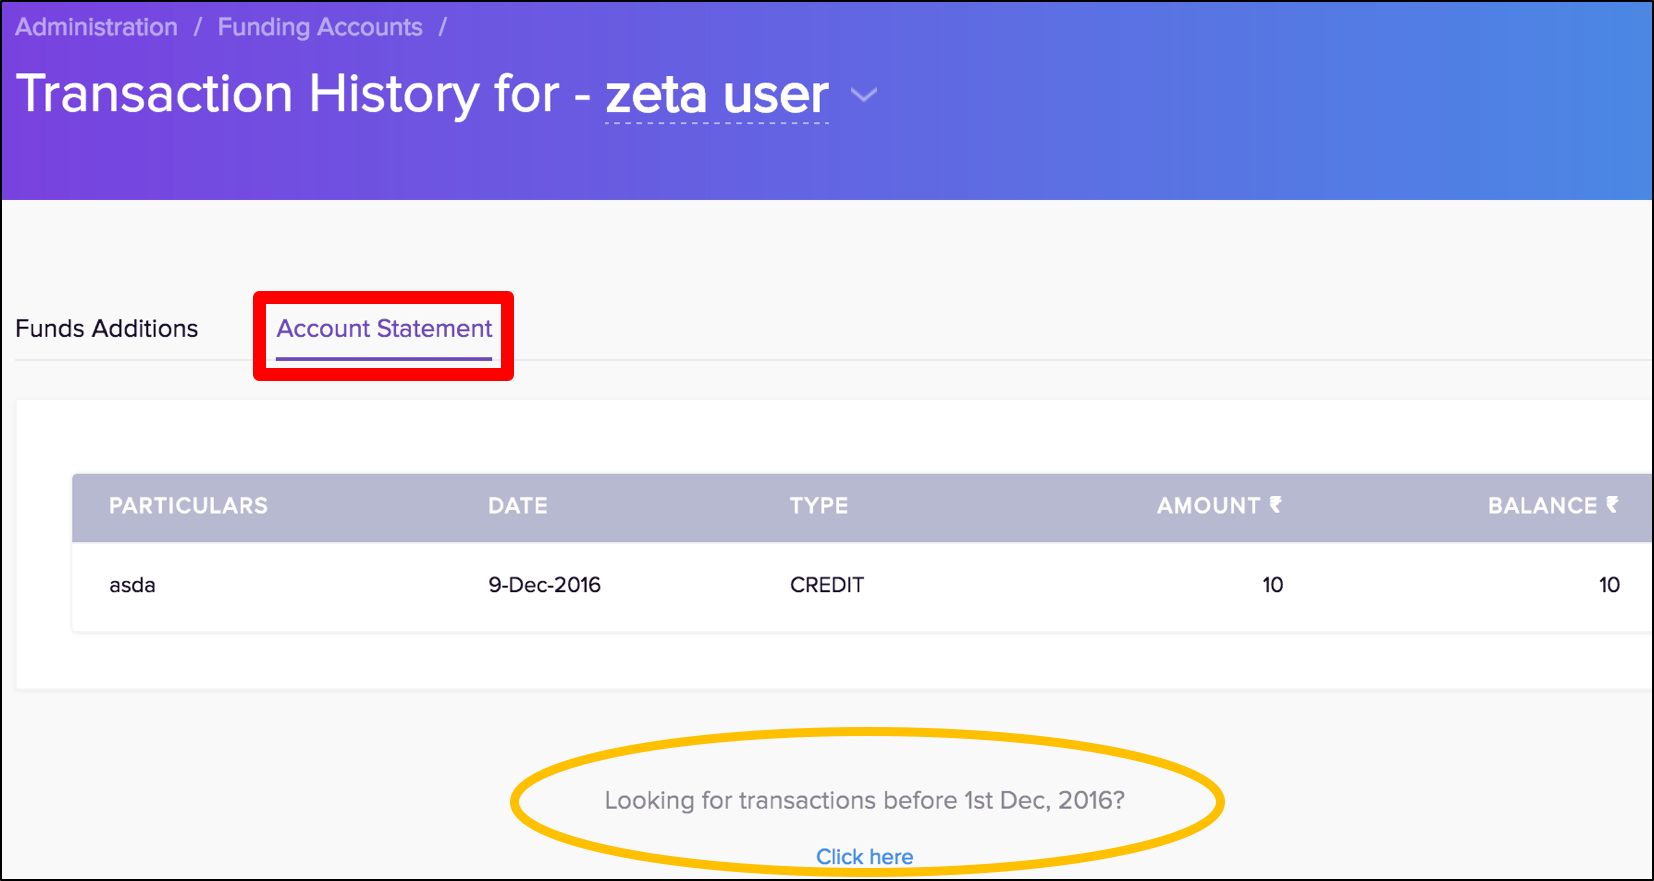
Click Account Statement tab to view the fund statement details. On this page, you can see all successful transactions such as debited, credited or revoked and so on.
You may wish to see older statement beyond Dec 1st, 2016, click "Looking for..... 1st Dec, 2016" option at the bottom of the screen.