The Zeta Merchant App Store provides a very simple Menu Management feature that allows you to manage the Store Menu in two ways - one for the kiosk setup and another one for the remote setup. The operation varies for the type of the store setup in the cafeteria. In the Kiosk enabled store you cannot add or delete any items or categories and can only edit the menu items but not the menu categories. In the remote ordering enabled store you can add, delete and edit both menu categories as well as the menu items.
Refer below for brief information on all Menu Management tasks.
| Tasks | Description |
|---|
| Add Menu Categories | provides Provides you an option to Add Menu categories for the menu. |
| Edit Menu Categories | provides Provides you an option to Edit the category preferences in the menu. |
| Delete Menu Categories | provides Provides you an option to Delete menu categories from the menu. |
| Add Menu Items | provides Provides you an option to Add Menu Items of a particular category. |
| Edit Menu Items | provides Provides you an option to Edit the Item preferences in the menu. |
| Delete Menu Items | provides Provides you an option to Delete Menu Items from the menu. |
- Open Log into the Zeta merchant app store and click on .
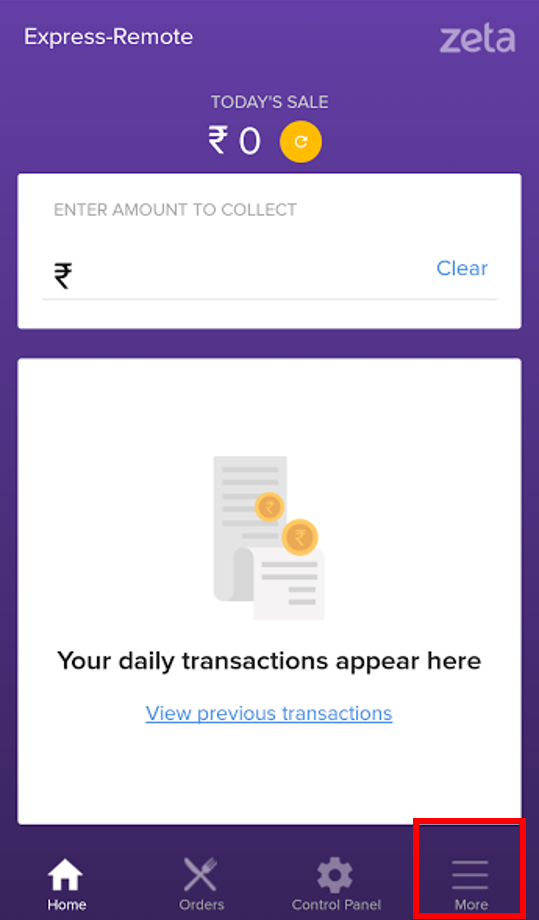
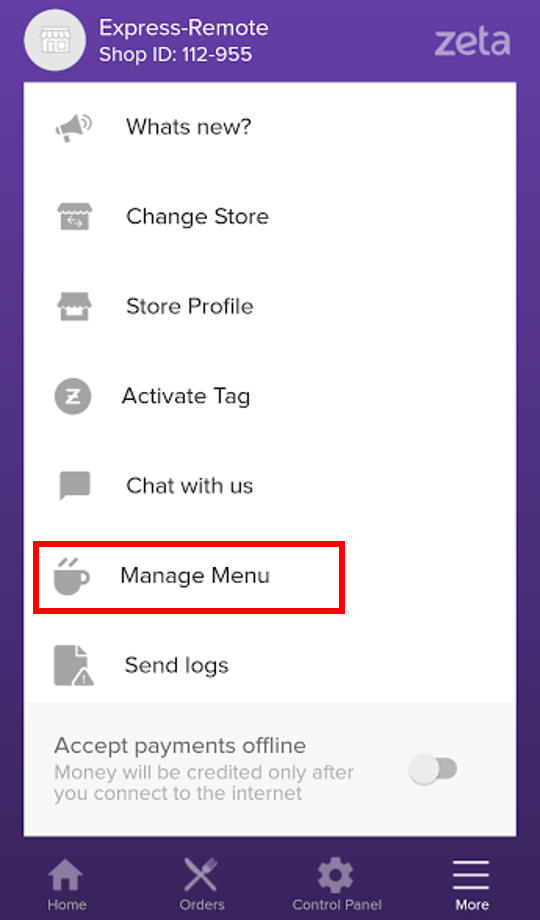
- Click More tab and Select select Manage Menu from the options.
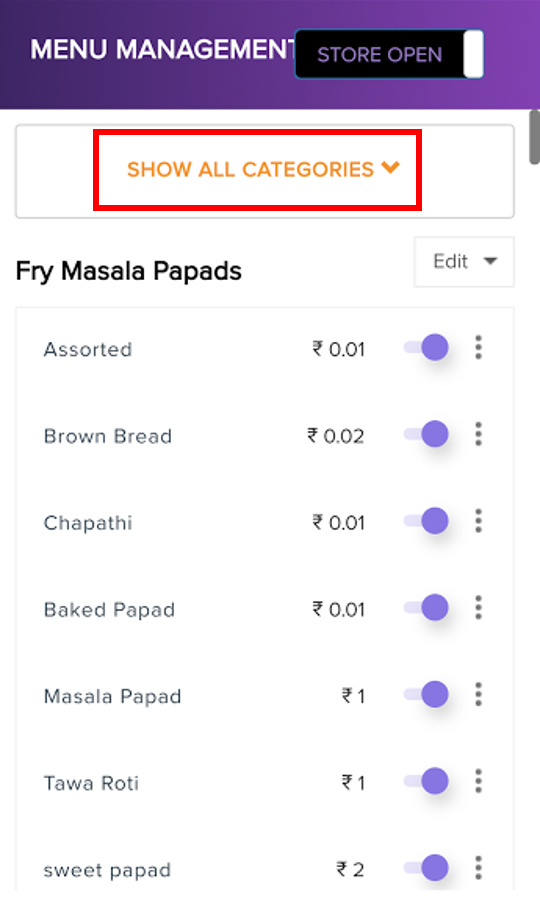
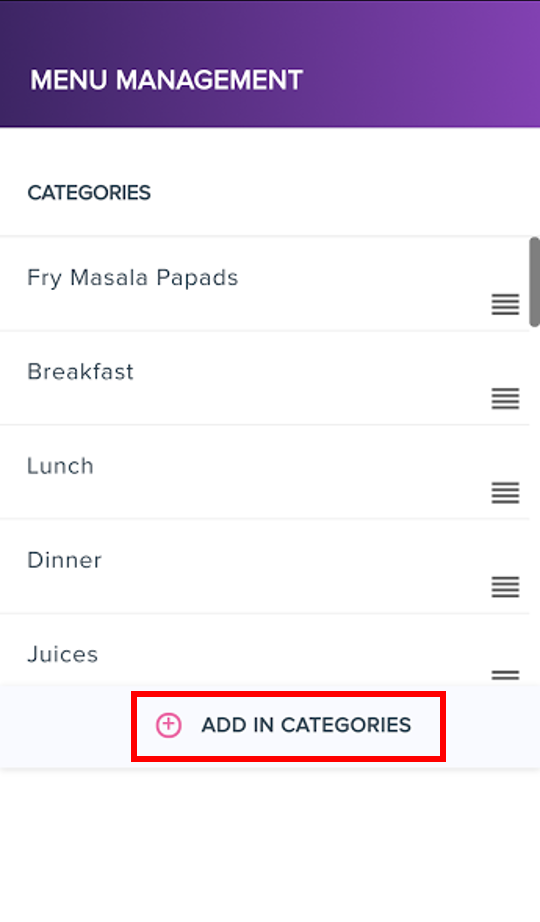
- In the Menu Management screen, click on click Show All Categories and click Add in Categories.
- In the create category screen, Specify specify the Category name and click on Category Name and click Add to confirm.
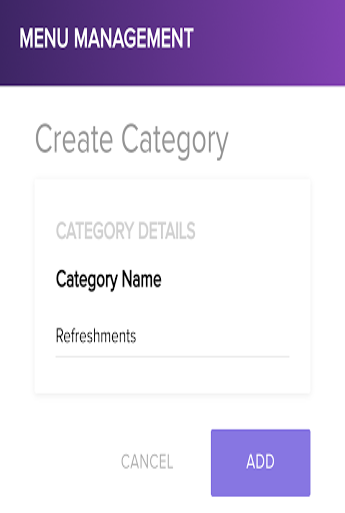
A confirmation message will be displayed on your screen once the Menu Category menu category is added.
- Open Log into the Zeta merchant App Store and Tap on app store.
- Click More tab and Select select Manage Menu from the options.
- In the Menu Management screen, click on the Edit Drop down menu beside the Menu category name and Select select Edit from the menu items.
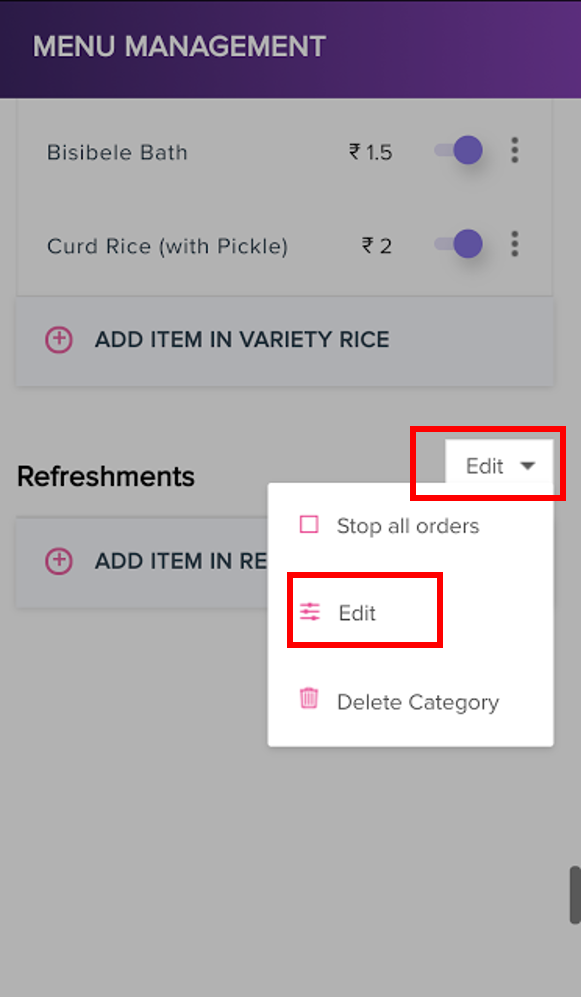
- In the Category preferences form, Edit edit the Category name Name and click on click save.

- Open Log into the Zeta merchant App Store and Tap on app store.
- Click More tab and Select Manage Menu from the options.
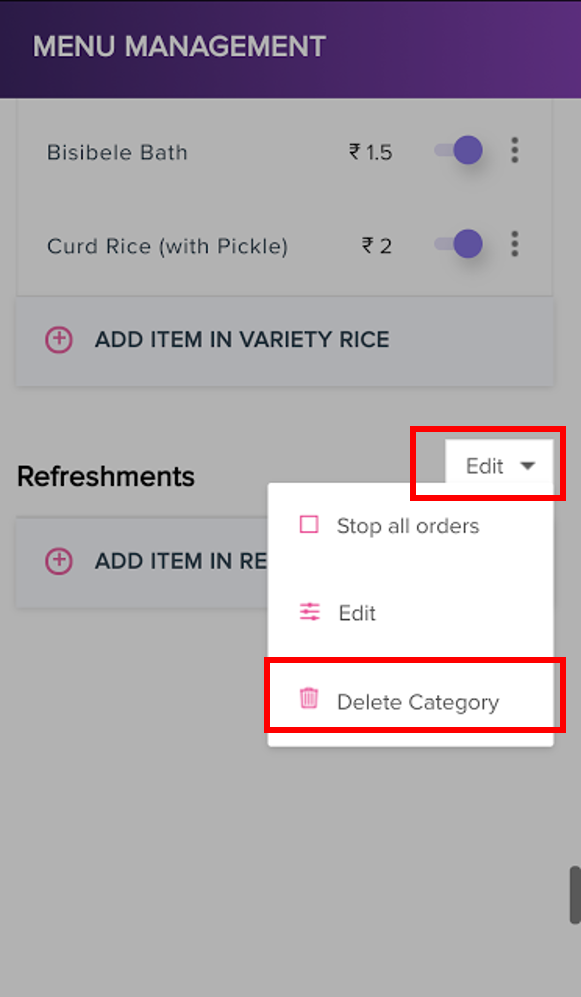
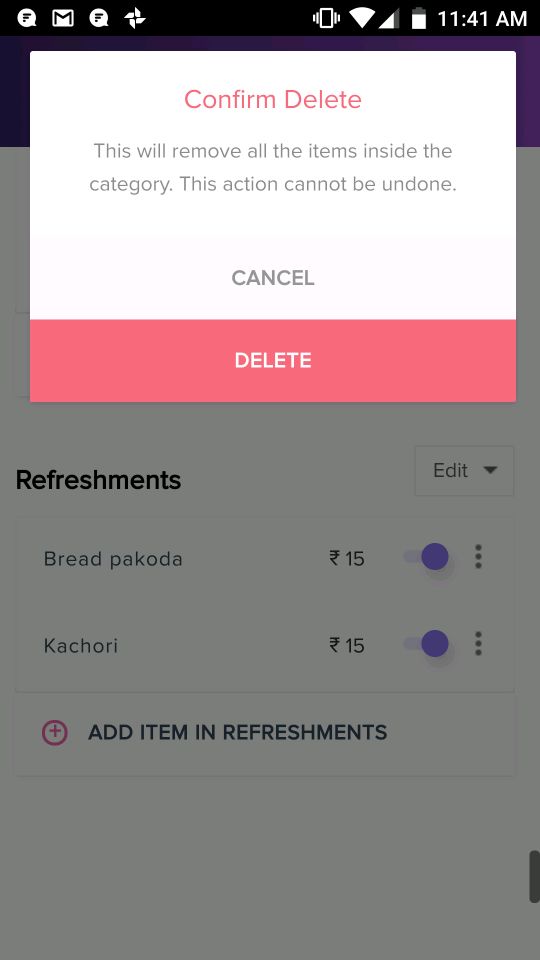
- In the Menu Management screen, click on the Edit Drop down menu beside the Menu category name and Select select Delete Category from the menu items. In the confirmation dialog, click on click Delete to confirm.
- Open Log into the Zeta merchant App Store and click on app store.
- Click More tab and select Manage Menu from the options.
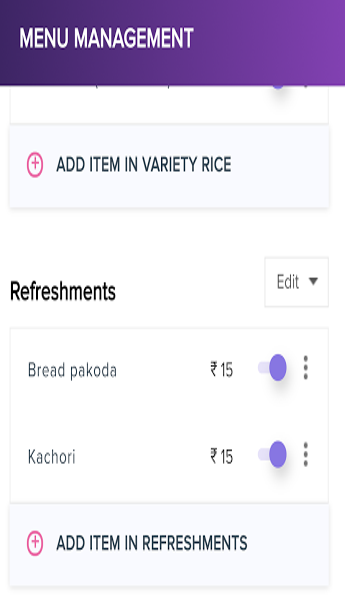
- In the Menu Management screen, Select select Add Item in category to Add add the menu Items.
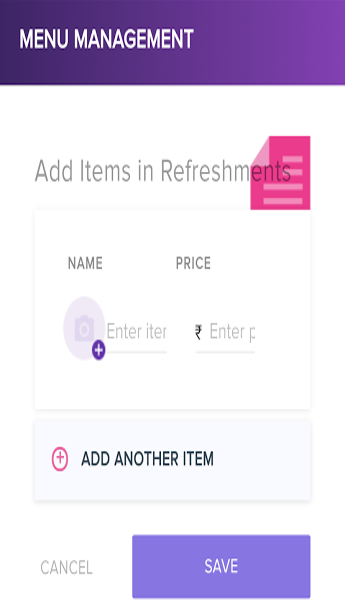
- In the Add items screen, Enter enter the Item item details such as Item item name and Item item price and click on click Save.
- Open Log into the Zeta merchant App Store and click on app store.
- Click More tab and Select select Manage Menu from the options.
- In the Menu Management screen, click on the Action Overflow button click
 Image Addedbutton beside the Menu item and Select select Edit from the Drop the drop down.
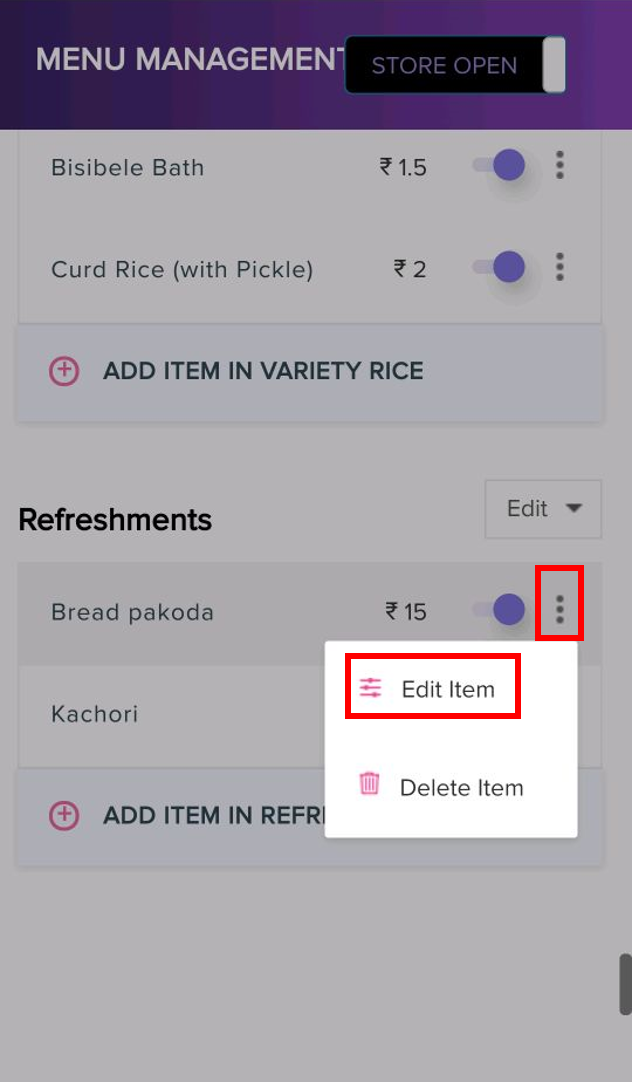
- In the Item details form, Type type in the Item item preferences and click on click save.

- Open Log into the Zeta merchant App Store and click on app store.
- Click More tab and Select select Manage Menu from the options.
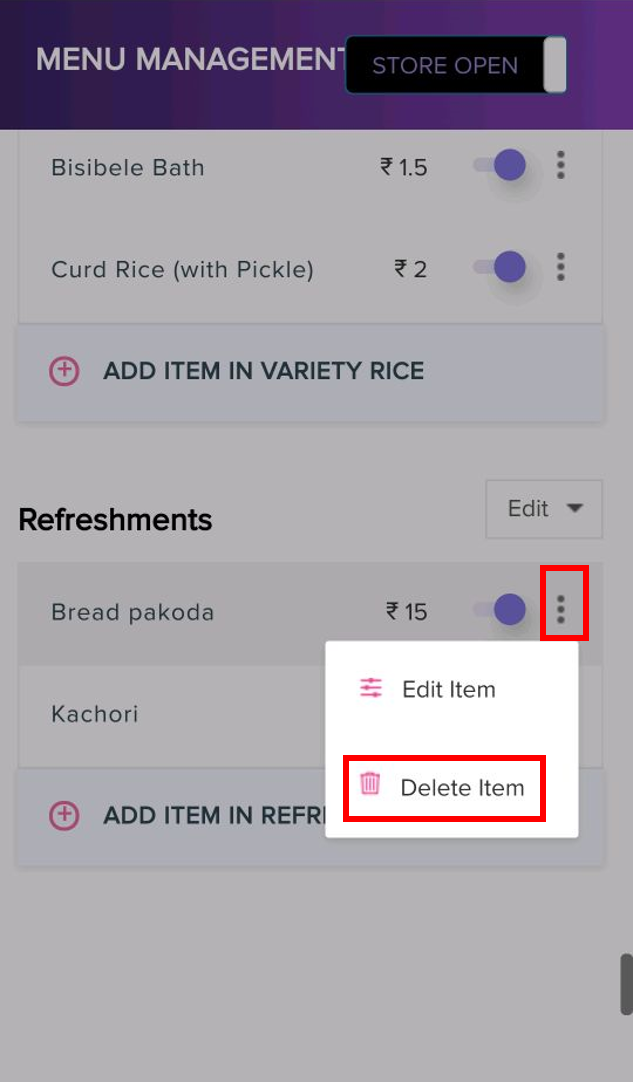
- On the Menu Management screen, click on the Action Overflow button Image Added beside the Menu menu item and Select select Delete Item from the Drop drop down.
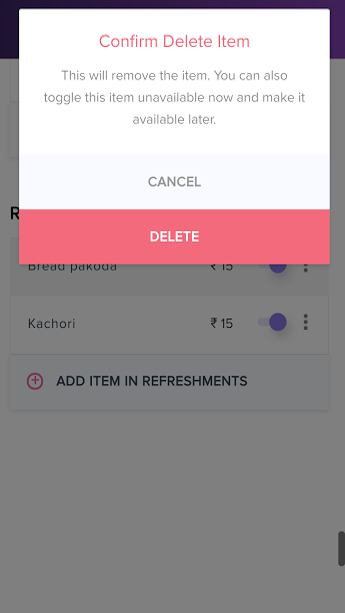
- In the confirmation dialog, click on click Delete to confirm.