| align | justify |
|---|
Overview
Optima administration gives you the flexibility to manage your companies,
fundfunding accounts, and also
manageto supervise the access controls to various benefit programs and applications. Access control allows you to configure fine-grained access control to secure your programs and resources.
Manage Companies
| Aligninfo | |||
|---|---|---|---|
| |||
Adding Companies helps large organizations to create multiple legal companies to manage their workforce effectively. This feature is coming shortly. Contact Zeta to add more companies. |
A company is a logical grouping of all active benefit programs including the beneficiaries. Create and manage one or multiple legal companies running under your parent organization for your convenience and as per policy. This feature is useful when you have a large workforce of employees with various horizontals and verticals in different geographical locations and you need an efficient group system to manage their overall benefit programs.
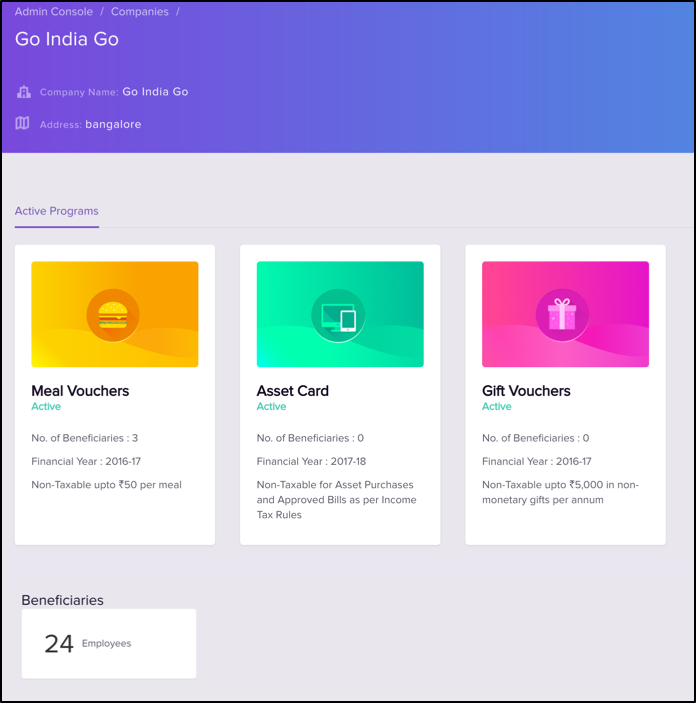
By default, a company is created during the sign up process so you can get started with the fund transfer activities. For instance, your company name is "
zeta userGo India Go" in the screen illustrated below.
To View YourViewing Companies
To ViewLog into the Zeta Optima platform
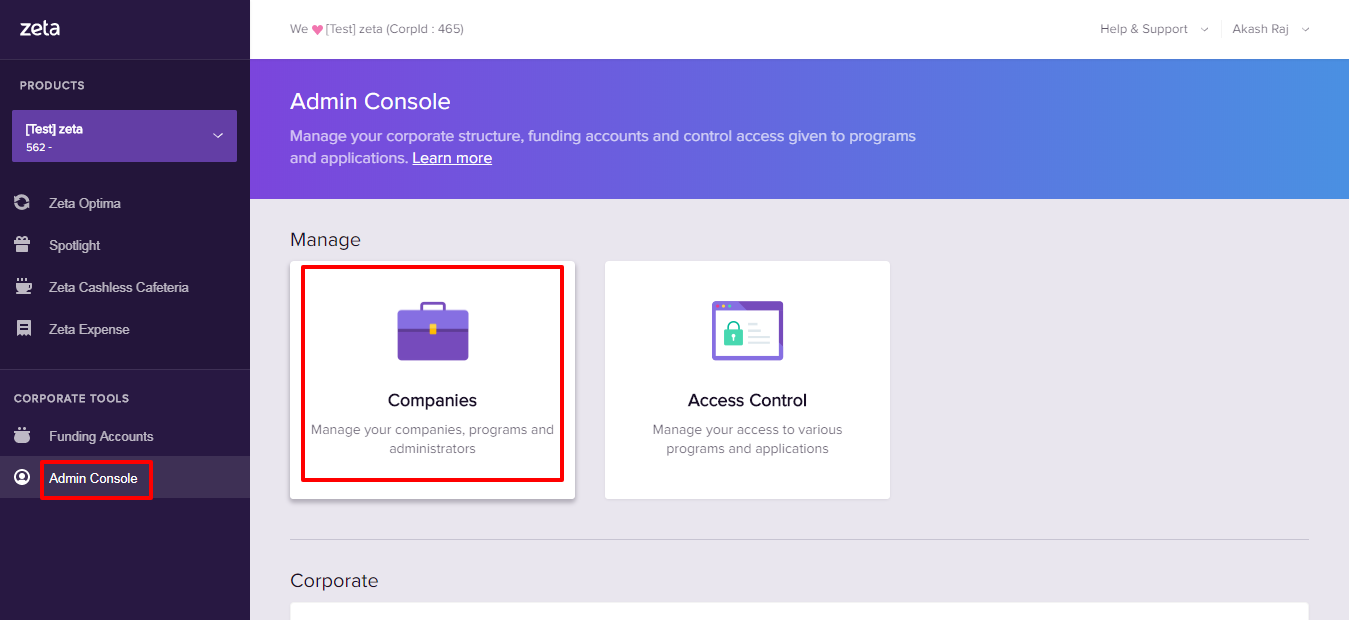
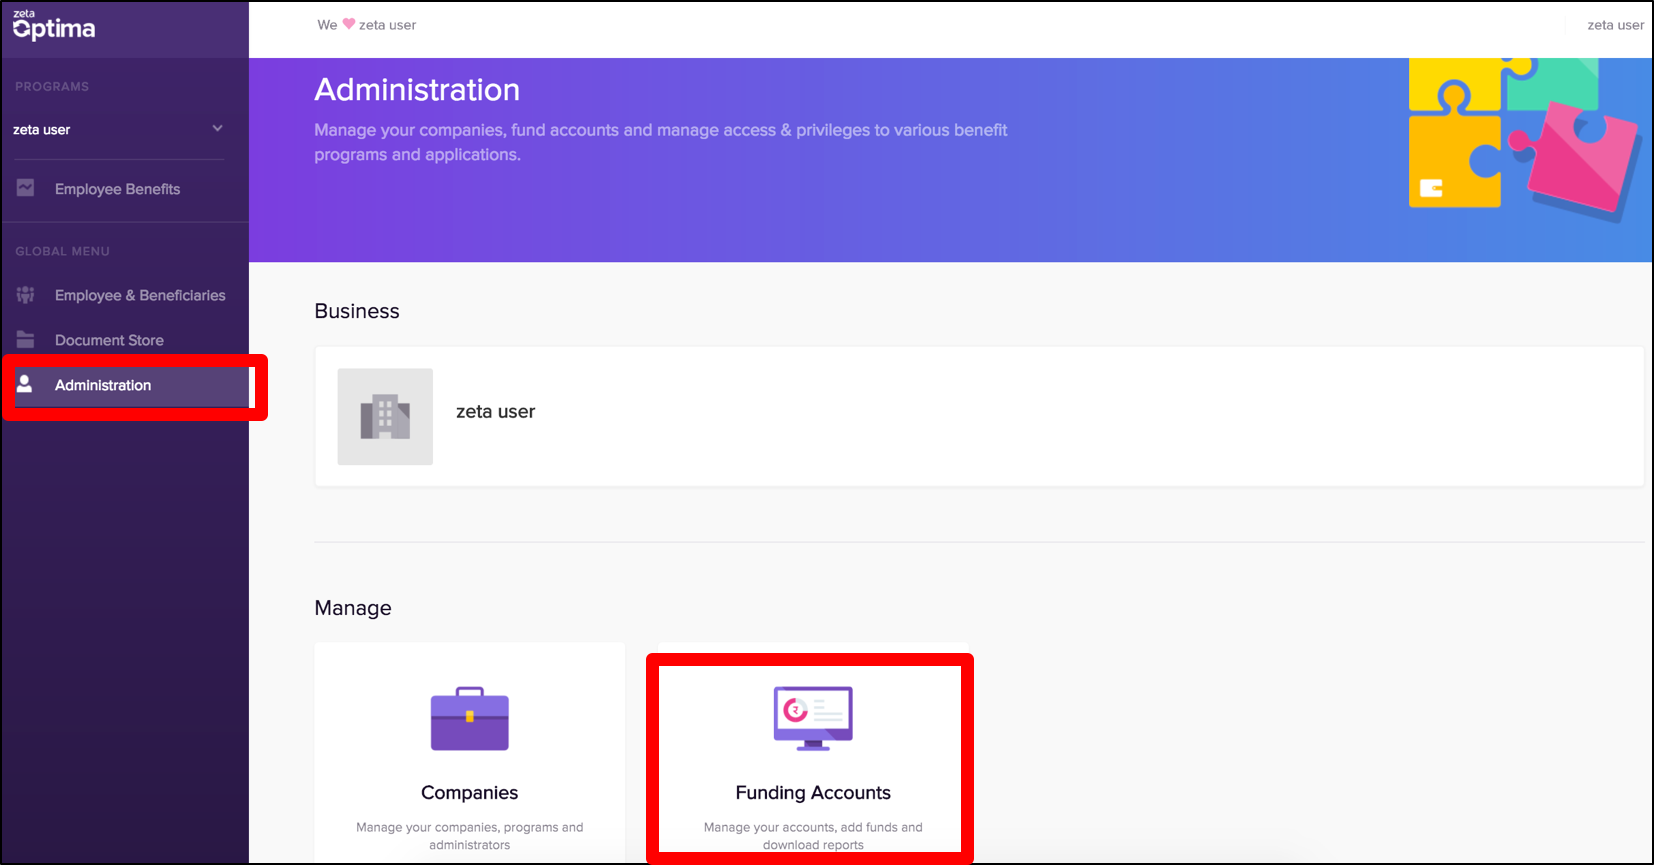
From the right left navigation space, go to Administration > Companies under global Admin Console > Companies under Corporate Tools menu. The company page opensappears.
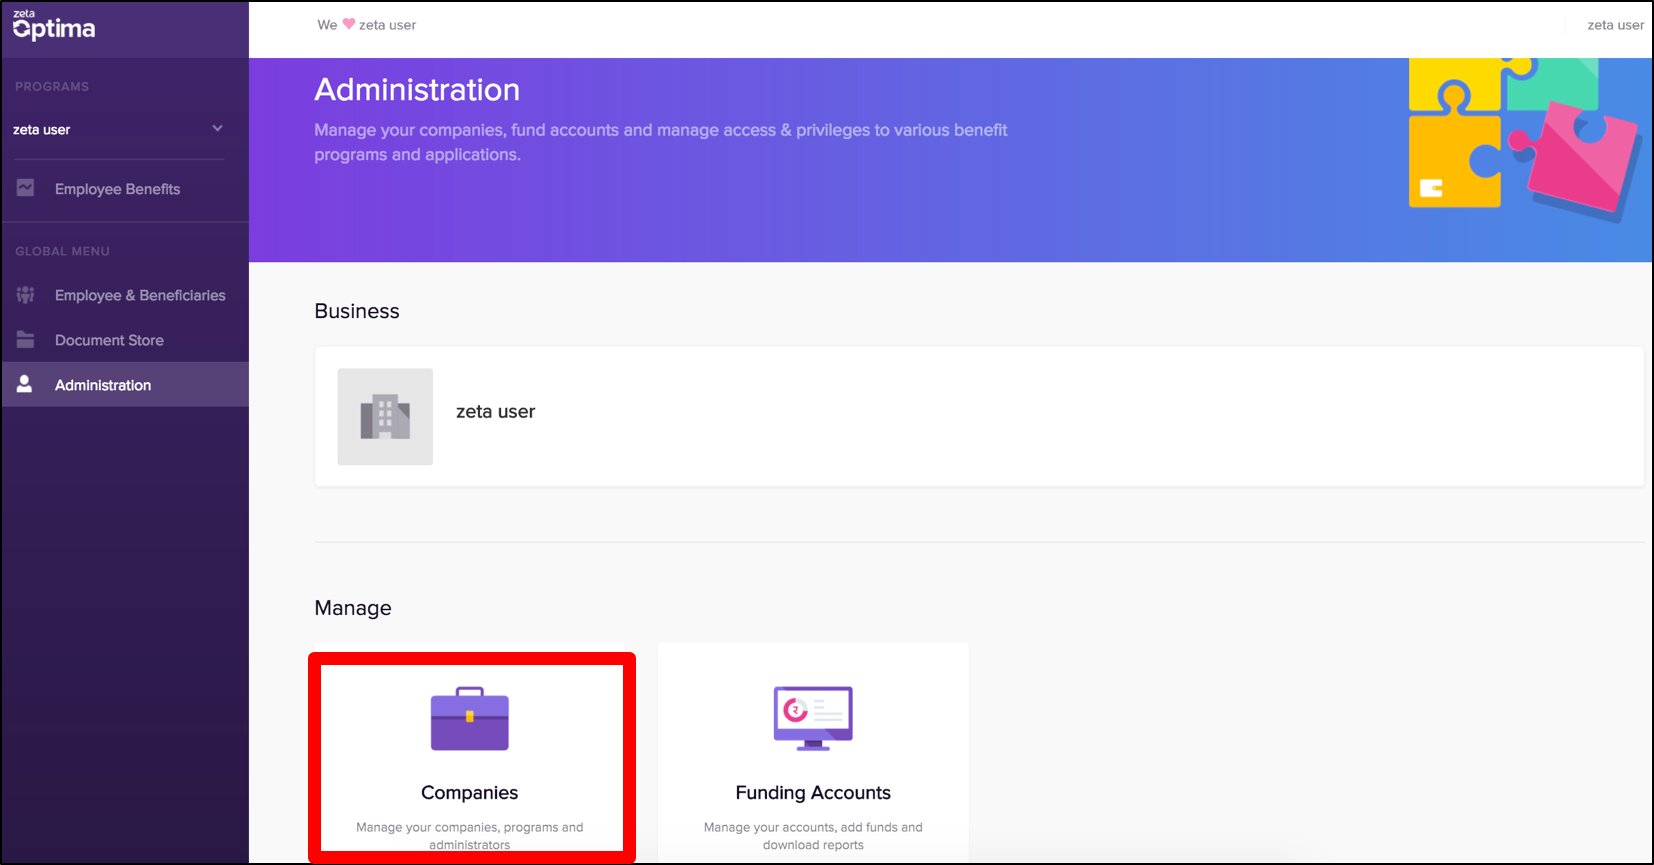
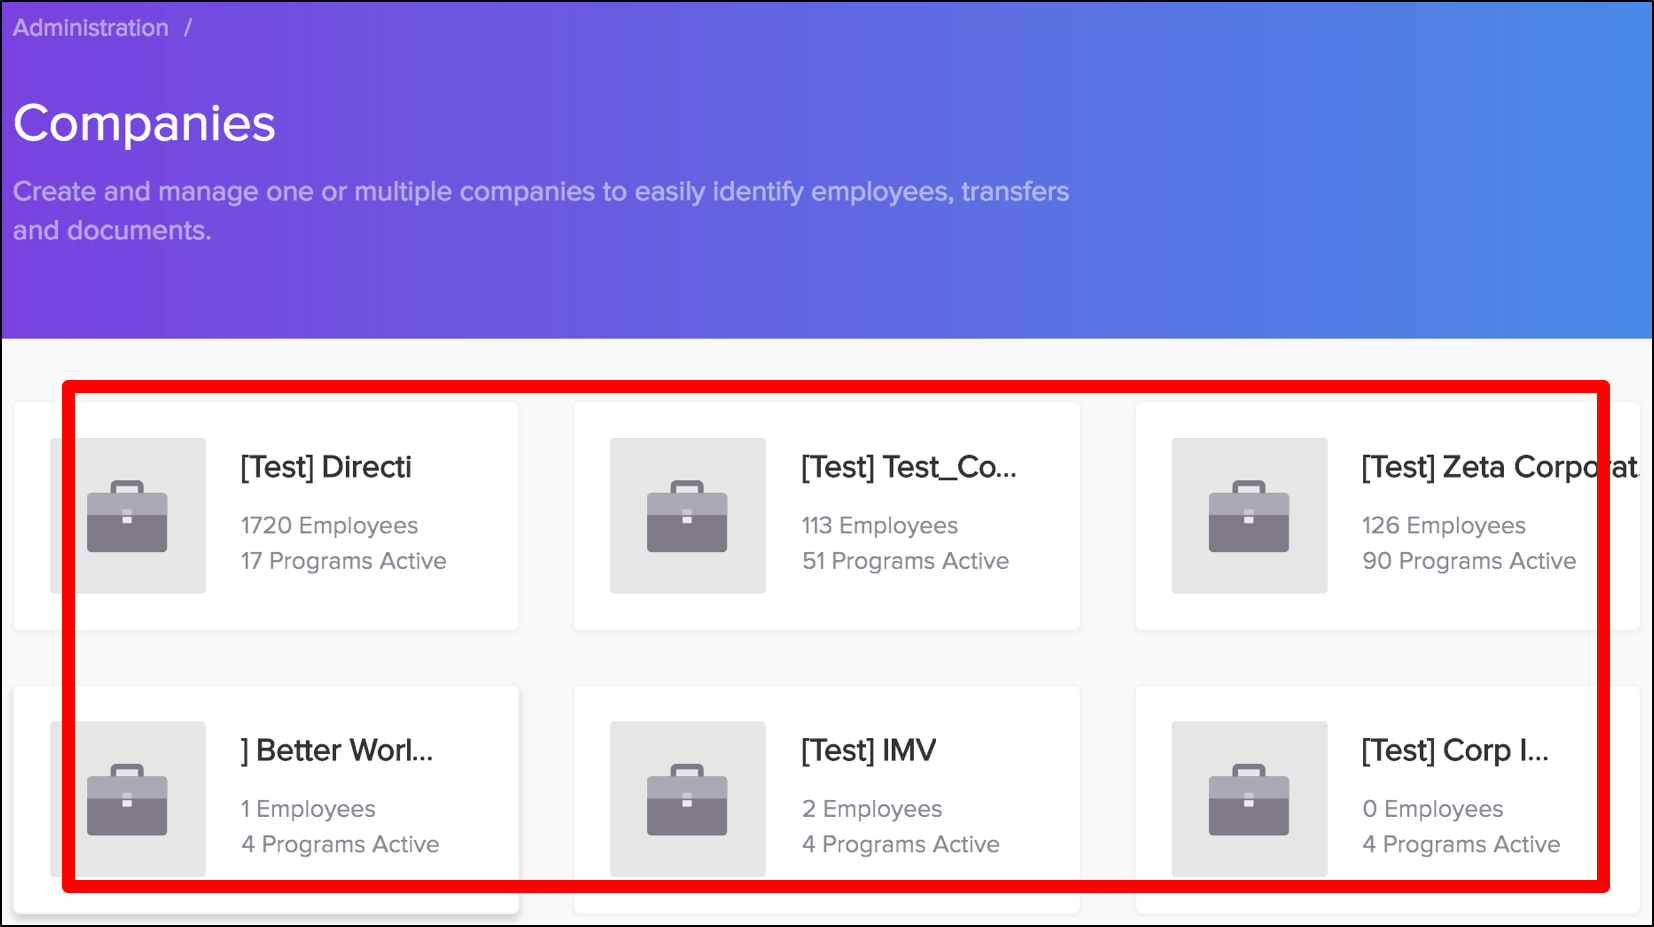
- View your companies with active programs and associated employees under your organization as seen in the image below.
| Note | ||
|---|---|---|
| ||
Adding companies is in WIP and soon be added in next sprint. Contact Zeta to add more companies for now. |
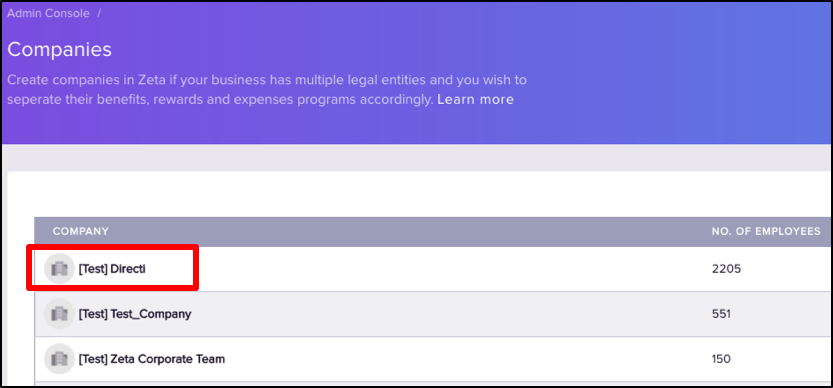
- On this screen, view all legal companies and number of employees associated with a particular company that you've created to run the benefit programs under your organization.

Viewing Programs under a Company
Log into the Zeta Optima platform
From the right navigation space, go to Administration > Companies under global menu. The company page opens.Follow the steps 1-3 as mentioned in Viewing Companies section.
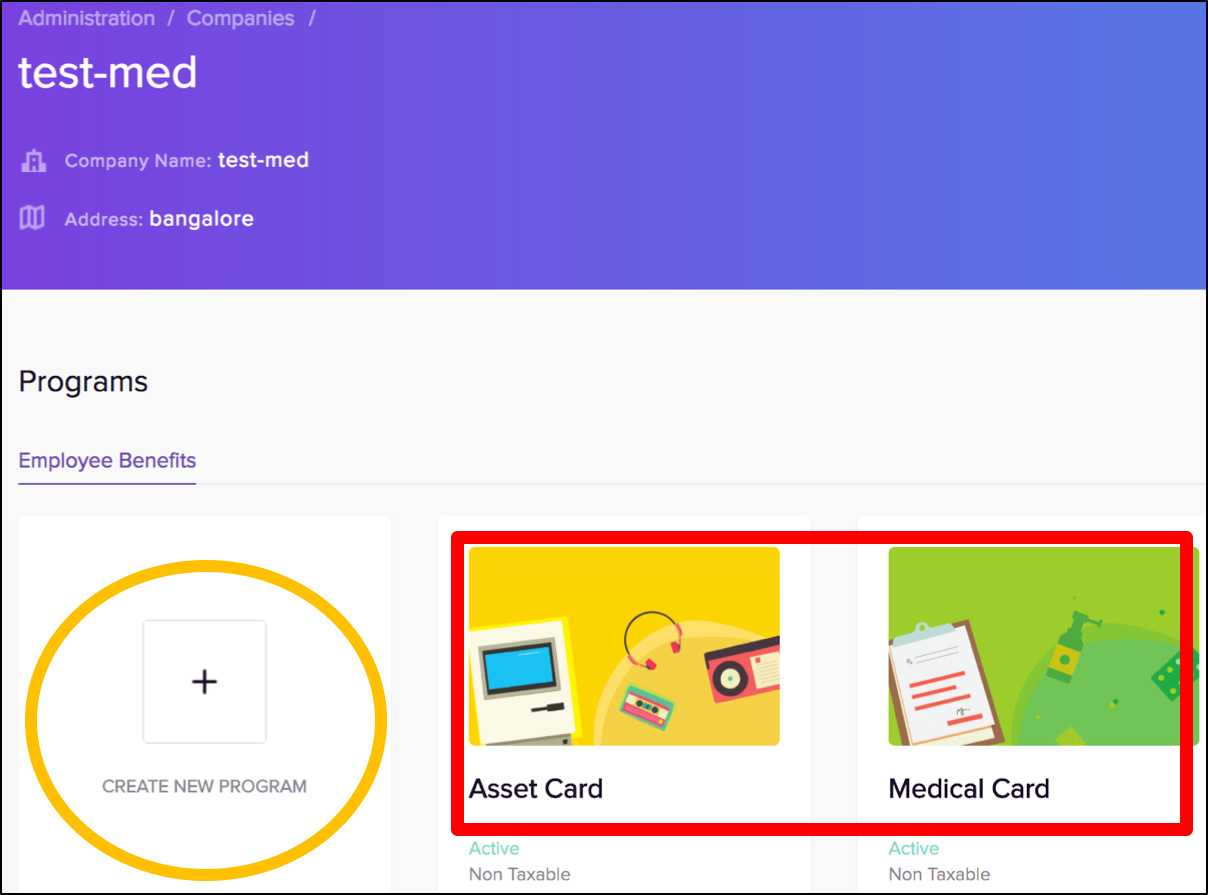
Click a company under the Company column.
On this screen, view all active benefit programs running under the company. Notice the total number of beneficiaries associated with the active programs at the bottom of the screen.
 Click a company to view the associated active programs under the company. This also displays a
 | Note |
|---|
On selecting a particular active program, you will be redirected to |
Manage Funds
| Align | ||
|---|---|---|
| ||
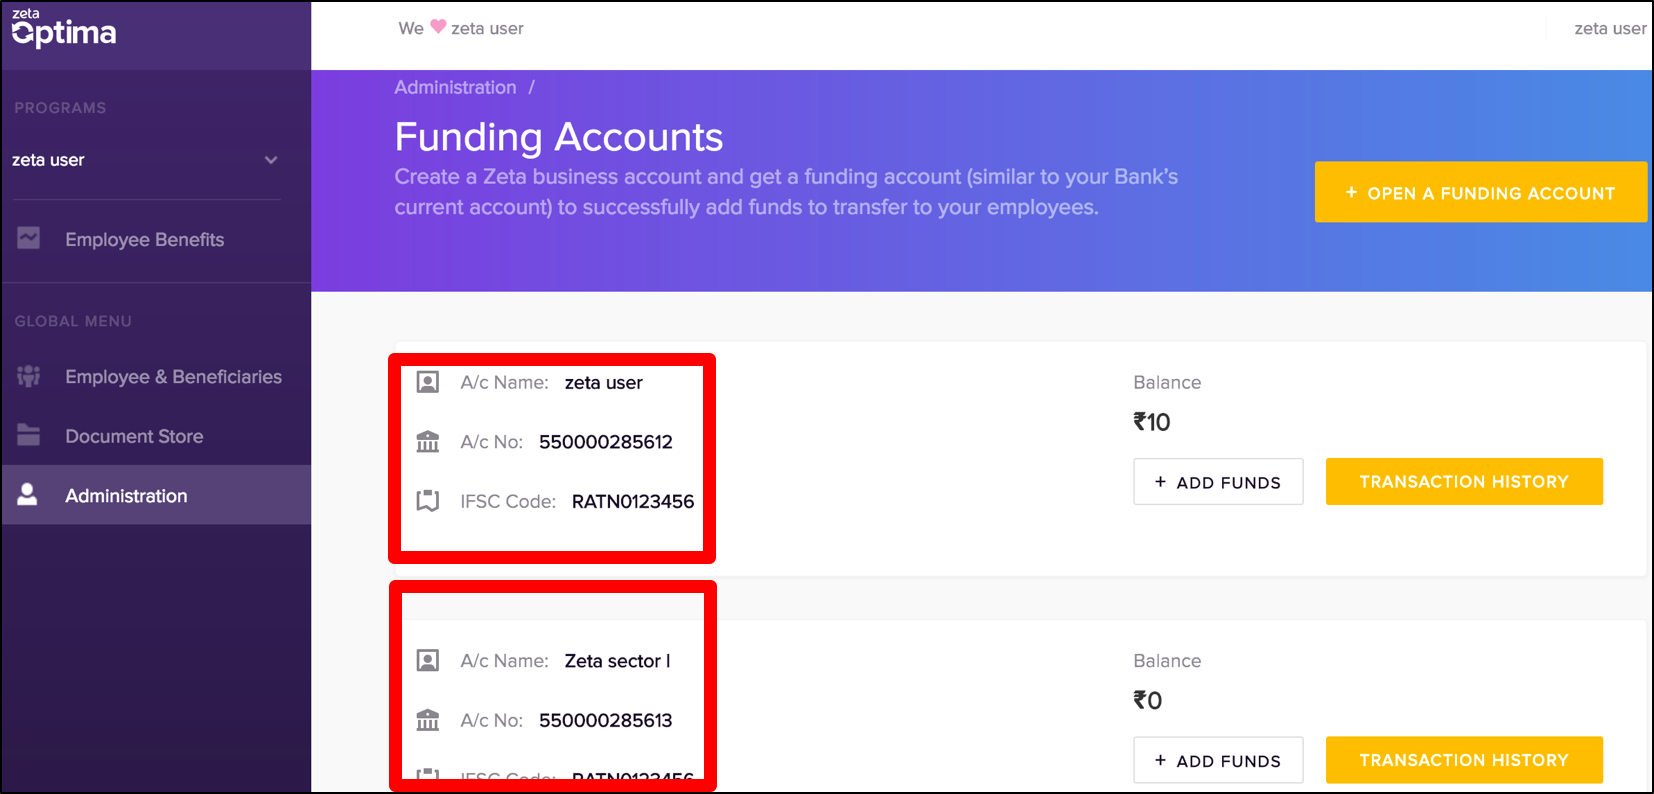
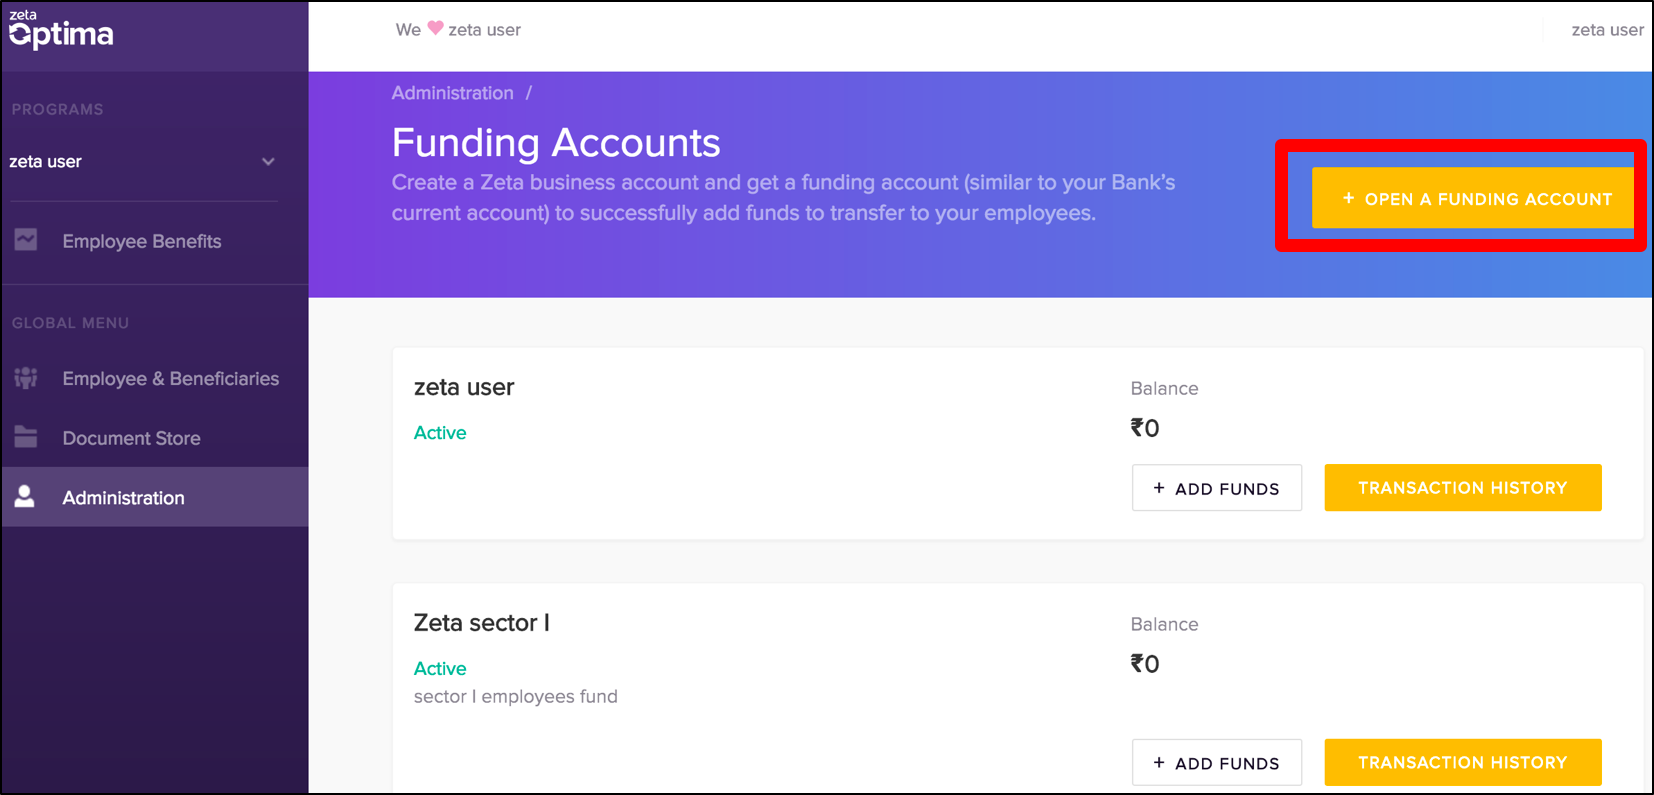
In order to get started with creating corporate benefit transfer, you would need to add sufficient funds in Zeta's bank account and enter the fund transfer details in the Zeta dashboard. This enables you to successfully execute the scheduled transfers. The dashboard also provides you a detailed view of your transactions, for example, viewing the fund addition history or account statement for your internal tracking. In principle, like companies you can have multiple legal funding accounts to manage employees fund transfers. But unlike companies, by default funding account doesn't exist and you need to create a funding account to successfully add funds to transfer to your employees. For instance, the screen below shows two funding accounts for your use. |
| Note |
|---|
You can initiate online NEFT/IMPS transfer or cheque payment towards Zeta bank account. The Zeta onboarding/sales team will share the bank details. Alternately, you may find Zeta bank details under |
Funding Account
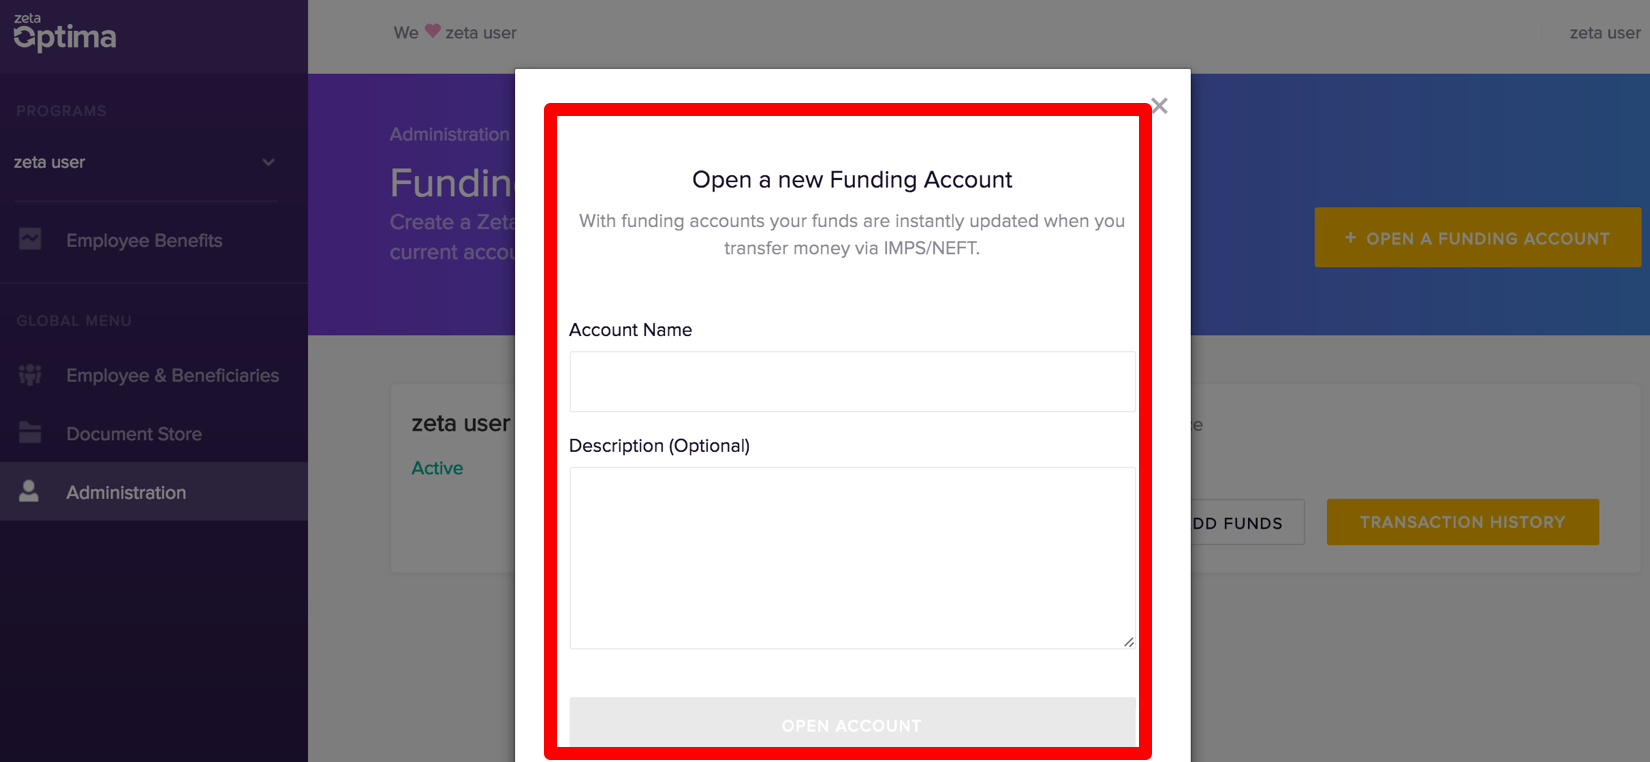
Zeta Optima interface provides you a quick and secure means to open a Zeta funding account and then add fund transfer details such as NEFT/IMPS reference or cheque number to the funding account. Create funding accounts as many as you want based on the requirements.
To Open a Fund Account
Optima Benefit Program section that lets you administer the respective tax benefit instruments. |
Manage Funds
See Managing Funding Account to learn about opening a funding account, adding funds or transferring funds to other accounts and many more.
Access Control
Zeta Optima platform is now equipped with a robust user entitlement system which is based on RBAC or role-based access control mechanism. This would permit and forbid requests to new users based on what roles they are associated with. Roles become primary handles of access to various entities and programs in Optima platform.
The idea behind role-based user management is to permit an Optima user to access only a subset of the universal set of privileges as defined in role(s) rather than unrestrained access to all entities and operations.
| Info | ||
|---|---|---|
| ||
This release allows you to only create users with admin privileges, having full access to the Optima dashboard. The other fine-grained privileges and roles mentioned below are coming shortly. |
The users would fall into several categories broadly, for example, admin, programadmin, or custom user. The following table is only a representative categories and privileges to elucidate the RBAC concept and not the complete list of desired access control operations in Optima platform. An organization may create its own roles and associated permissions based on its own needs.
| User Categories | Privileges |
|---|---|
| Admin | An admin is someone who has privileges to add users and assign them to roles, edit roles to add or remove permissions from them and such administrative function. An admin can setup and administer programs and funds and assign programadmin or fundadmin or any custom user roles to others. |
| Programadmin | A programadmin has privileges limited only to a specific program (eg. a meal program). The users with programadmin in an organization will have access to the universal set of privileges (say, administering a program, editing a program, generating a report, revoking funds, managing funds). |
| User | The user category will be restrained by the set of privileges that are enabled for them by the admin. A member may never add or manage other users. |
Adding New Users
As described above, you can only create users, not the role and by default, the approved users would be treated as "admin". Perform the following to add new administrators:
Log into the Zeta Optima platform
From the
Cheque Number
Enter the cheque number that you’d see on the cheque leaflet
Cheque Date
Enter the date of the issued cheque
Amount
Enter the transfer amount in rupees`
In both cases, click Submit Request once you’ve entered the fund transfer details. Once approved, you can view the details under Fund Addition tab (see next section).
Viewing Fund Details
| Align | ||
|---|---|---|
| ||
Zeta Optima dashboard lets you view your corporate fund details such as available funds, fund request history and balance history for your review. This helps you take informed action well in advance to avoid any order failure since sufficient funds are required to successfully execute the orders. |
You can view the following options under Funding Accounts option:
Available Balance
Gives a quick view of available balance in your funding account.
Fund Addition History
Gives a quick view of all fund request that are added to your funding account.
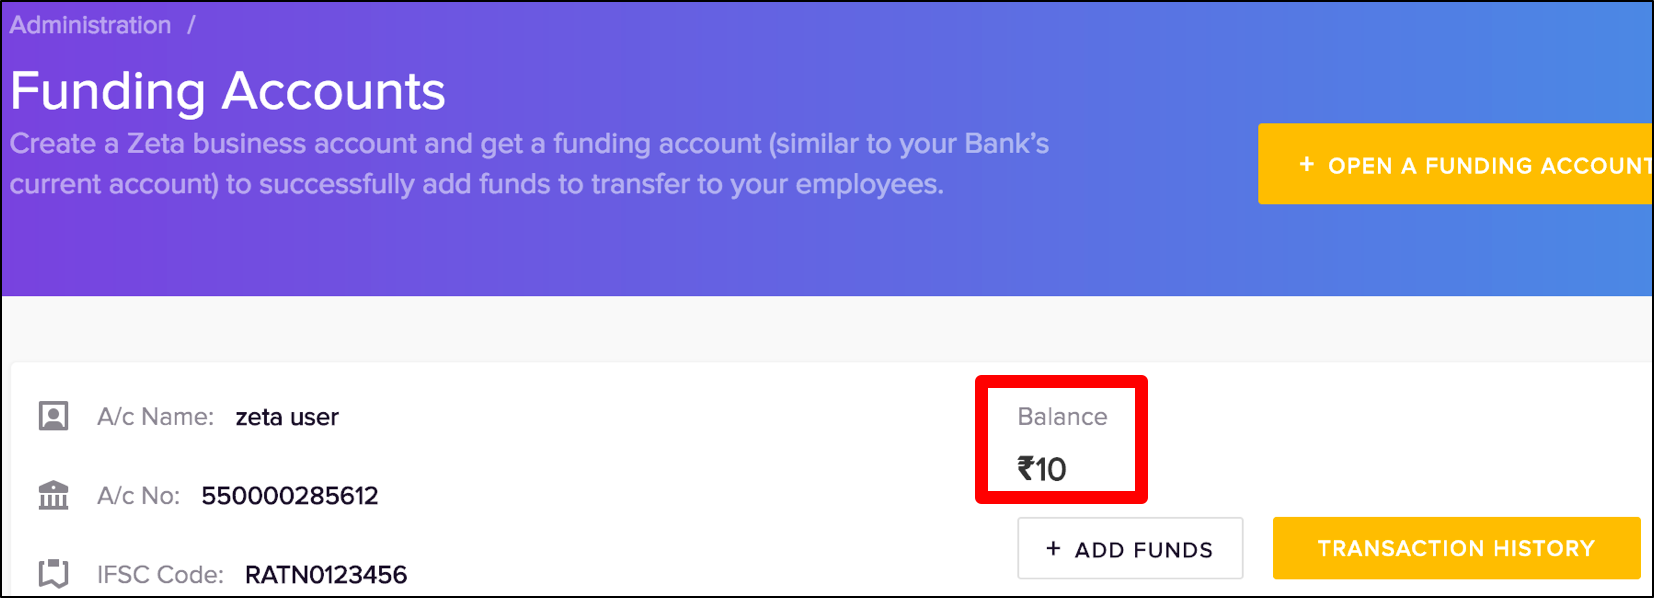
To View Available Balance
Log into the Zeta Optima platform
From the right navigation space, go to Administration > Funding Accounts under global menu.
In the "Funding Accounts" page, view the available balance in the individual accounts as seen below.
To View Fund Addition History
Corporate Tools menu, go to
To Add Fund Details
Log into the Zeta Optima platform
From the right navigation space, go to Administration > Funding Accounts under global menu.
In the "Funding Accounts" page, click ![]() Add Funds against a fund account where you want to add the fund transfer details
Add Funds against a fund account where you want to add the fund transfer details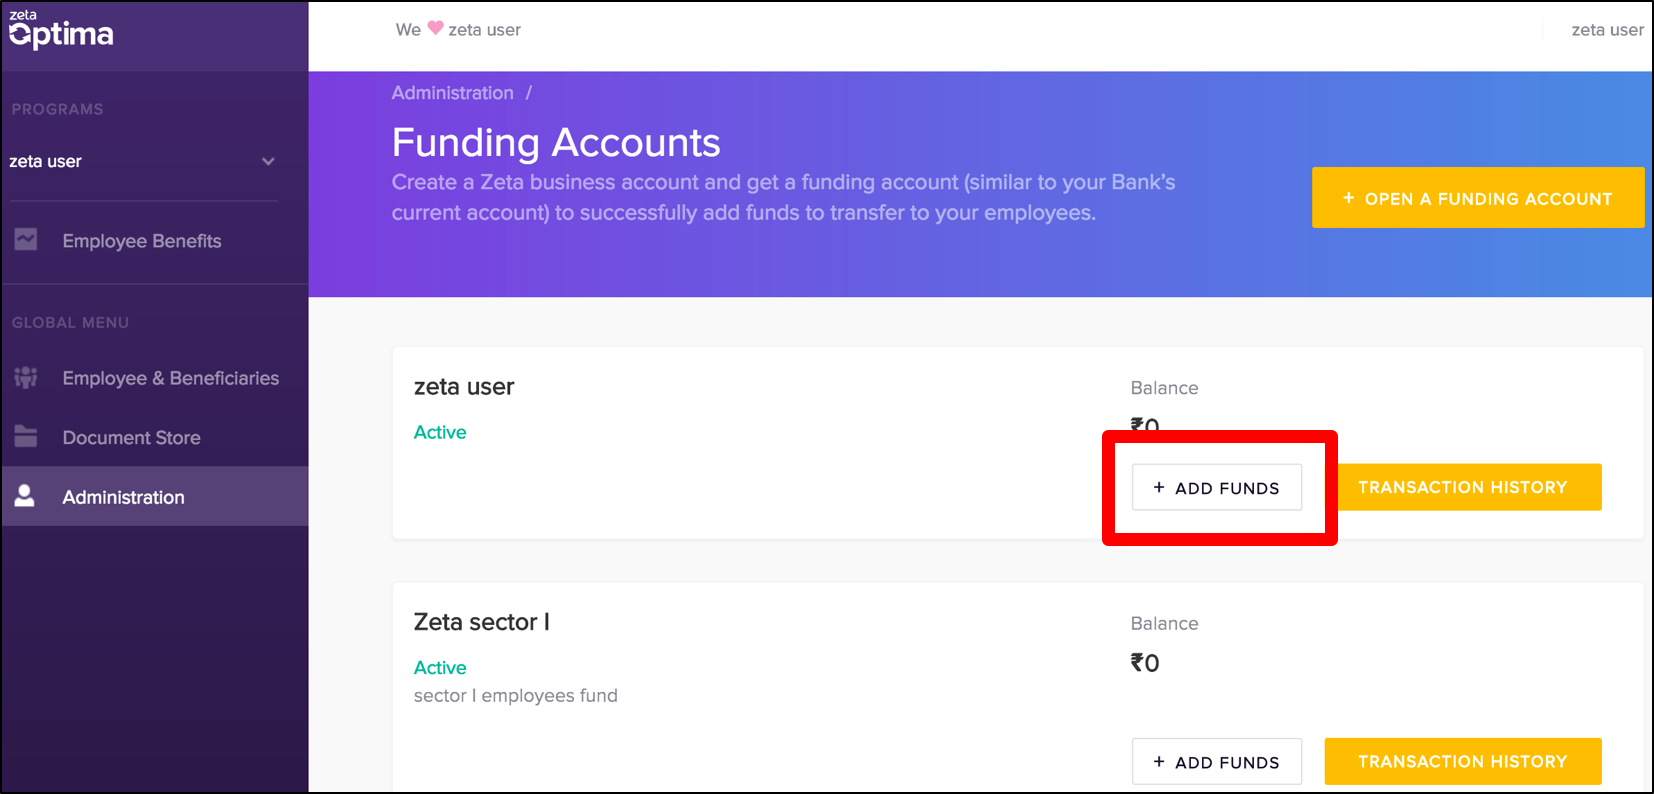
In the “Add Funds to (account name)” screen, select option 2 to enter you payment details such as transaction type as NEFT/IMPS or CHEQUE.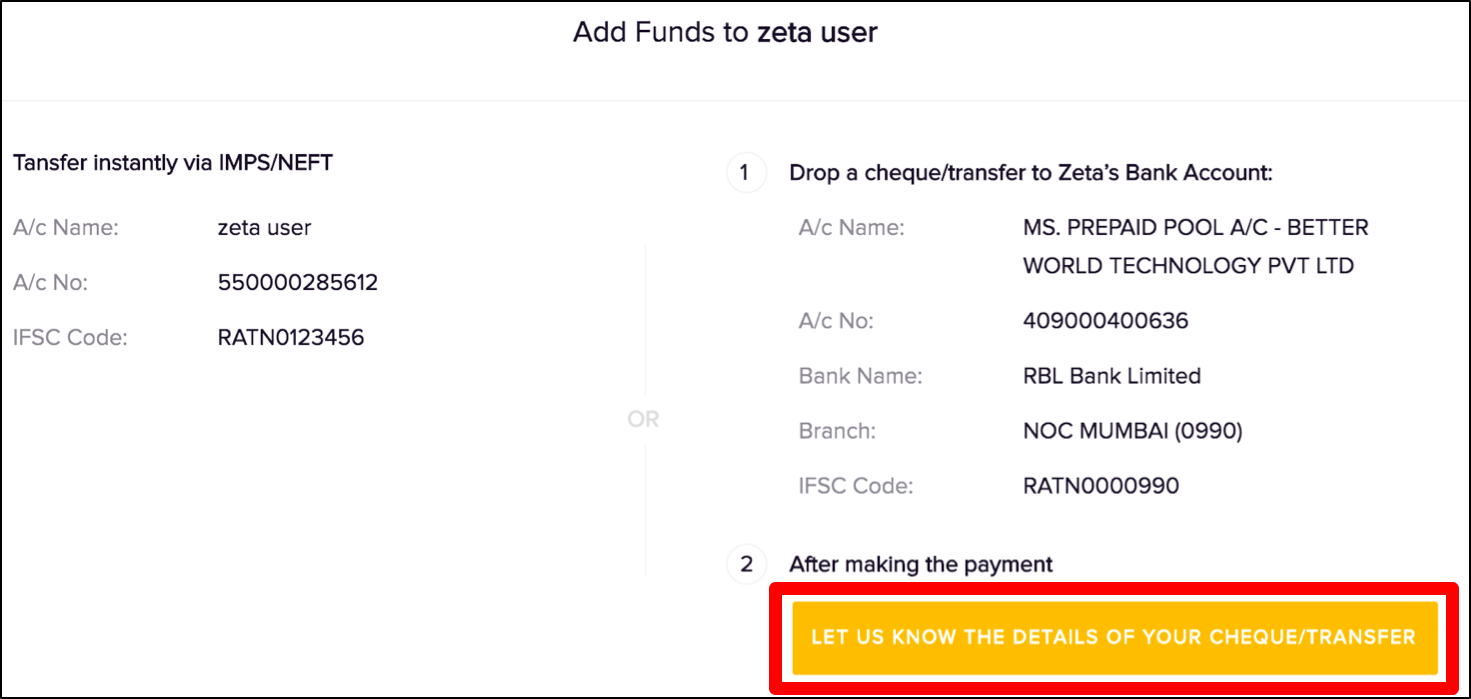
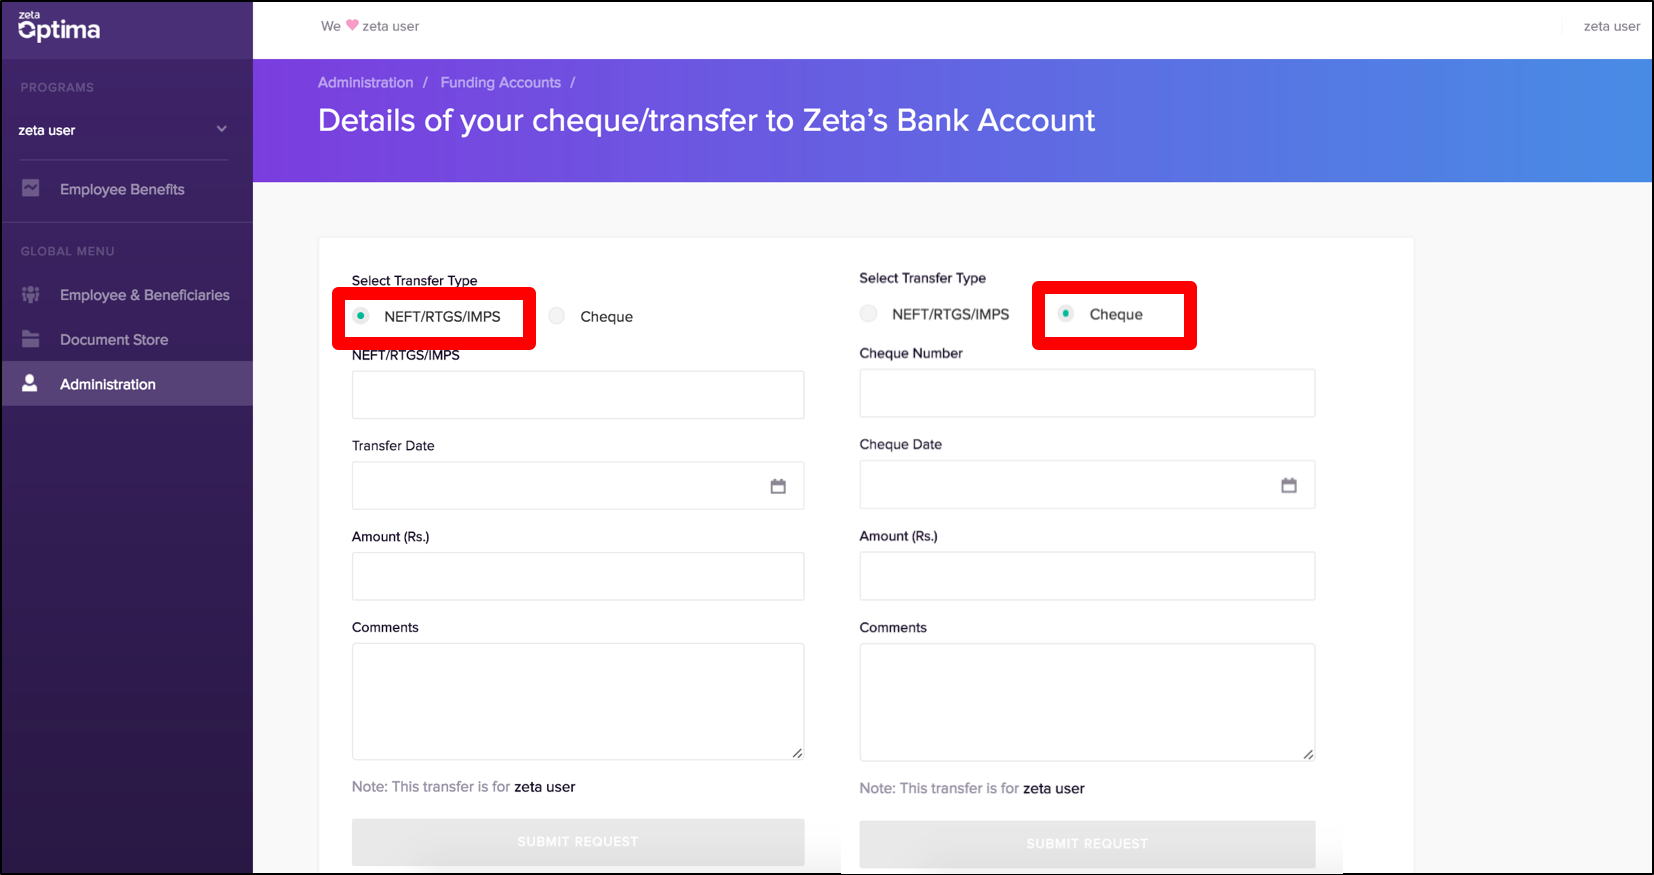
If selected NEFT/RTGS/IMPS, configure the following:
NEFT/RTGS/IMPS Number
Enter the NEFT/RTGS/IMPS reference number that you’d see post fund transfer or receive via SMS notification
Transfer Date
Enter the date of the online transfer
Amount
Enter the transfer amount in rupees
If selected CHEQUE, configure the following:
Admin Console > Access Control. This opens up the user entitlement page
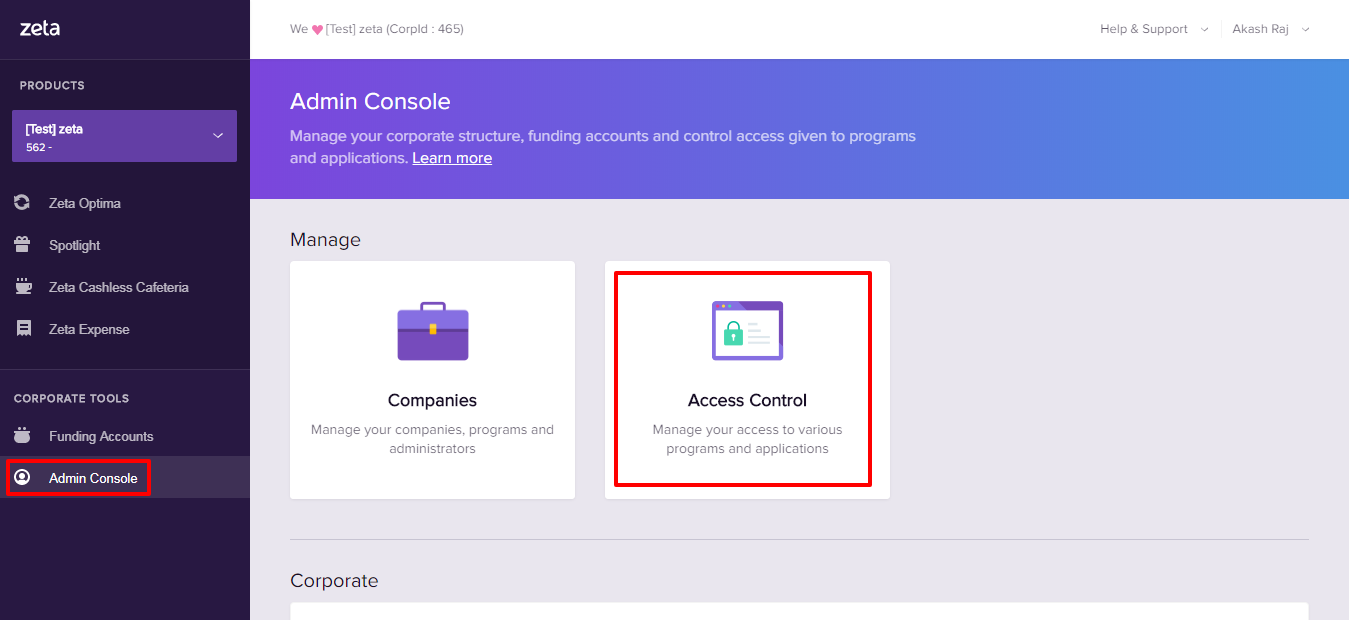
On this page, click Add Useroption. The "Add a new user" screen appears.
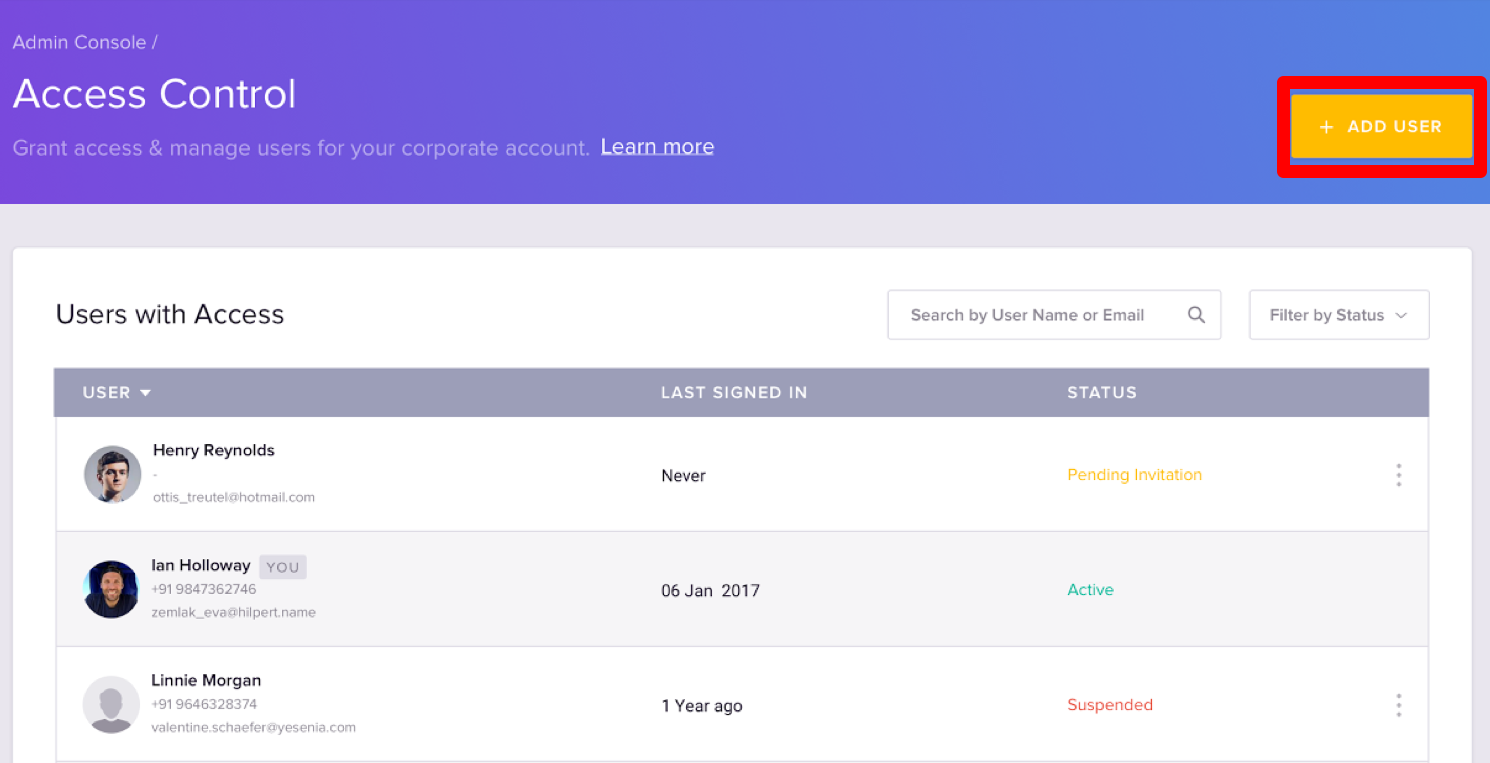
Specify Full Name and valid Email Address of the user
Finally, click Add User to create a new user
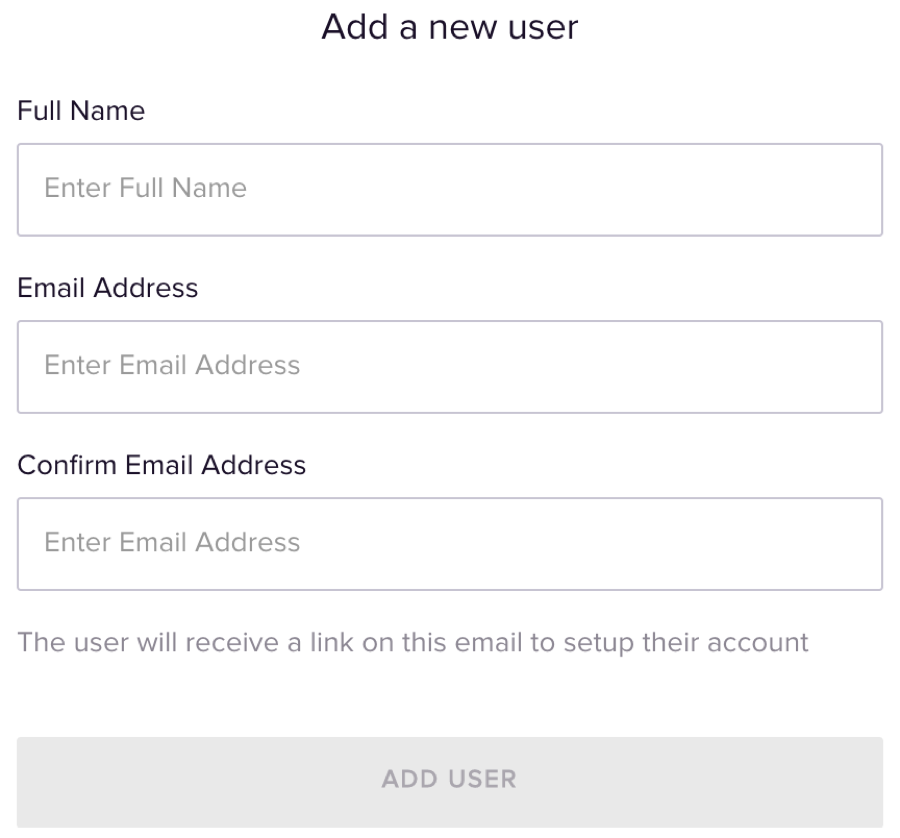
Once the email is verified and added to the Optima platform, a user receives an email notification to activate the account. A user would need to create a new Zeta account to gain access to the Optima dashboard.
Suspending User Privileges
As an administrator, you can suspend the active users temporarily in the Optima platform. Perform the following to modify users:
Log into the Zeta Optima platform
From the Corporate Tools menu, go toAdmin Console > Access Control. This opens up the user entitlement page
On this page, locate and click more action (
 ) option against an active user and then click Suspend this User to suspend an active user.
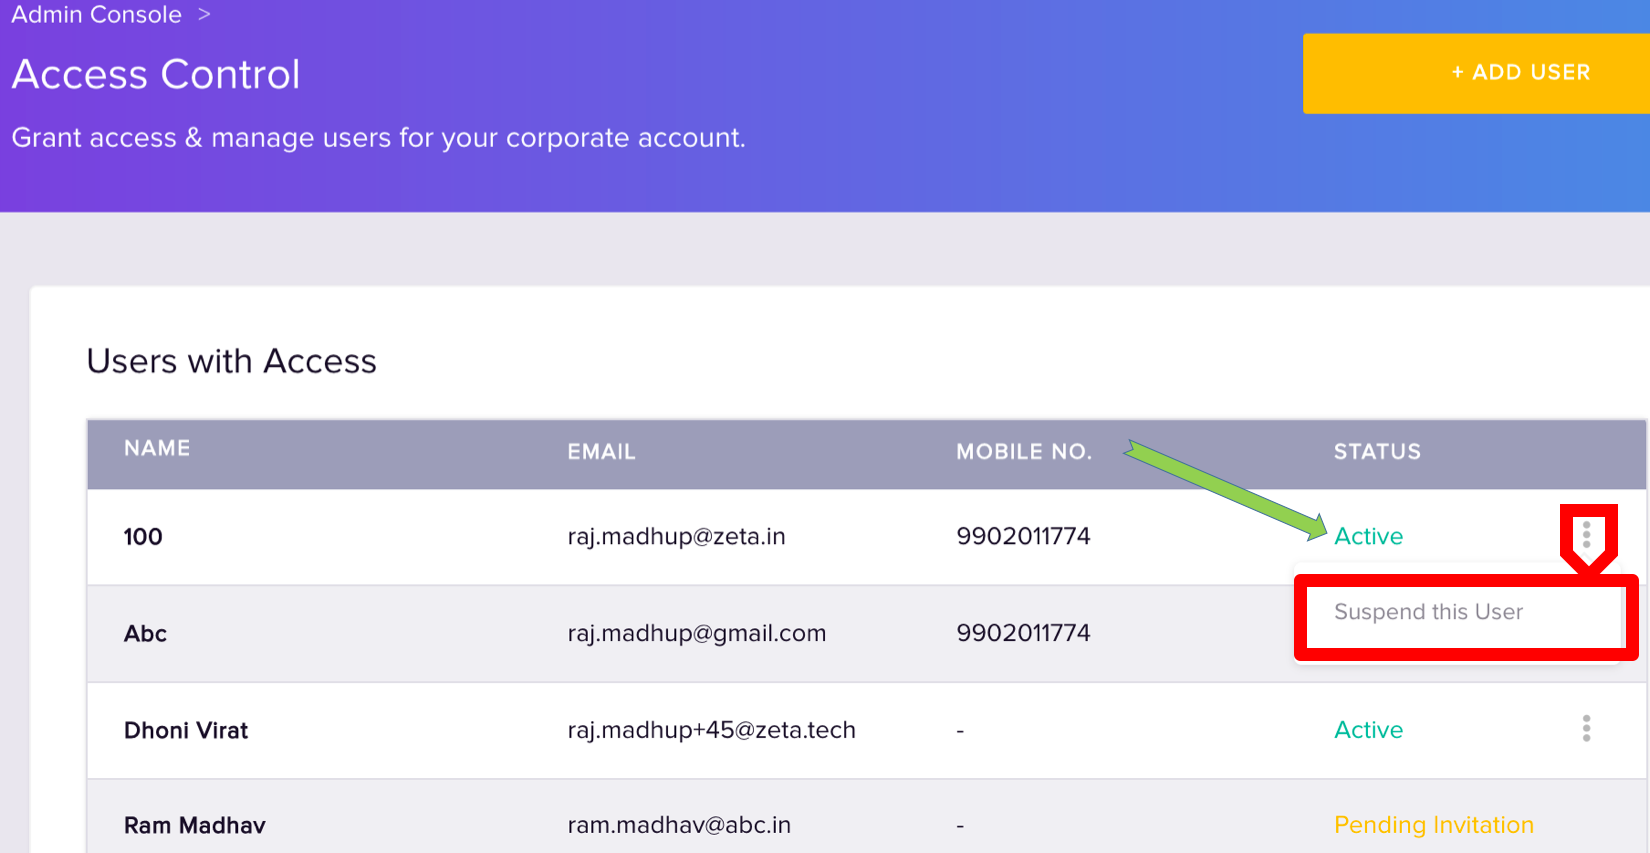
Click Yes, Suspend This User to confirm the suspension. You can view the suspended entry on the same page as shown below:
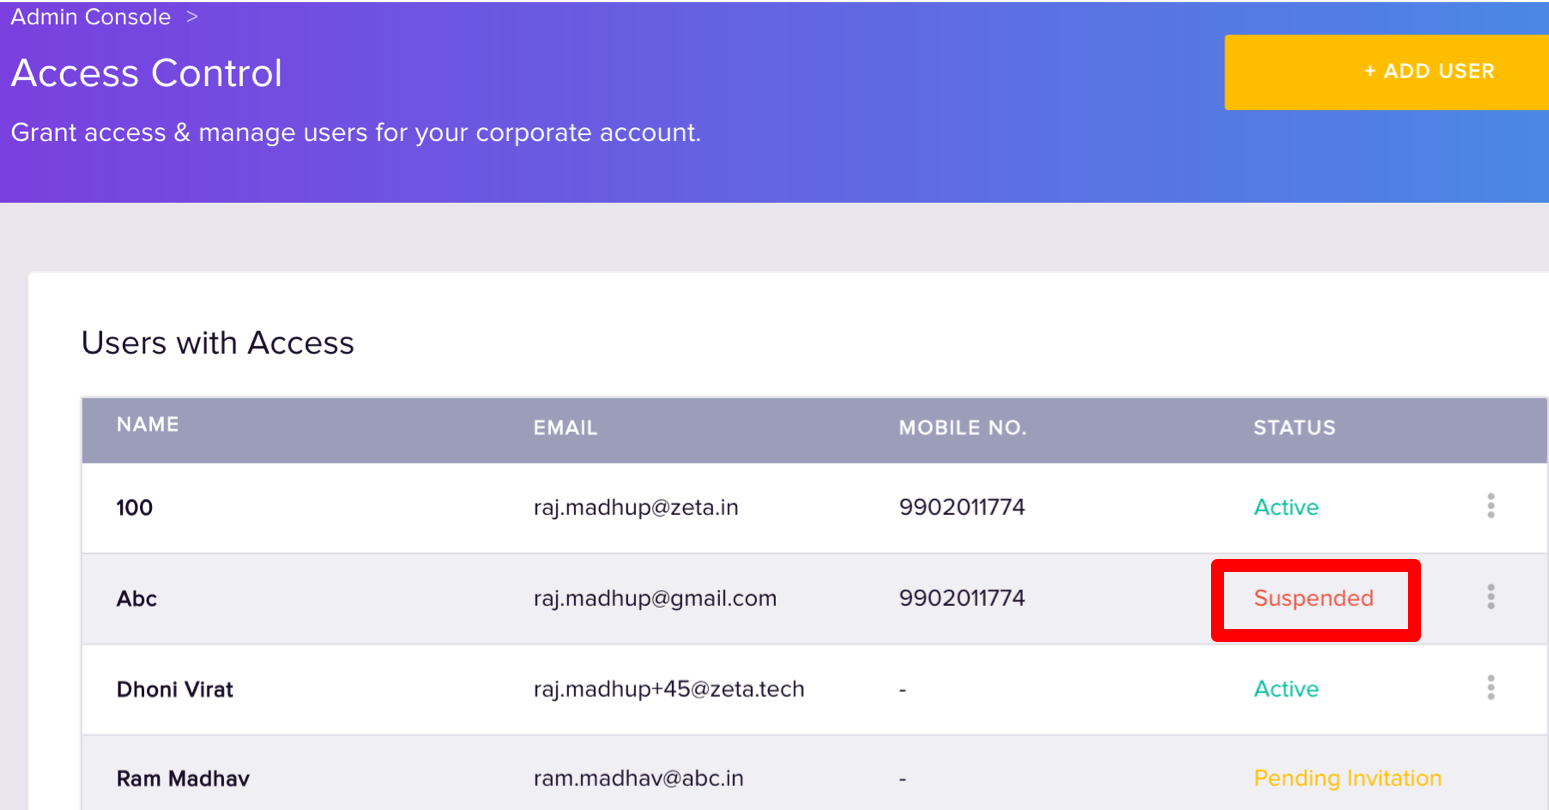
You’ve successfully revoked the access control of an active user for a limited time.
Restoring User Privileges
You can restore suspended users who are not removed permanently in the Optima platform. Perform the following to restore users:
Log into the Zeta Optima platform
From the right navigation spaceCorporate Tools menu, go to Administration > Funding Accounts under global menu.
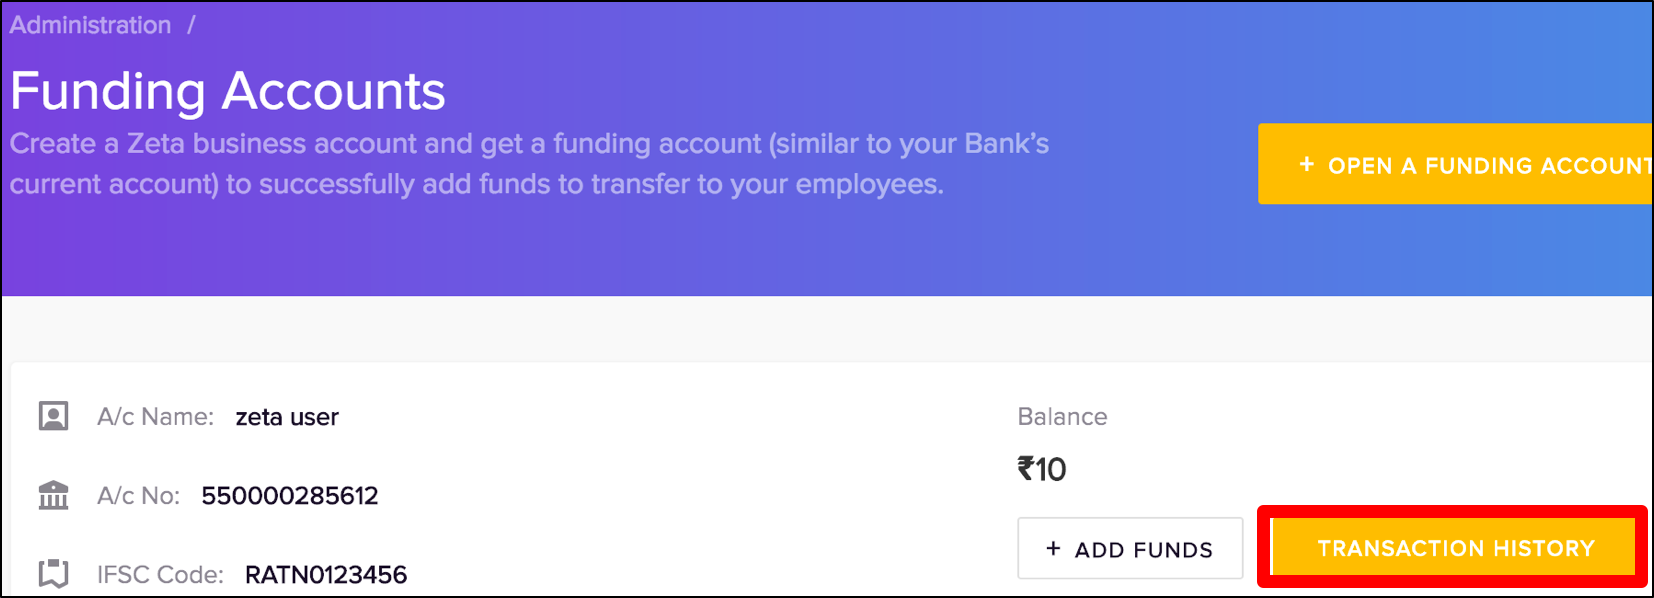
In the "Funding Accounts" page, click Transaction History next to add fund option.
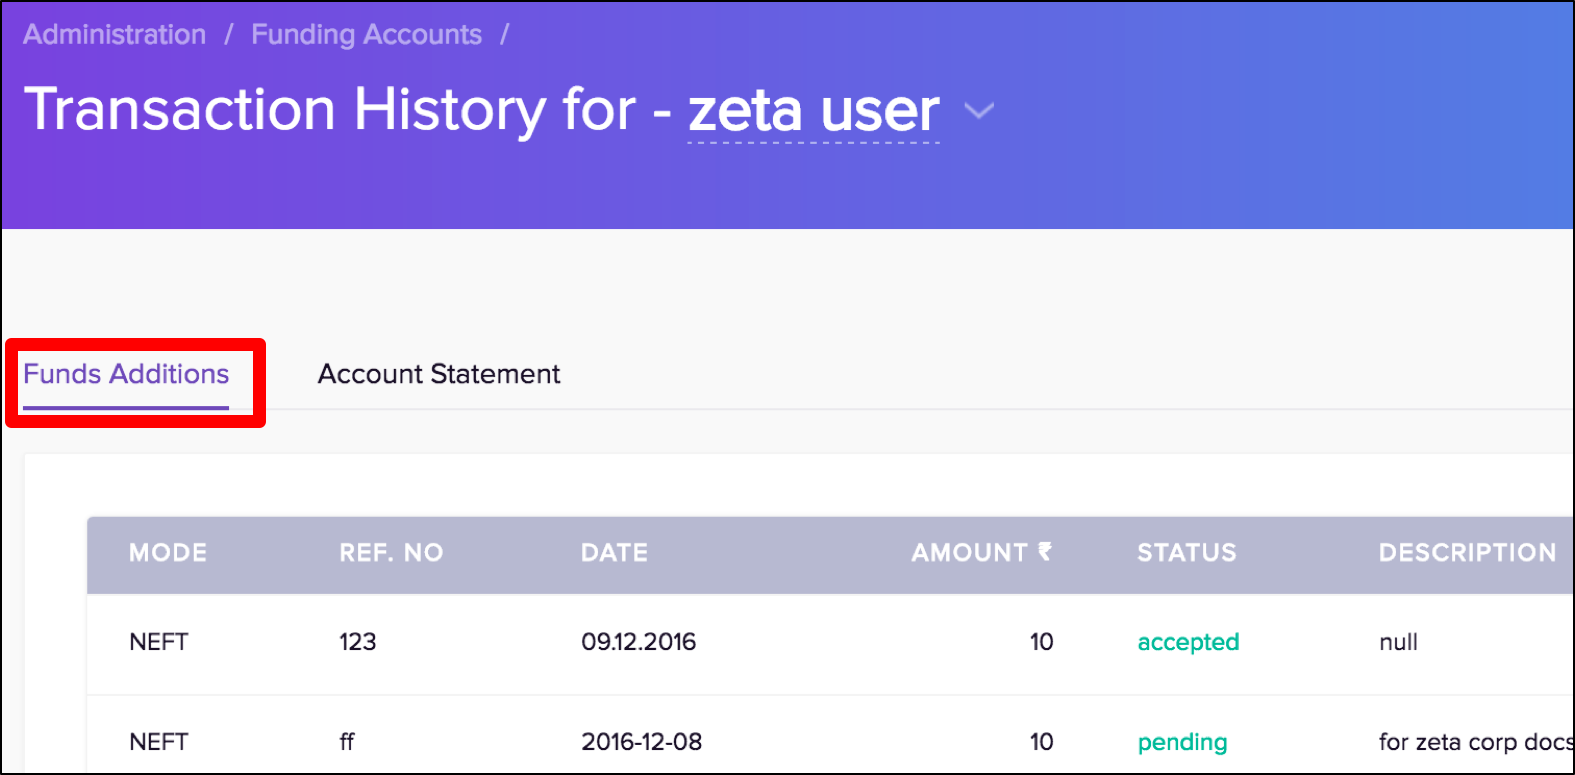 Click Funds Additions tab to view the fund transfer detail. On this page, you can see all accepted or pending funds initiated via NEFT/RTGS/IMPS or cheque transfer.
To View Account Statement
Log into the Zeta Optima platform
From the right navigation space, go to Administration > Funding Accounts under global menu.
In the "Funding Accounts" page, click Transaction History next to add fund option.
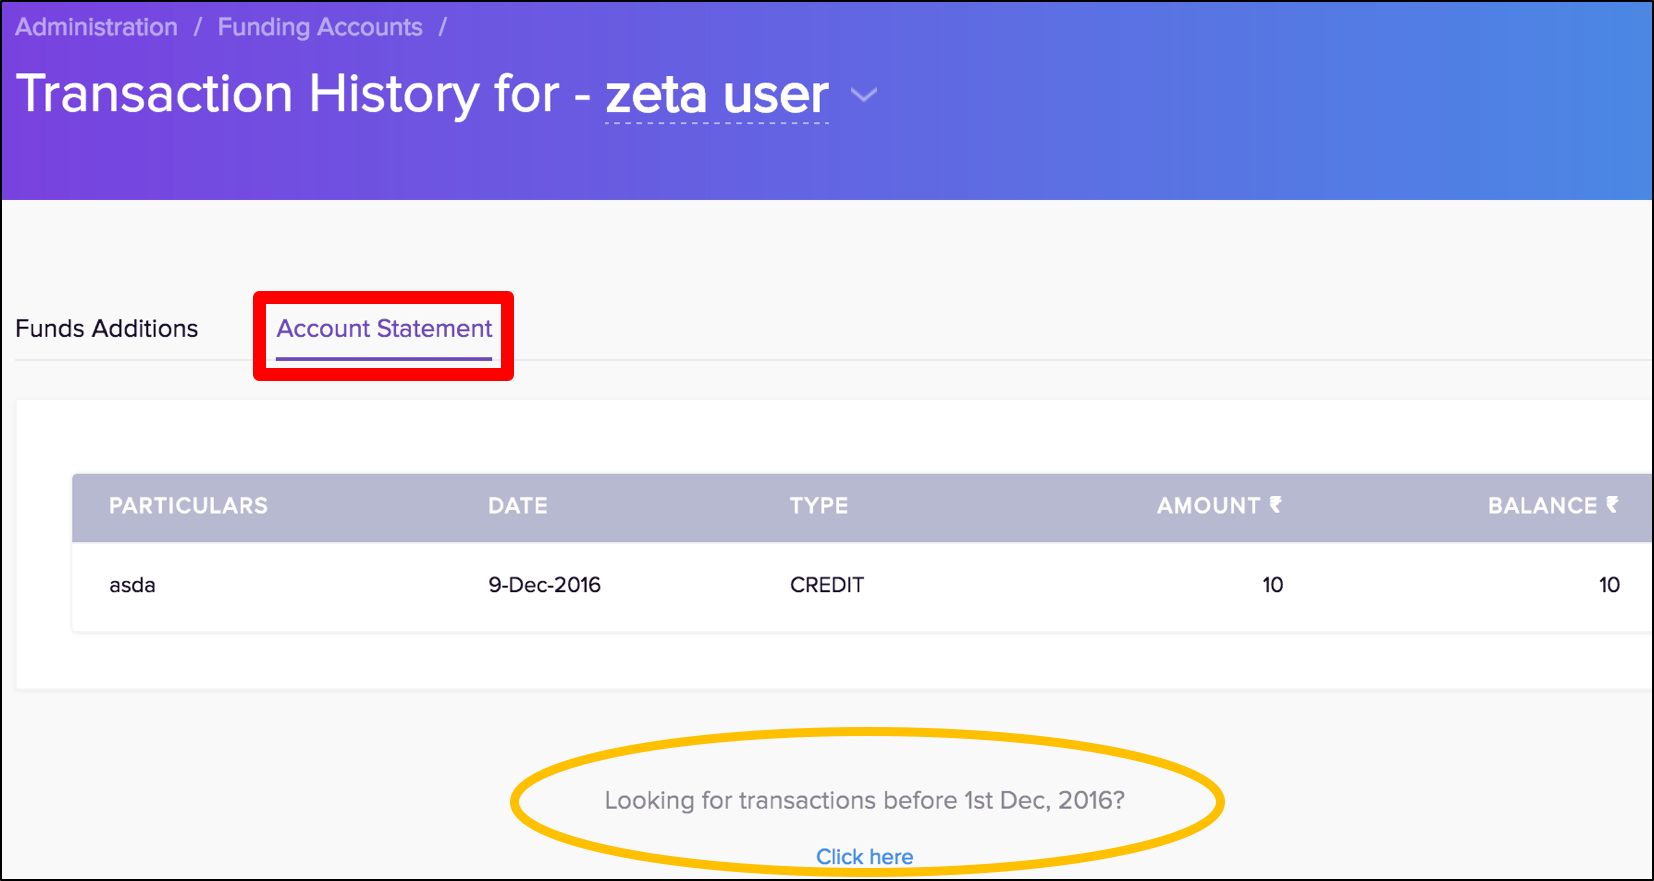
Click Account Statement tab to view the fund statement details. On this page, you can see all successful transactions such as debited, credited or revoked and so on.
| Note |
|---|
You may wish to see older statement beyond Dec 1st, 2016, click "Looking for..... 1st Dec, 2016" option at the bottom of the screen. |
| Panel | ||||
|---|---|---|---|---|
| ||||
|
Admin Console > Access Control. This opens up the user entitlement page
On this page, locate and click more action (
) option against an suspended user and then click Restore this User to restore a suspended user.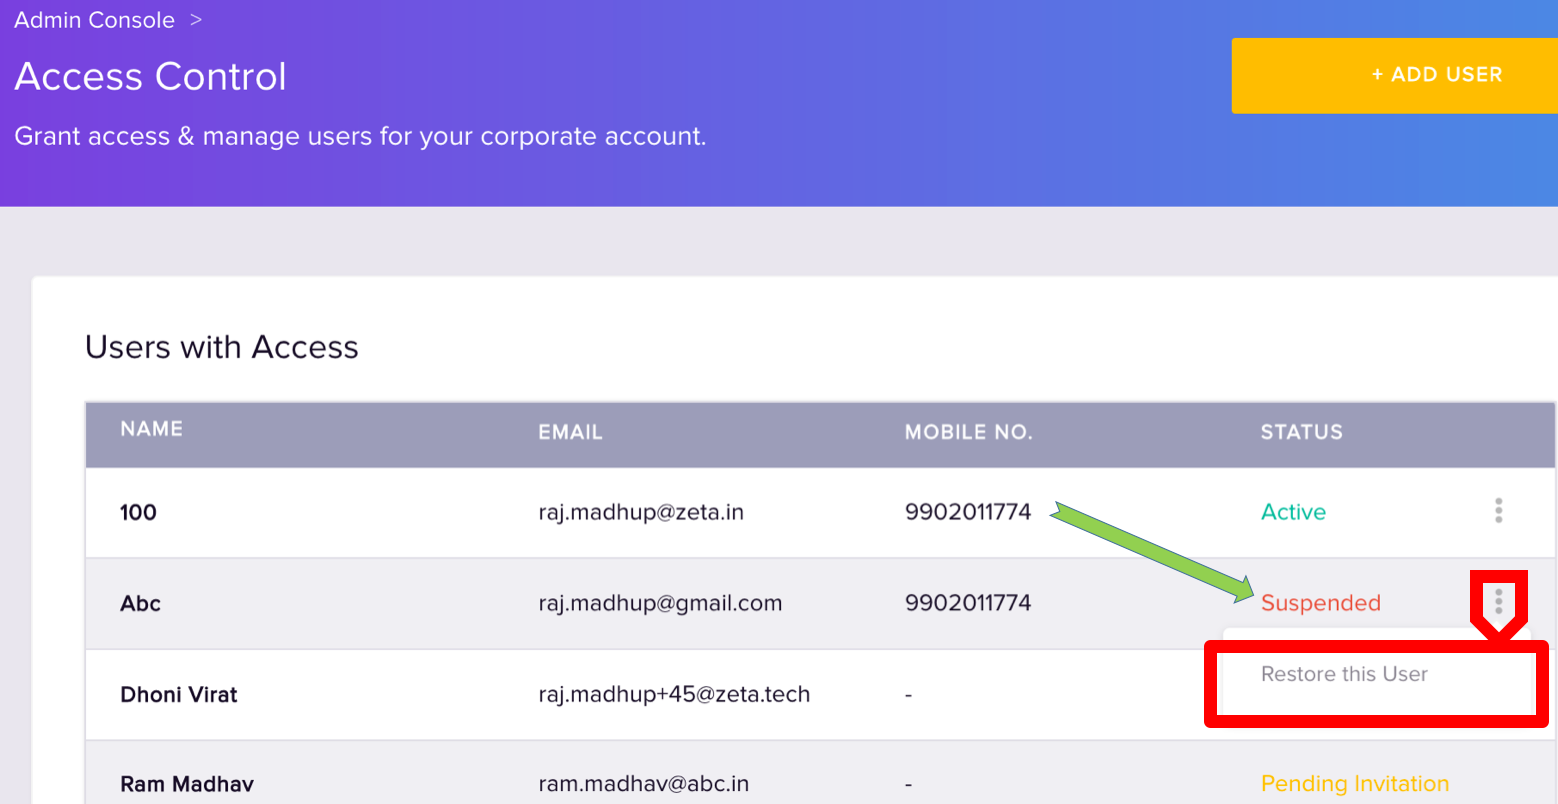
Click Yes, Restore Access to confirm the restoration. You can view the reactivated entry on the same page as shown below:
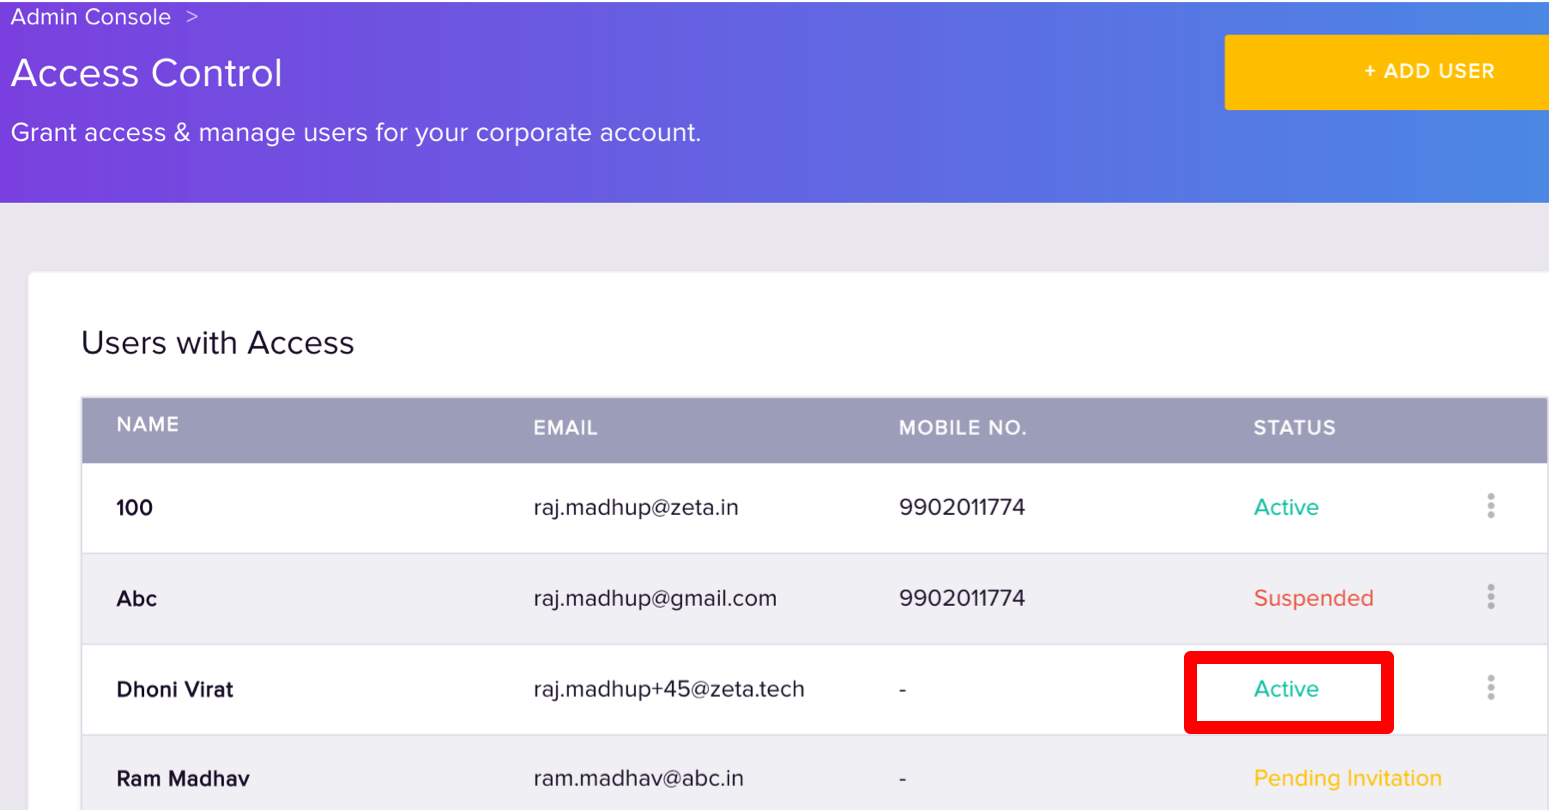
You’ve successfully restored the access control of a suspended user to an active state.
| Panel | |||||||||||||||||||||||
|---|---|---|---|---|---|---|---|---|---|---|---|---|---|---|---|---|---|---|---|---|---|---|---|
|