Overview
A merchant’s life cycle starts with onboarding into the system. The merchant’s data is added into the zeta system, which enables accepting payments.
Merchant Data Modelling
Before we get started on understanding various steps of the onboarding data flow, we need to understand how a merchant is integrated in the zeta system. This data model is leveraged to map the corresponding entities in the Sodexo Merchant data and then pushed into the zeta system.
Each business in Zeta is modeled as a three tiered hierarchical , consisting of Business , Store and Counter . This model can be utilized to manage operations of any business. Below is an example:
Example
A catering company RV Foods sells food at multiple tech parks, viz. DLF, Bagmane and Trident, and has counters in multiple floors/food-courts at each of these tech parks. Below is the data modelling for this business:
Business - RV Foods (BID 134768)
Store 1 - DLF
Counter 1 - Block A, Floor 2 (B/S/C = 134768:1:1, Shop Id 346283)
Counter 2 - Block C, Floor 5 (B/S/C = 134768:1:2, Shop Id 465826)
Counter 3 - Block E - Food Court (B/S/C = 134768:1:3, Shop Id 349393)
Store 2 - Bagmane
Counter 1 - Block B, Floor 1 (B/S/C = 134768:2:1, Shop Id 293749)
Counter 2 - Block D, Floor 3 (B/S/C = 134768:2:2, Shop Id 942985)
Store 3 - Trident
Counter 1 - Block F, Floor 2 (B/S/C = 134768:3:1, Shop Id 116223)
Counter 2 - Block G, Floor 4 (B/S/C = 134768:3:2, Shop Id 226883)
Sodexo - Zeta Entity Mapping
Sodexo Entity | Zeta Entity |
|---|---|
Affiliate ID | Business ID |
Address Id | Store ID |
AID/MID/TID | Counter ID |
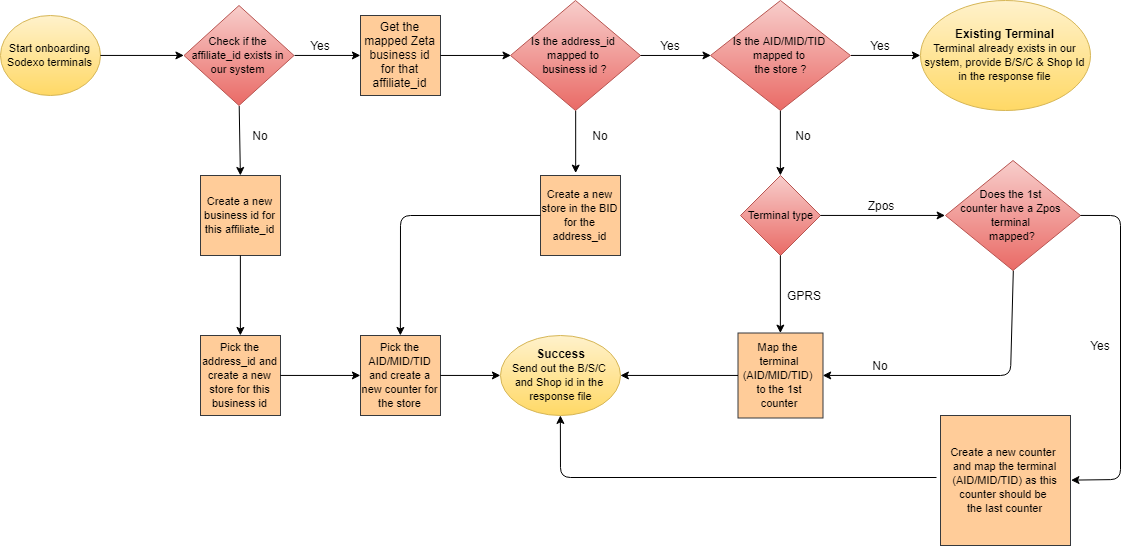
Onboarding Data Flow
Data collection(Sodexo)
Sodexo merchant team collects data of all merchants to be onboarded, and shares the data with Zeta team in a ZAF file as per the POS onboarding contract.Terminal addition
There are two types of terminals that can be added:GPRS - Terminals for activating a POS machine issued by other acquirers like Innoviti.
ZPOS - Terminals for Zeta payment methods like QR, Shop Id, Zeta Code, NFC etc.
The terminal addition flow is illustrated in the flowchart below.
User mapping to counters
There is a contact number sent in through terminal onboarding file which is mapped as a Store Owner for the store which contains the mapped terminal.
Hybrid Merchants
Hybrid Merchant terminal - A ZPOS terminal which can accept payments from both Sodexo & Zeta users.
Prerequisites
- The business should have completed agreements & all other formalities with Sodexo and they should have created a merchant in their system and issued an AID/MID/TID.
- The business should be onboarded as a Zeta merchant and not yet onboarded as a Sodexo merchant in zeta system (through ZAF file).
Process
- Sodexo team should share the AID/MID/TID details to the Zeta team along with the details of the business which need to be mapped.
- Zeta team (Express Team) will map the AID/MID/TID with the Zeta business so that the QR code can be used to accept payments from Sodexo users as well.
- The post transaction flow for Hybrid merchants will remain similar to the other merchants.
NFC Trust Establishment
NFC Payment Flow
In the usual flow, the first transaction between the merchant and user will need an OTP from the user. To avoid the OTP requirement, the terminal can be whitelisted for the user card program. This eliminates the need for an OTP even for the first transaction of the user at the merchant.
Process
Required fields for trust establishment for any business at the card program ID Level:
- CardProgramID
- Corporate BusinessID
- MerchantList (BusinessID: StoreId)
Request should be raised to the Zeta Ops team.
It'll take the 24 hours for cache invalidation. After that the business will be trusted for that card program ID.
Administration
The Zeta Store App provides a control panel for easy administration. You can perform various functions such as manage users, view business related information and sales and settlements of all the available stores.
Business Profile
The Control Panel tab in the Zeta Store App provides you the information related to the established business. Details of stores implemented under a particular business and beneficiary's bank account details can be viewed in the same screen.
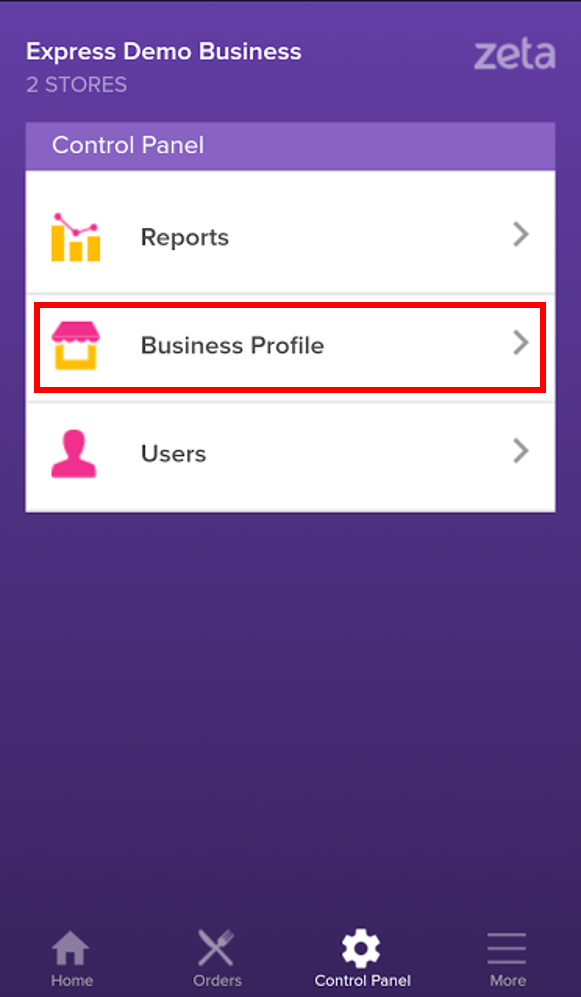
To view the Business Profile, go to Control Panel > Business Profile. You can also generate QR code for a particular store or for the entire business.
- Log into the Zeta Store App.
- Go to Control Panel > Business Profile.
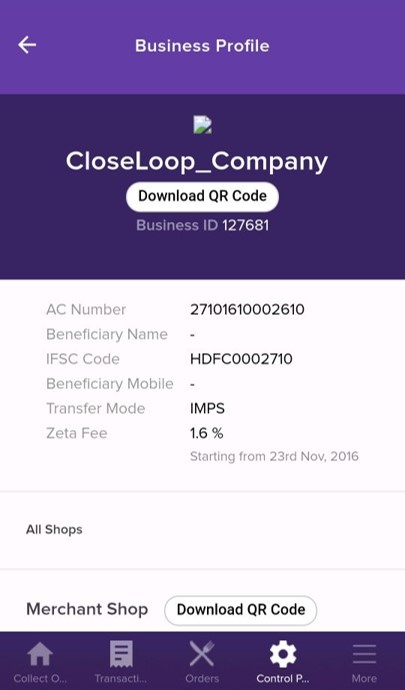
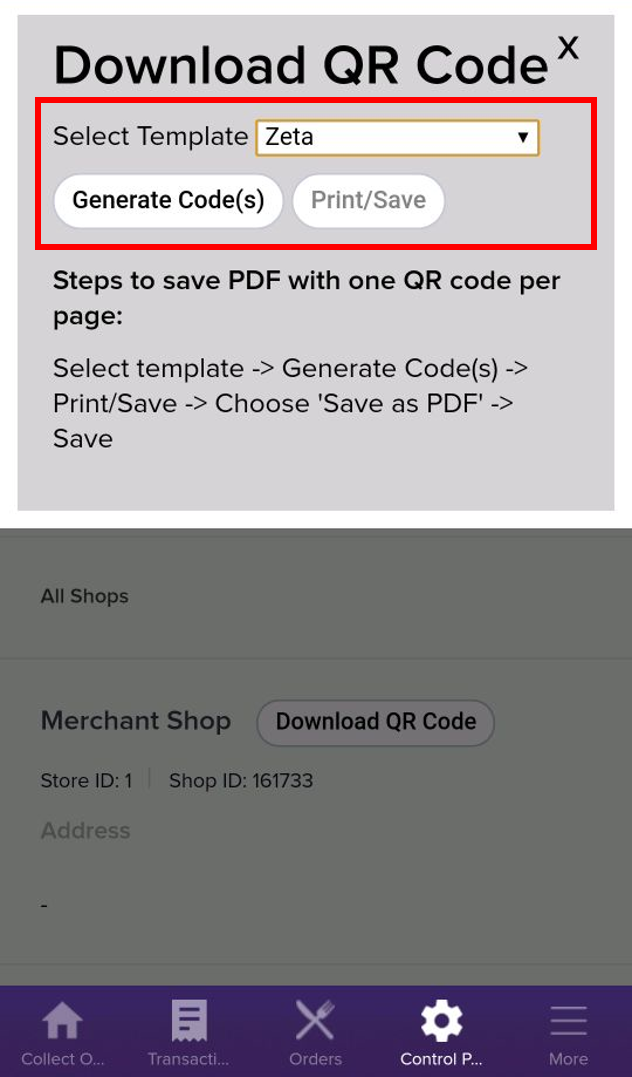
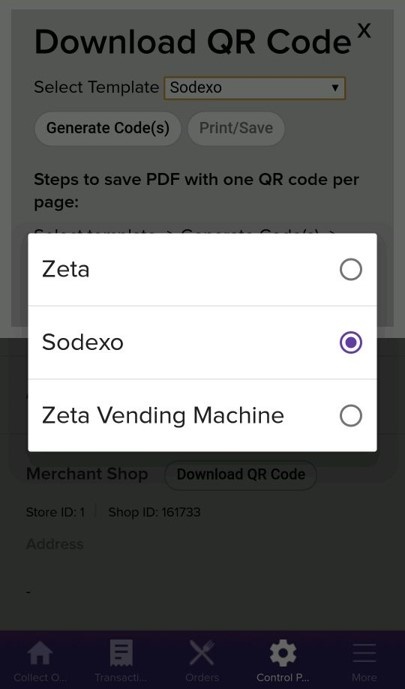
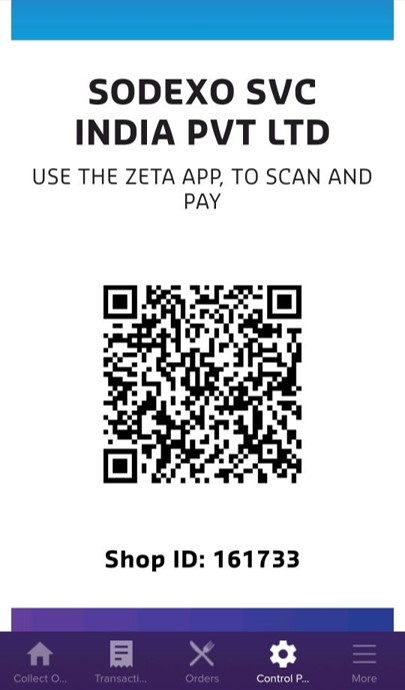
- To generate QR Code, tap Download QR Code for a particular store or for the entire Business.

Select the template for which the QR code is to be downloaded and tap Generate Code(s).
On this page: