Overview
The Zeta merchant store provides an easy-to-use menu management feature to manage all the tasks regarding the store menu. The options you can perform include managing the menu categories and the menu items, starting or stopping the services.
Refer the below table to get a brief information on the menu management tasks:
| Tasks | Description |
|---|---|
| Add Menu Category | Allows you to add new menu categories. |
| Edit Menu Category | Allows you to change existing menu category preferences. |
| Delete Menu Category | Allows you to remove a category from the menu. |
| Add Menu Item | Allows you to add new menu items into the menu. |
| Edit Menu Item | Allows you to edit the menu item preferences. |
| Delete Menu Item | Allows you to delete the items from the menu. |
Option to modify the menu category is available only for the remote ordering and not for the kiosk-enabled store.
Add Menu Category
- Log into the Zeta web POS.
- In the left navigation pane, select the Manage Menu tab and select
 Add In Categories in the menu management pane.
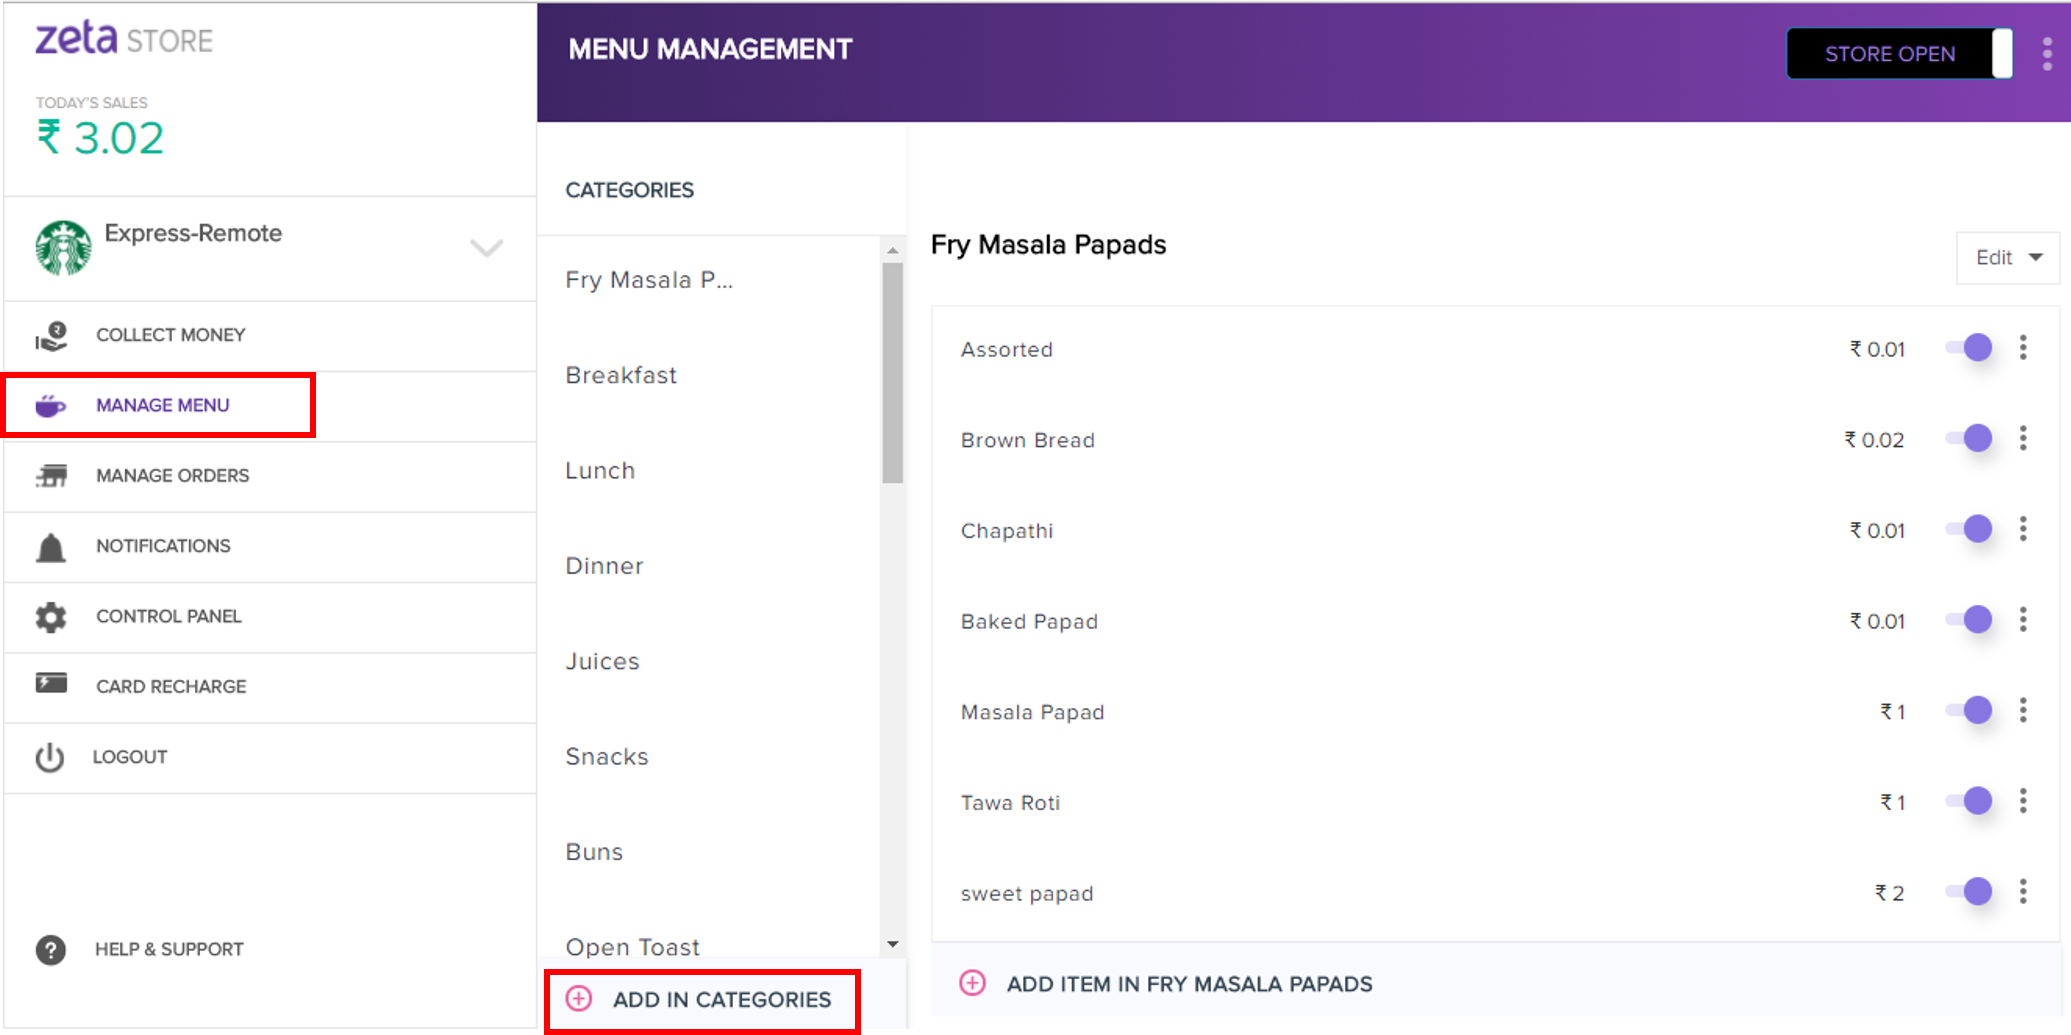
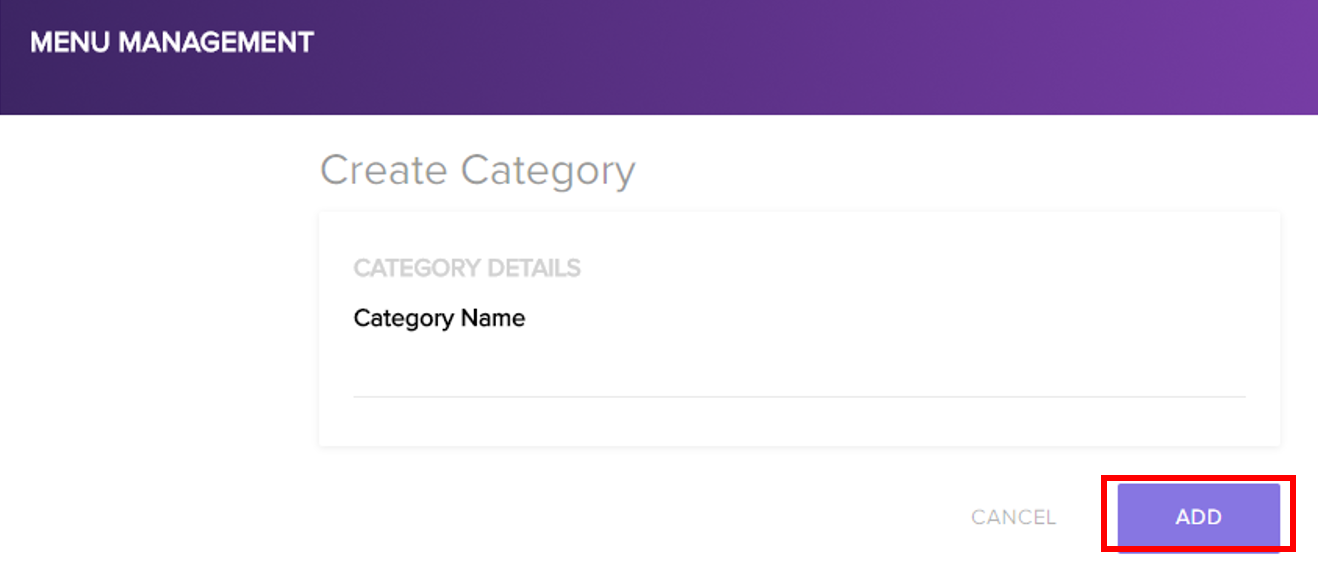
- In the Create Category dialog, specify the category name and click Add to confirm.
Edit Menu Category
- Log into the Zeta web POS.
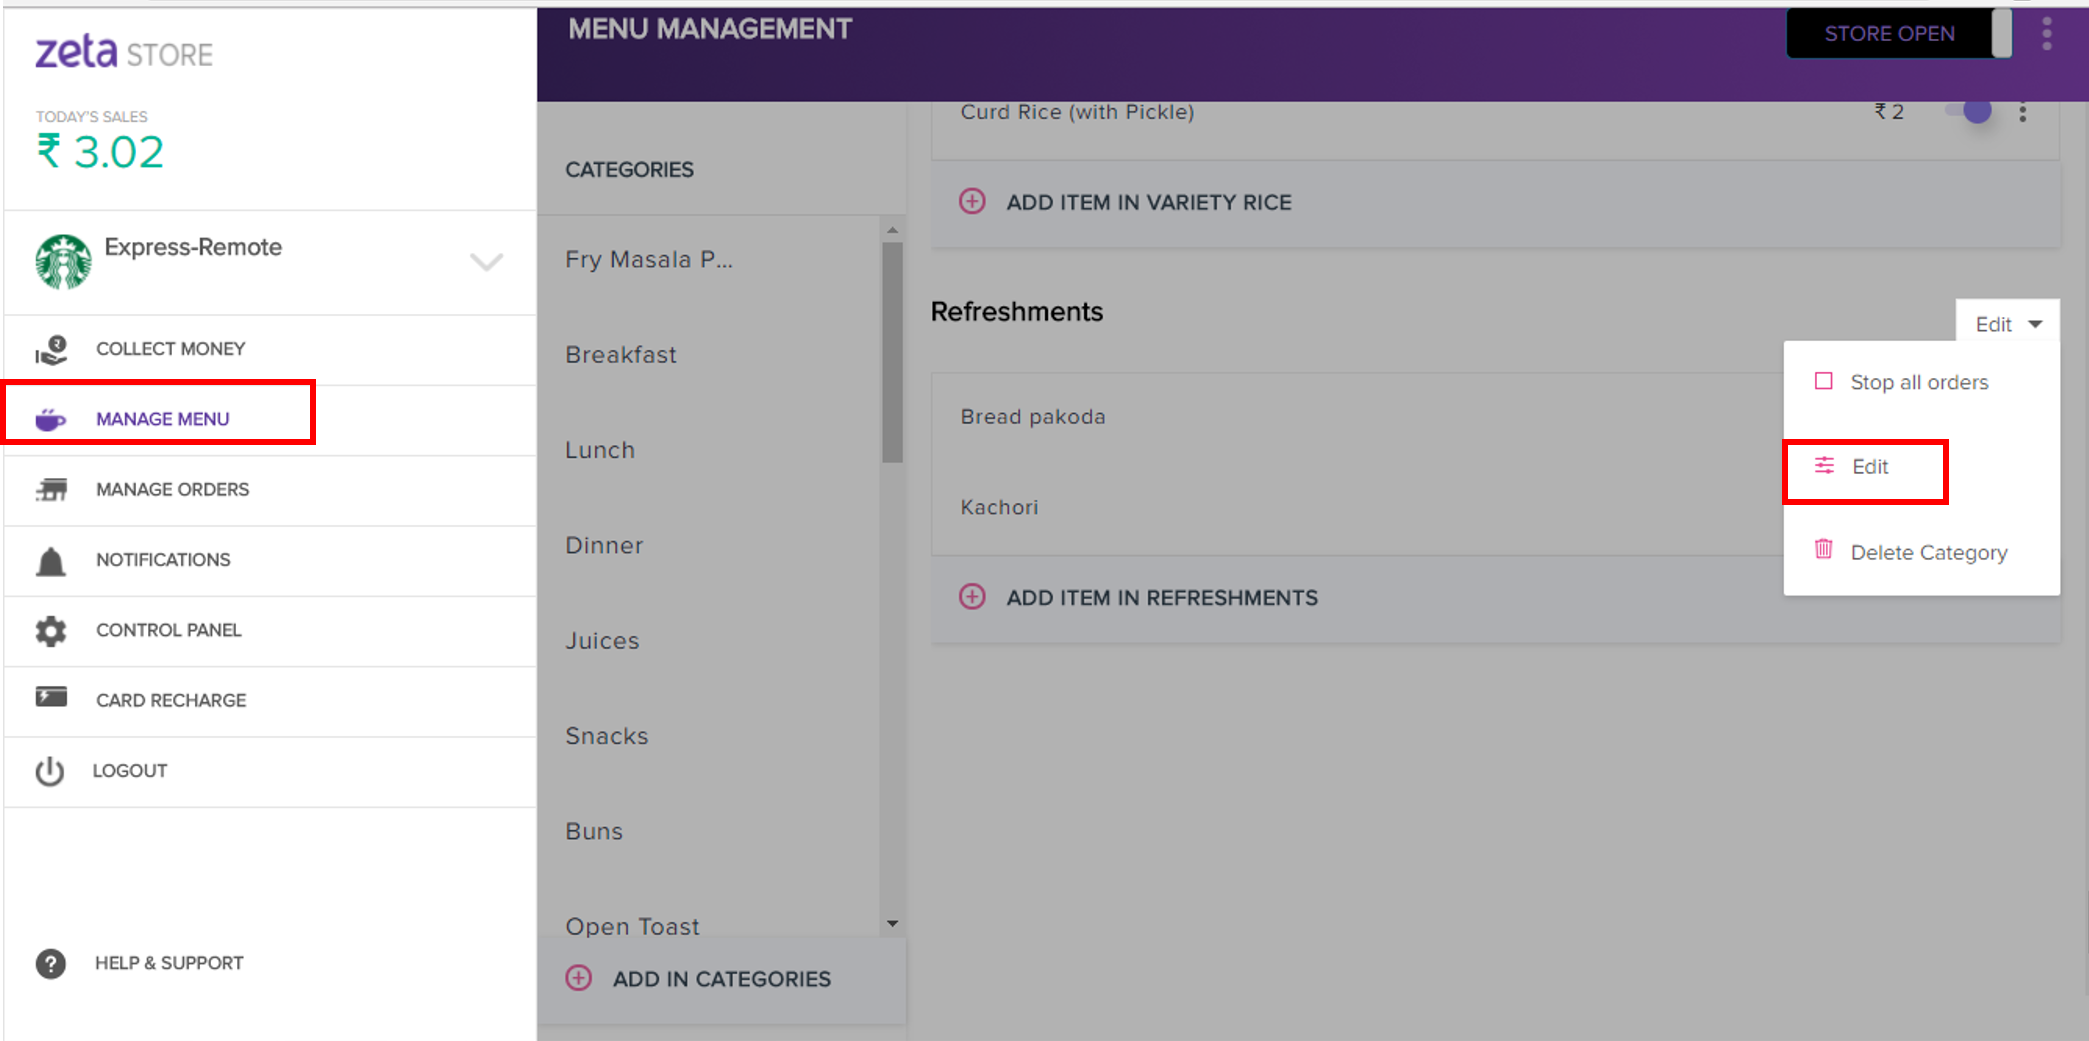
- In the left navigation pane, select the Manage Menu tab and navigate to the category in the menu management pane.
- In the drop down menu, select Edit and in the category preferences page.
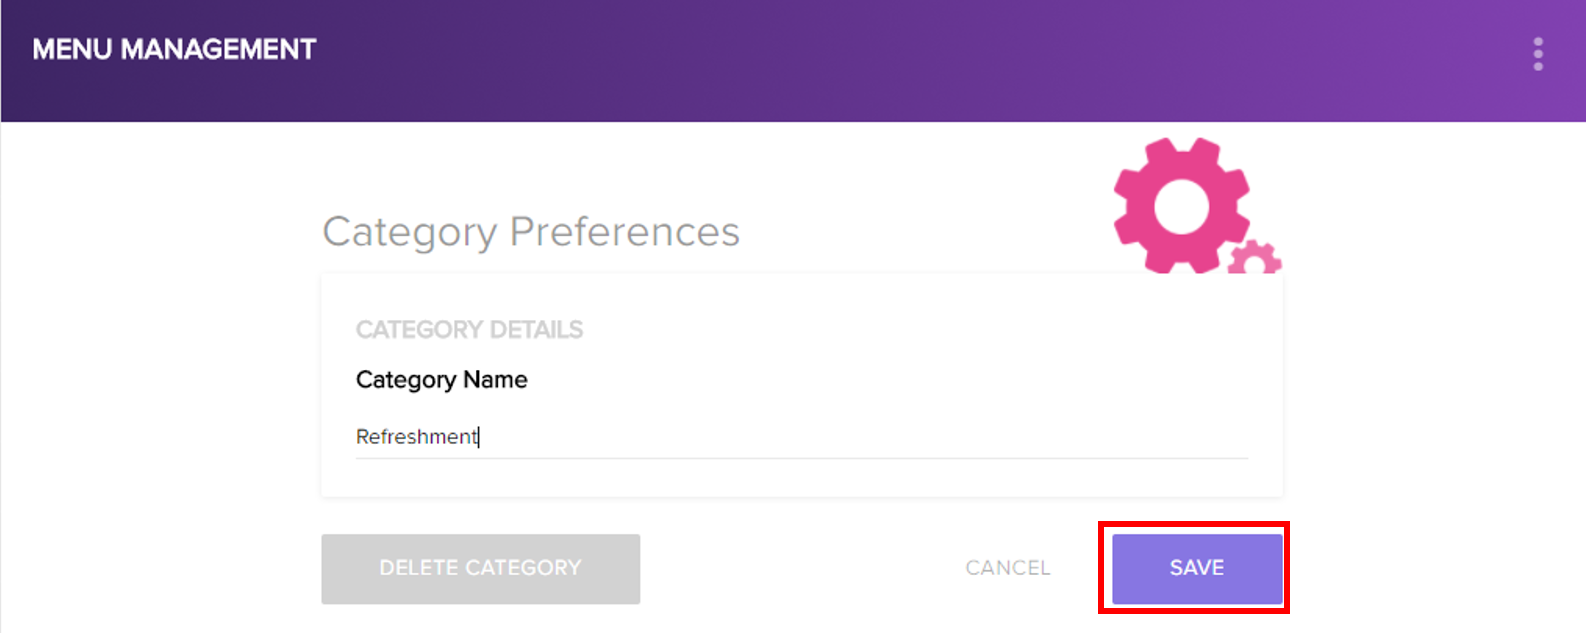
- In the Category Preferences dialog, type the category name and click Save to confirm.
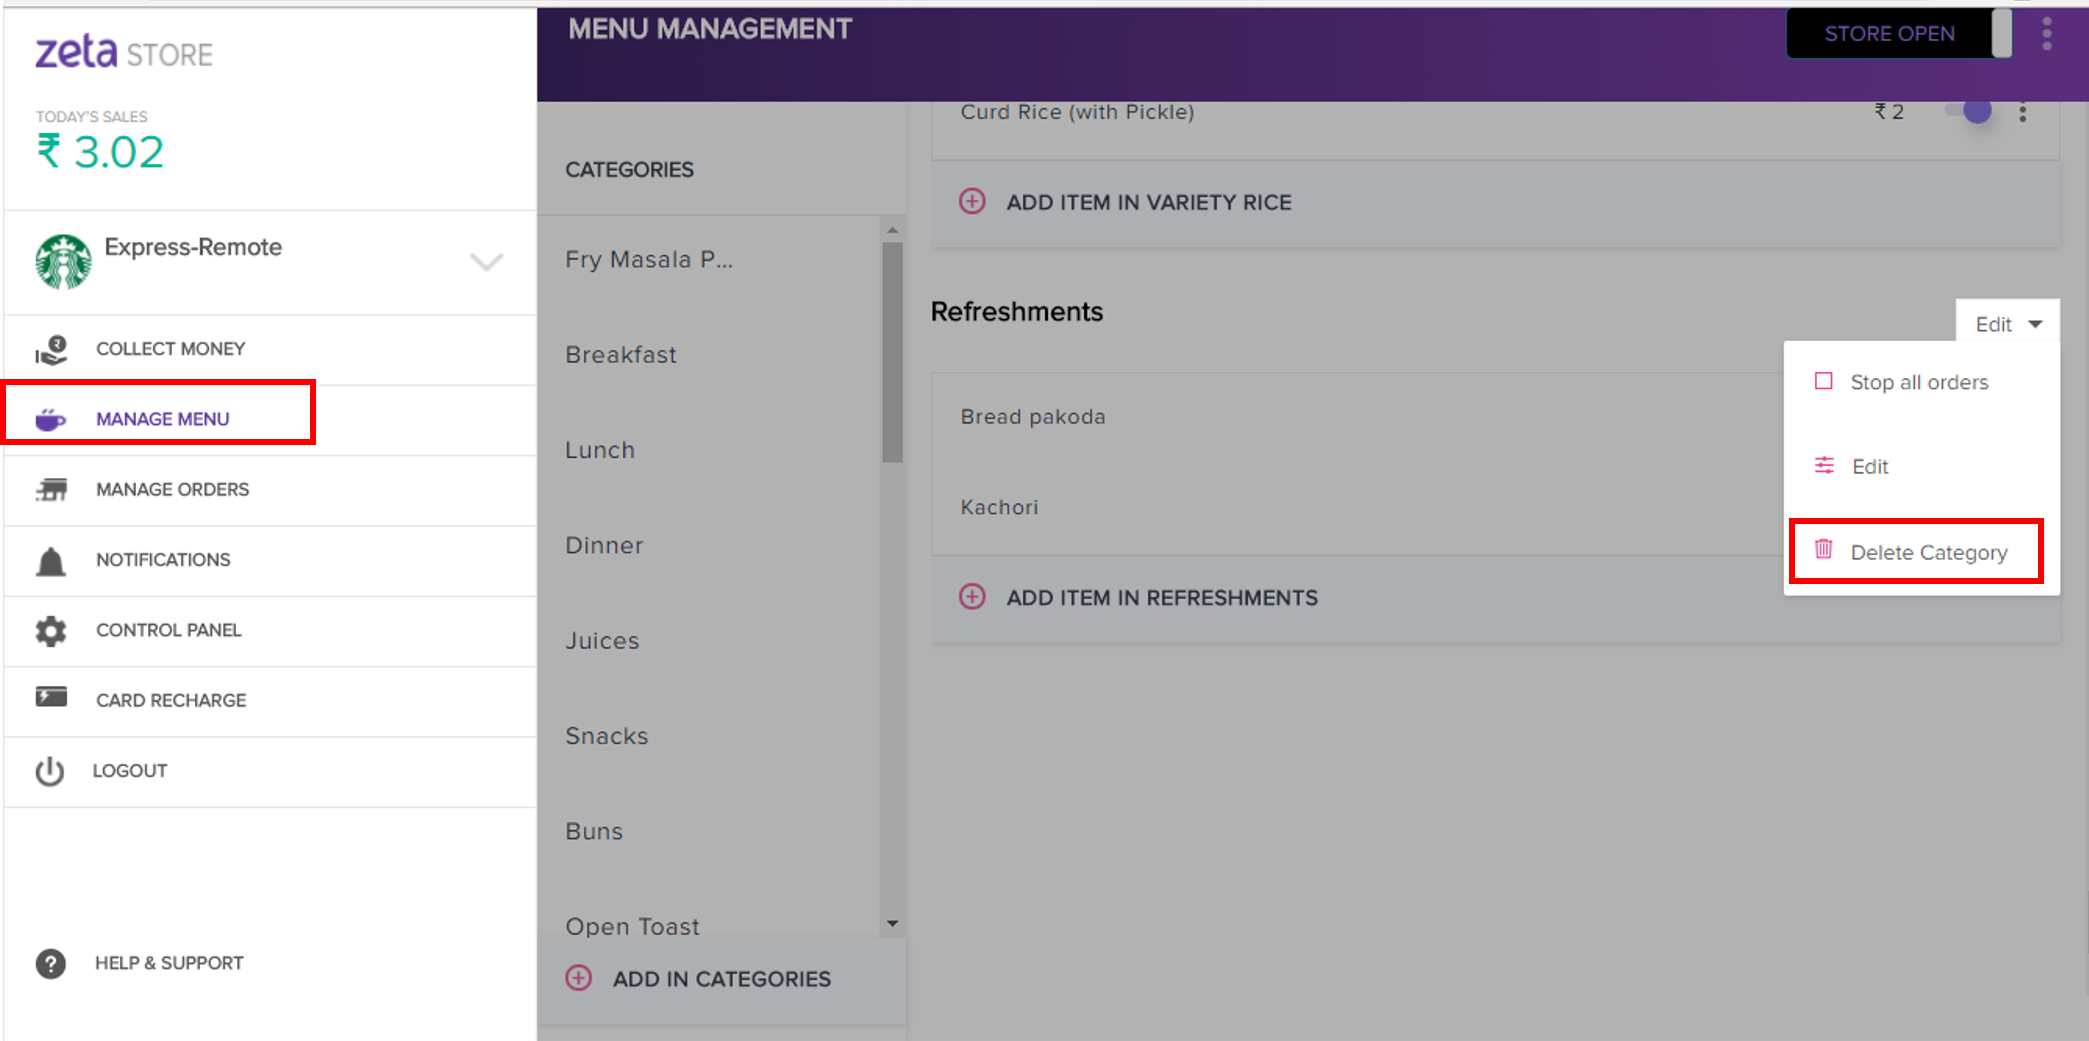
Delete Menu Category
- Log into the Zeta web POS.
- In the left navigation pane, select the Manage Menu tab and navigate to the category in the menu management pane.
- In the drop down menu, select Delete Category.
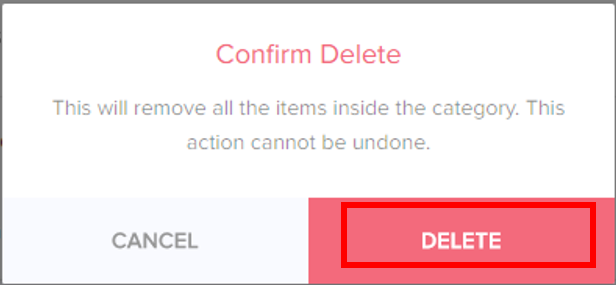
- Click Delete in the dialog to confirm.
Add Menu Item
- Log into the Zeta web POS.
- In the left navigation pane, select the Manage Menu tab and select the category, from the category list, for which you wish to add the Item into and click
") Add Item.
Add Item. 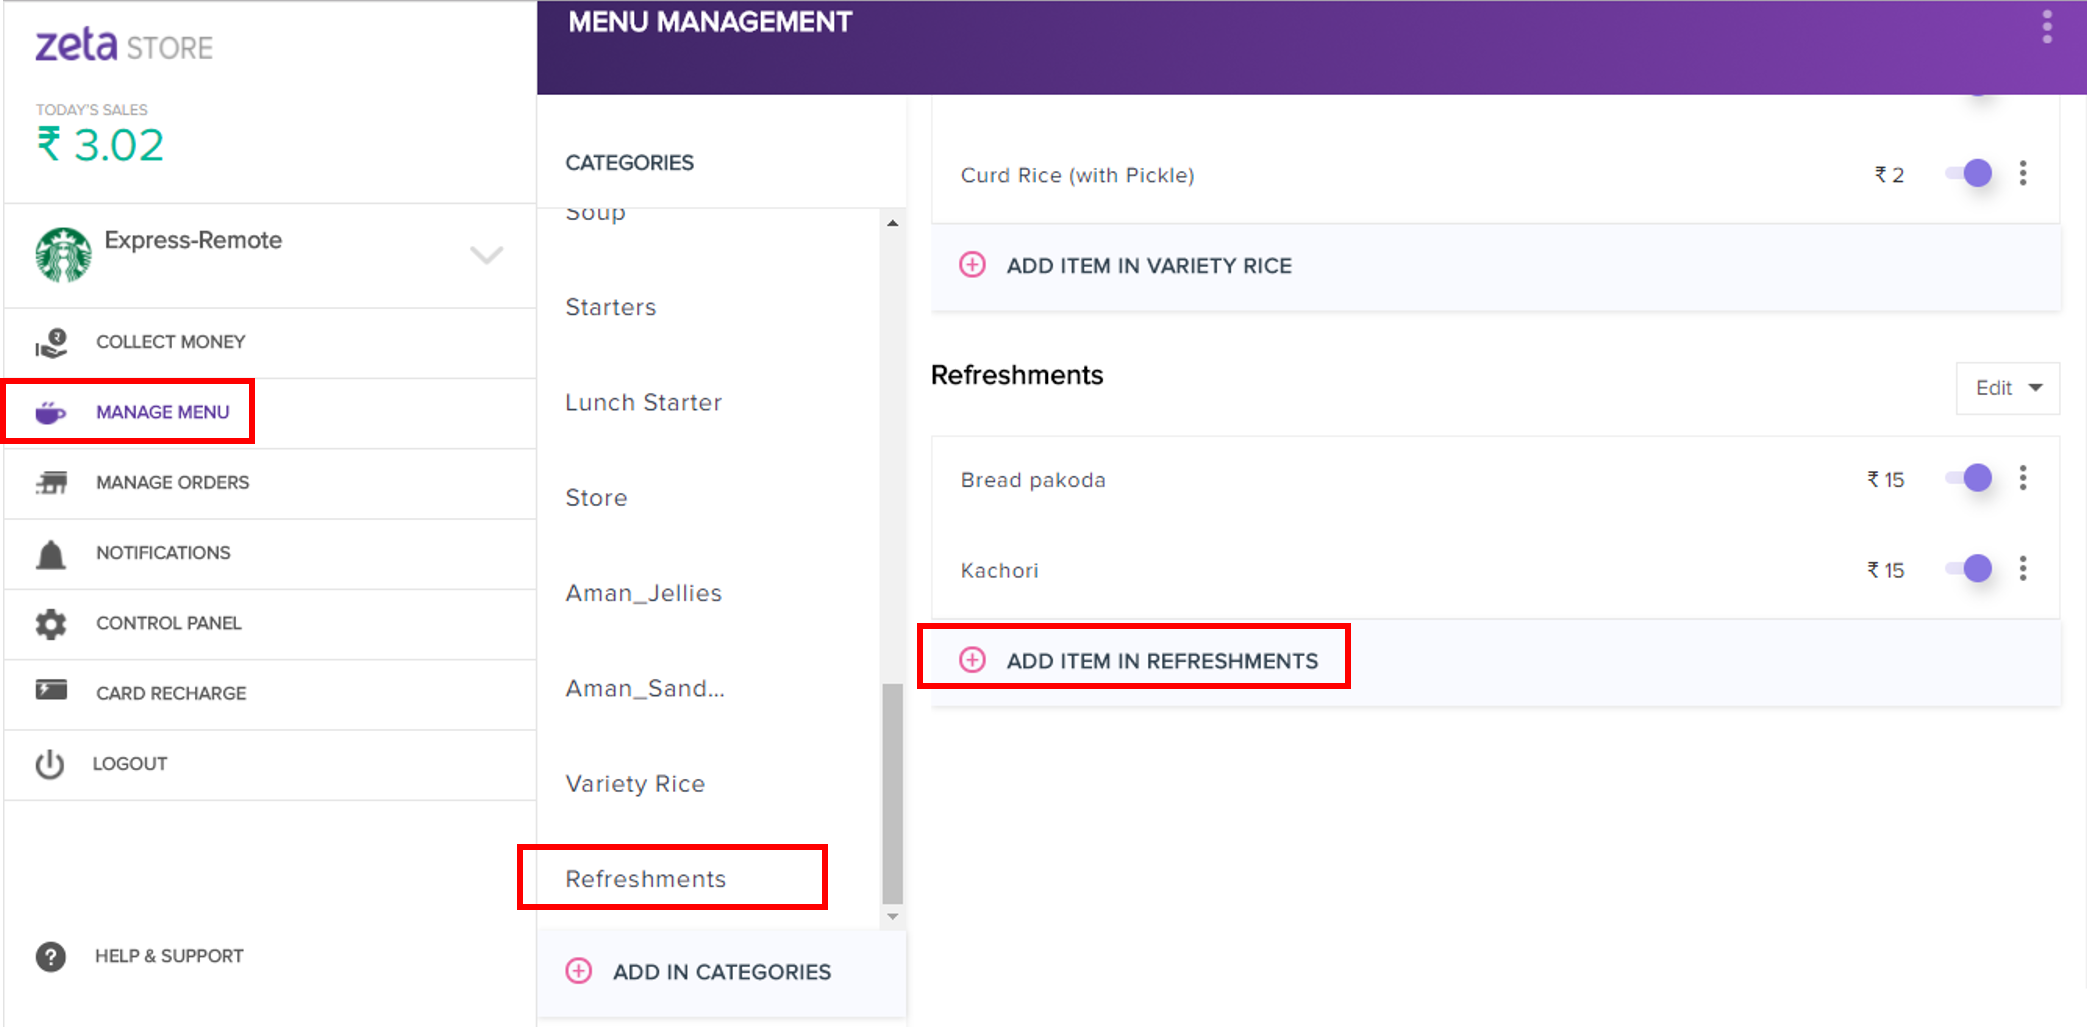
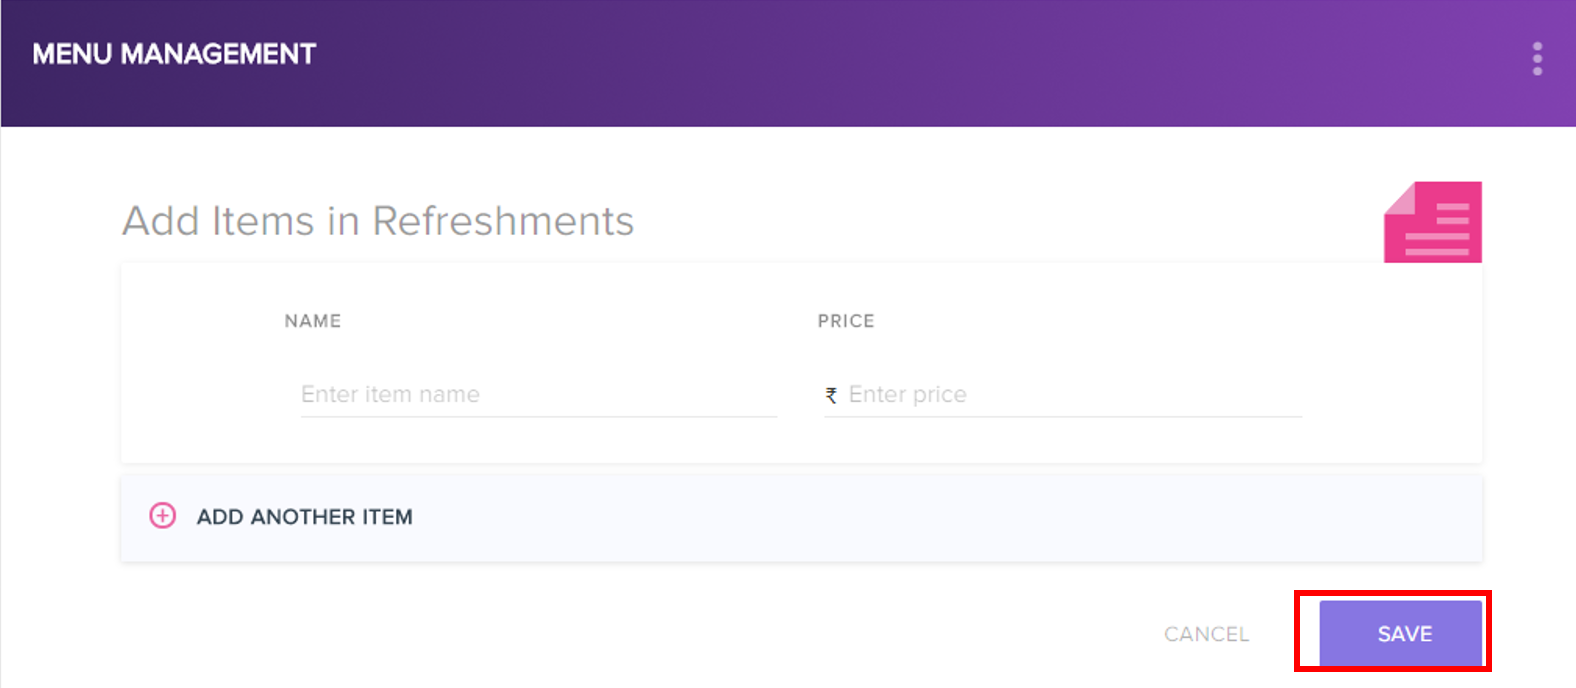
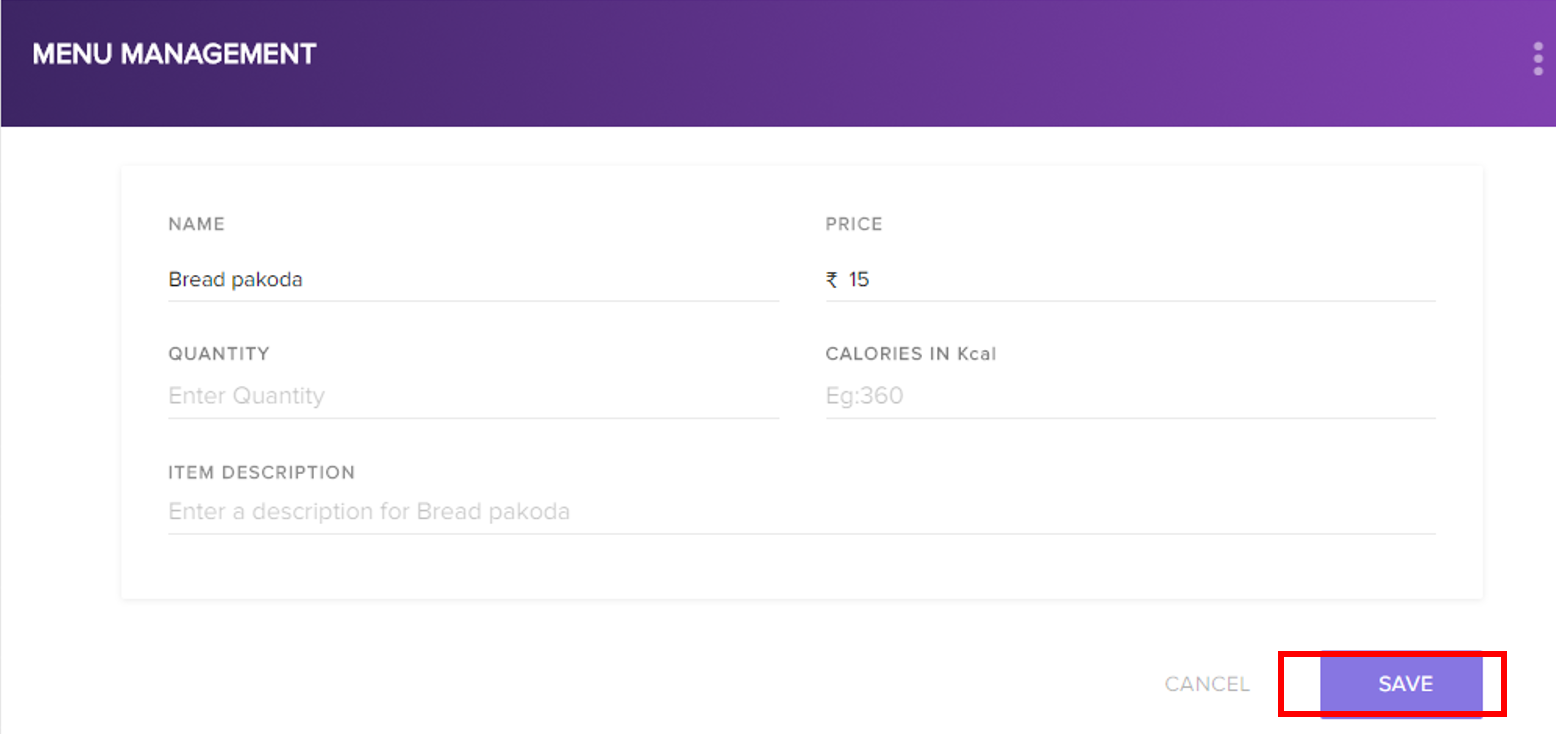
- In the adding item screen, specify the item name and the price and click Save to confirm.
Edit Menu Item
- Log into the Zeta web POS.
- In the left navigation pane, select the Manage Menu tab and select the category, from the category list, for which you wish to edit the item.
- In the menu item list, click anywhere on the item or click
 and select Edit Item from the drop down.
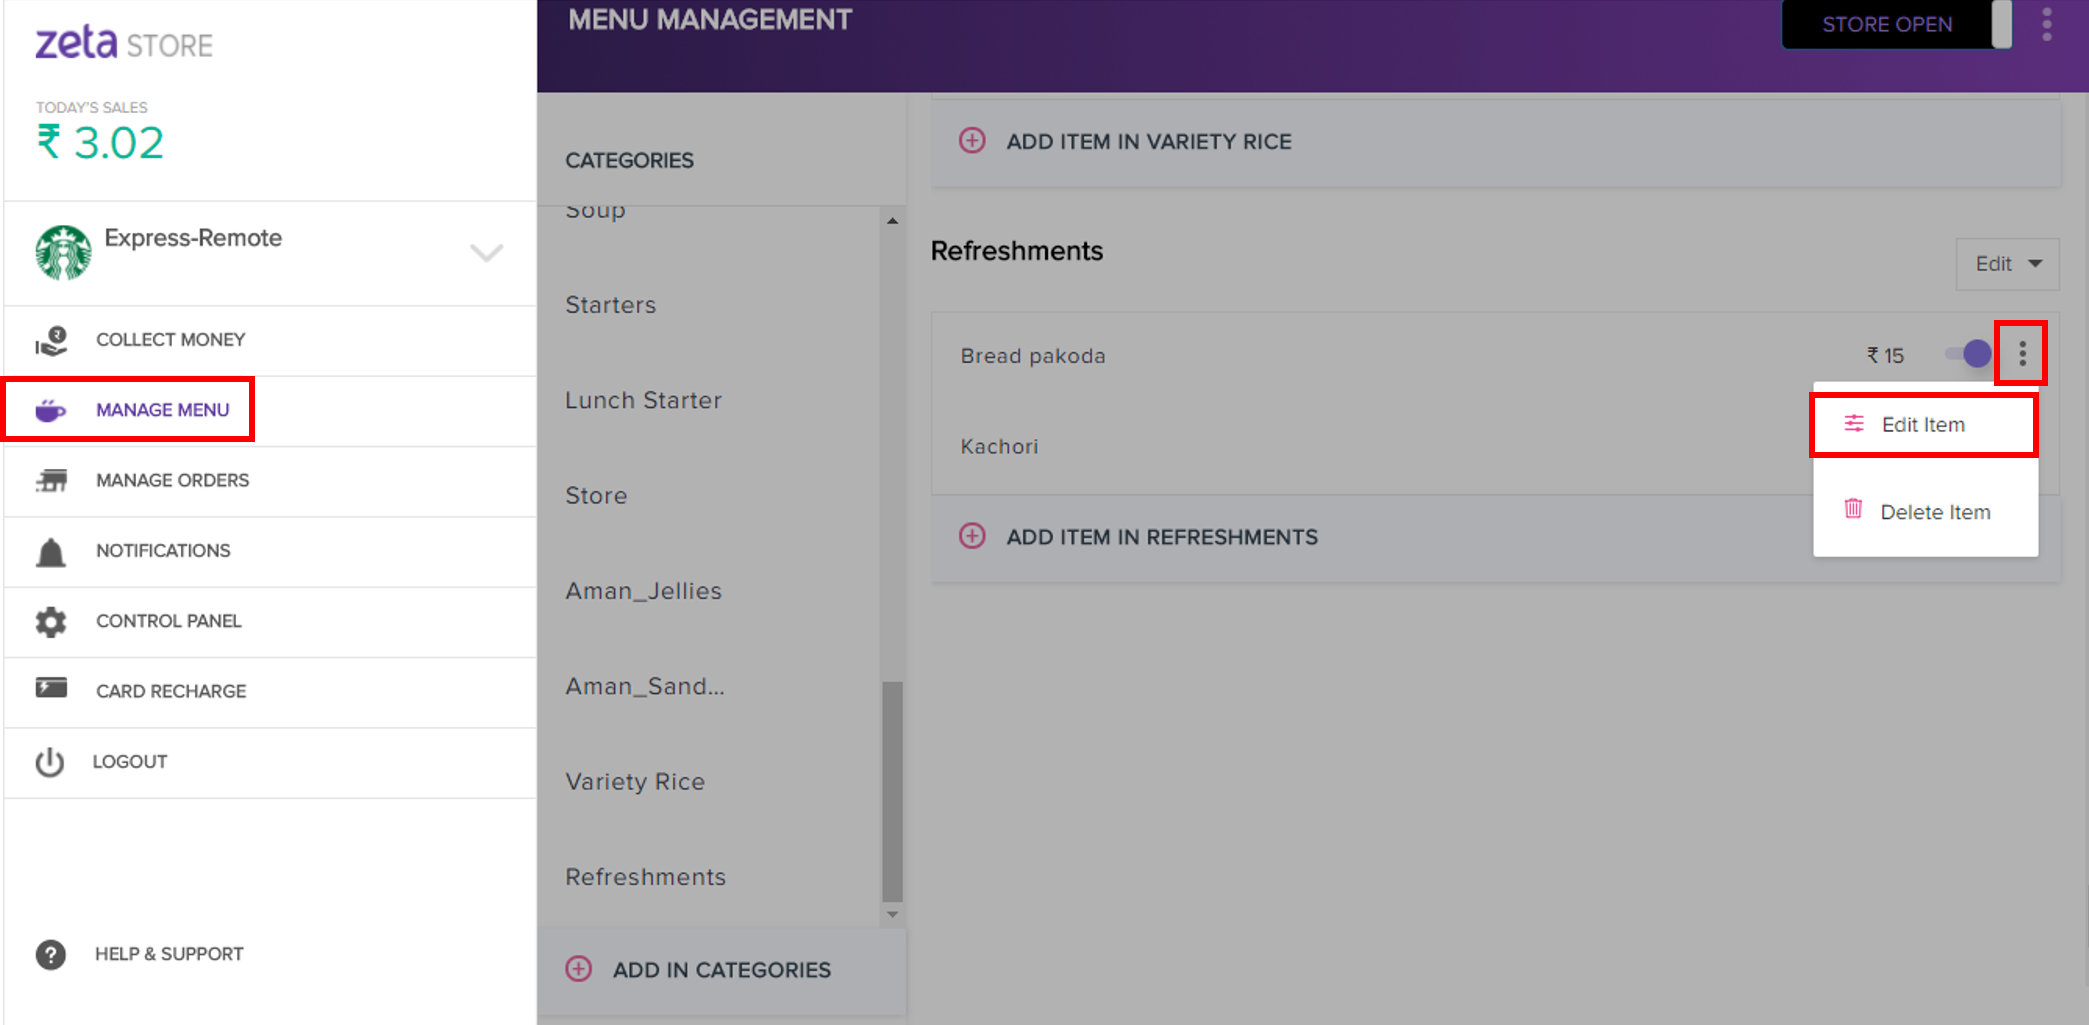
- Edit the menu item preferences and click Save to confirm.
Delete Menu Item
- Log into the Zeta web POS.
- In the left navigation pane, select the Manage Menu tab and select the category, from the category list, from which you want to delete the item.
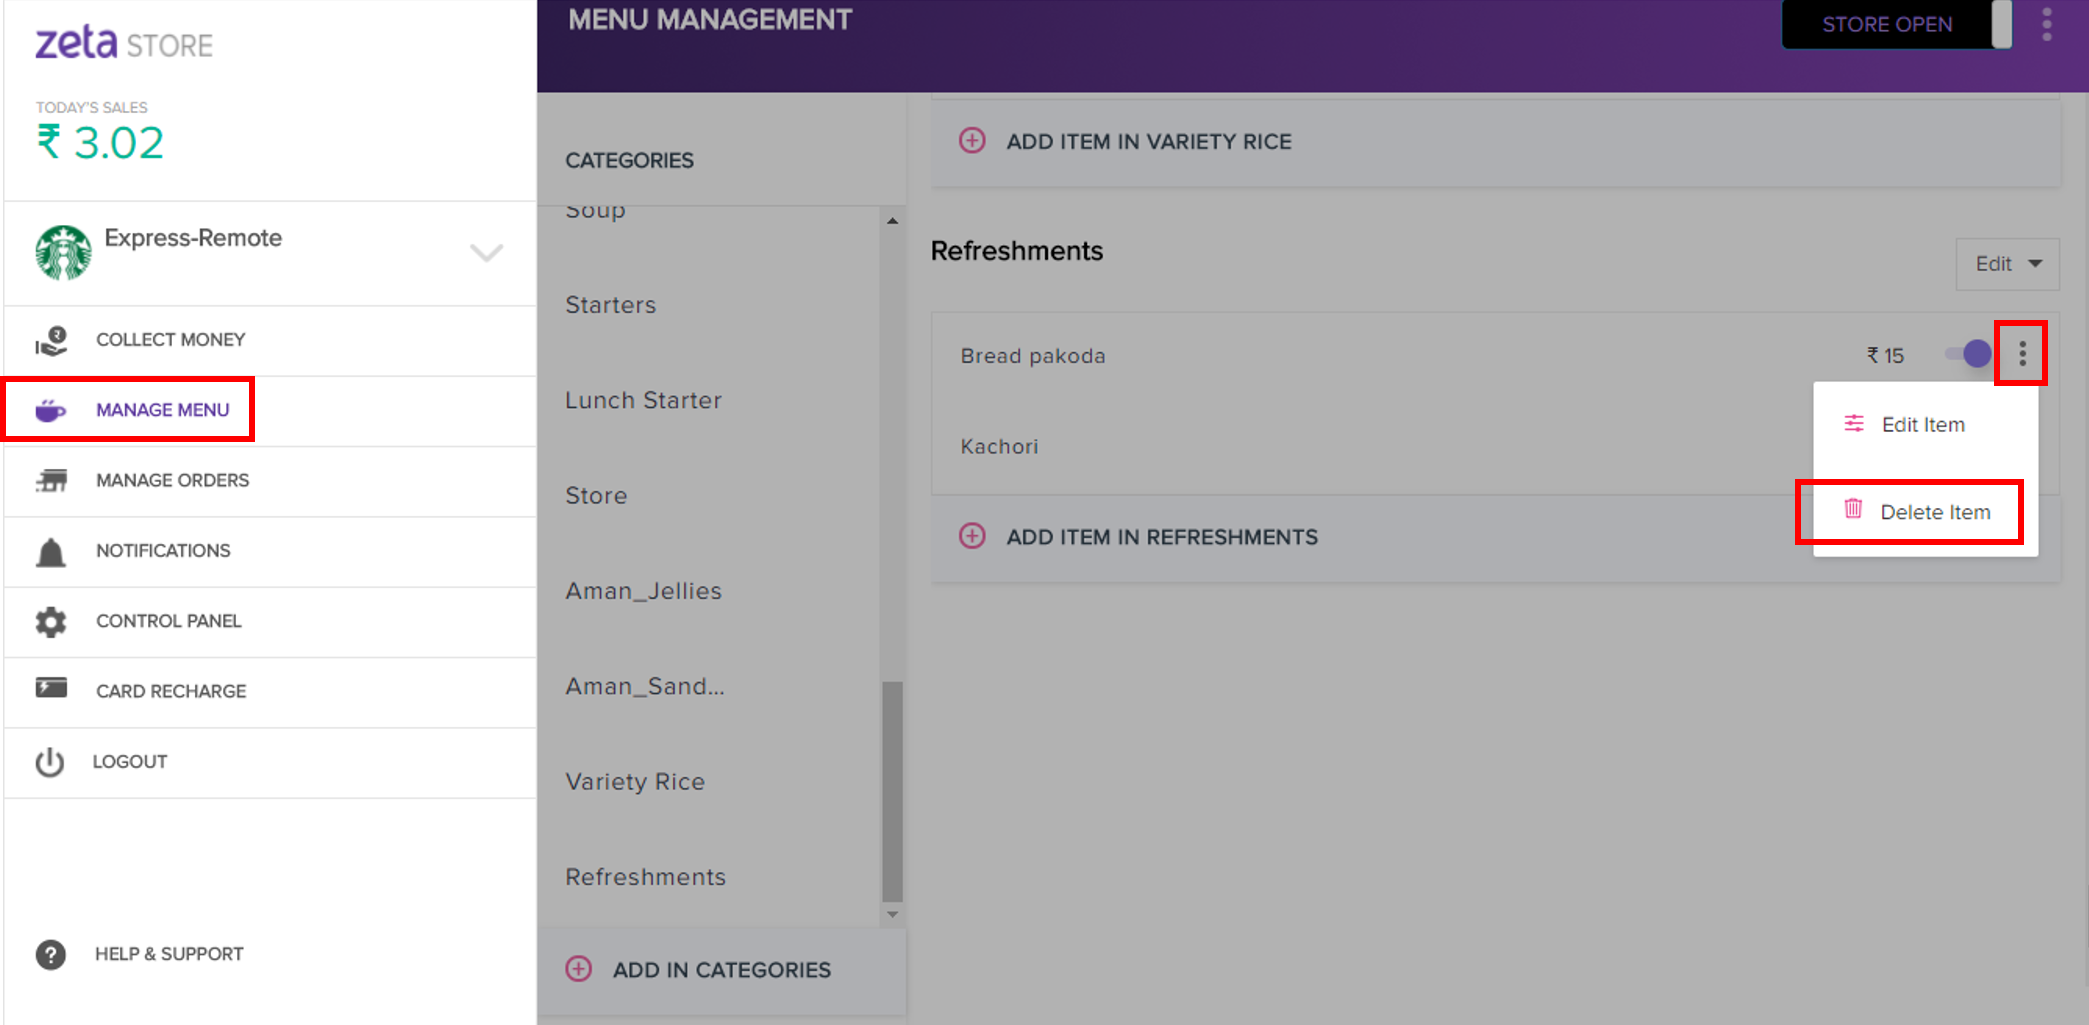
- In the menu item list, click and select Delete Item from the drop down.
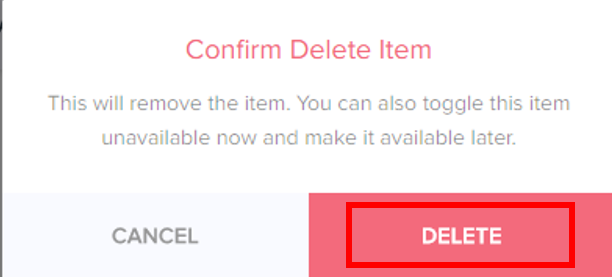
- Finally, click Delete to confirm.
On this page: