UPI SDKs enable you to create and manage different UPI workflows. The Android UPI SDKs are designed to provide the app framework to support multiple layout and style properties.
This article consists of a step-by-step sequence for integrating with UPI SDKs on the Android operating system.
Before you begin
Take care of the following prerequisites before you begin with SDK setup:
- Fusion uses an authentication token to authenticate the SDK. To know how to generate an authentication token, see SDK Authentication.
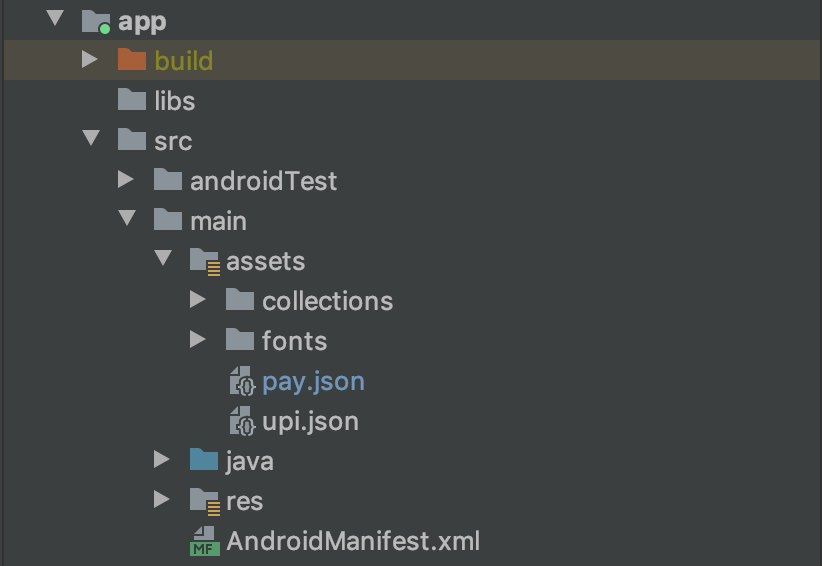
- Ensure to have SDK config files
pay.jsonandupi.json. - Ensure you have all assets required for UPI SDK and Pay SDK to function properly.
Getting Started with Android UPI SDK
Follow the steps below to integrate SDK:
- Prepare the SDK setup.
- Initialize your SDK.
 Step 1: Setting up the SDK
Follow the steps below to set up the SDK:
Add SDK config files in your assets folder.

We host all our SDKs on a remotely accessible Maven Repository. Add the following code to your project level
build.gradleto resolve dependencies.allprojects { repositories { .... maven { credentials { username = "<usename>" password = "<password>" } url 'https://apollo-SDK.zetaapps.in/repository/maven-releases/' authentication { basic(BasicAuthentication) } } maven { credentials { username = "<username>" password = "<password>" } url 'https://apollo-SDK.zetaapps.in/repository/maven-snapshots/' authentication { basic(BasicAuthentication) } } .... } }Add dependencies for UPI SDK and Pay SDK in your app-level
build.gradle.dependencies { ............ implementation 'apollo.sdk:upi:<latest-version>' implementation 'apollo.sdk:pay:<latest-version>' ............. }
 Step 2: Initializing the SDK
Create instances of UPI SDK and Pay SDK in
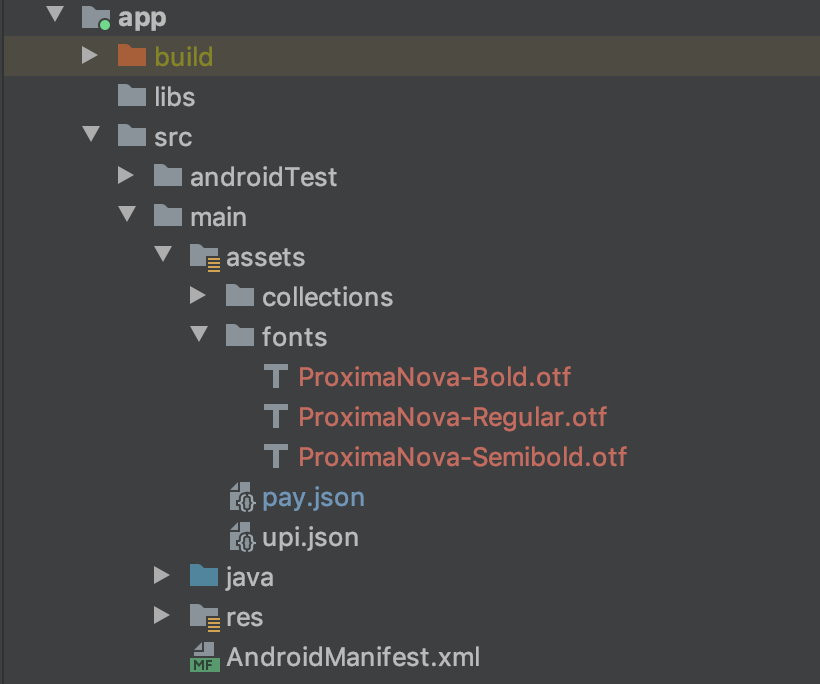
onCreate()method of Application.@Override public void onCreate() { super.onCreate(); setupPaySdk(this); setupUpiSdk(this); } private void setupUpiSdk(Context context) { upiSdk = new UpiSdkBuilder(context) .setExternalFontsMap(fontsMap) .setNotificationIcon(R.mipmap.ic_launcher_round) .setAccentColor(R.color.colorAccent) .setAppName(R.string.app_name) .build(); } private void setupPaySdk(Context context) { paySdk = new PaySdkBuilder(context) .useDeviceLock(true) .externalFontsMap(fontsMap) .build(); }You can also provide the fonts you want to use. Place font files in your assets folder.

And initialize the
fontsMapproviding path values to your fonts. Set this font map when building SDKs in step 1.private static final Map<String, String> fontsMap = new HashMap<>(); static { fontsMap.put("ProximaNova-Regular".toLowerCase(), "fonts/ProximaNova-Regular.otf"); fontsMap.put("ProximaNova-Semibold".toLowerCase(), "fonts/ProximaNova-Semibold.otf"); fontsMap.put("ProximaNova-Bold".toLowerCase(), "fonts/ProximaNova-Bold.otf"); }
UPI SDK APIs
Authenticate
For a user to use UPI SDK through your app, you need to authenticate the user using a tenant token. This tenant token should be computed at your backend as it needs sensitive information. ‘callback’ is triggered for success or failure of authentication.
fun authenticate(
       tenantToken: String,
       callback: UpiSdkCallback<String>
) |
UPI Registration
After UPI SDK authentication is successfully completed, you can trigger the UPI registration flow.
fun triggerRegistration(
       parentActivity: Activity,
       requestCode: Int,
       request: RegisterUpiRequest
) |
The class RegisterUpiRequest expects these parameters.
data class RegisterUpiRequest(
       val phoneNumbers: List<String>,
       val firstName: String,
       val lastName: String,
       val userEmail: String,
       val bankDisplayName: String
) |
Logout
Ensure to call logout on SDK when the user logs out from the app or the current user is switched to another user in the app.
fun logout() |
Pay SDK APIs
Initialize
To initialize and prepare Pay SDK. ‘callback’ is triggered in case of success or failure.
fun initialise( callback: PaySdkCallback<Boolean> ) |
PaySDKCallback the structure is as follows.
interface PaySdkCallback<T> {
   fun onSuccess(result: T)
   fun onFailure(t: Throwable)
} |
Authenticate
When SDK is initialized successfully, you need to authenticate the user using a tenant token so that the user can use pay SDK features through your app. Authentication should be done at each app start. ‘callback’ is triggered in case of success or failure of authentication.
fun authenticate( tenantToken: String, callback: PaySdkCallback<String> ) |
Setup
After successful authentication, you need to call the setup API.
fun setup( triggerActivity: Activity, request: SetupRequest, callback: PaySdkCallback<Boolean> ) |
SetupRequest the structure is as follows.
data class SetupRequest( val ifi: Long, val vectorType: String, val vectorValue: String ) |
It expects unique ifi , the ID of the issuer, a vector type (example - “ACCOUNTHOLDER”), and a unique vector value for the user.
Authentication Token
To get the authentication token of the user.
fun getAuthToken( callback: PaySdkCallback<String> ) |
SDK State
To get the current state of SDK.
fun getSdkState(): String |
Supported SDK states are:
object SdkState {
   const val SDK_NOT_READY = "SDK_NOT_READY"
   const val SDK_READY = "SDK_READY"
} |
Initially, at each app start, SDK is at SDK_NOT_READY state. SDK comes to SDK_READY state when initialize, authenticate and setup steps are completed successfully. If SDK fails at any of these 3 steps, then it remains at SDK_NOT_READY state.
When SDK is in SDK_READY state, you will be able to make payments through various modes.
Send Money
Triggers an activity to start UPI payments flow.
fun sendMoneyFlow( triggerActivity: Activity, requestCode: Int? ) |
Request Money
Triggers an activity to start the request money flow.
fun requestMoneyFlow( triggerActivity: Activity, requestCode: Int? ) |
Received and Collect Requests
Shows all received collect requests. Users can approve or decline a collect request. Users can also see the collect requests sent by him and cancel the pending requests.
fun allRequestsFlow( triggerActivity: Activity, requestCode: Int? ) |
Profile
Shows UPI QR code of the user.
fun profileFlow( triggerActivity: Activity, requestCode: Int? ) |
Logout
Ensure to call logout on SDK when the user logs out from the app or the current user is switched to another user in the app.
fun logout( callback: PaySdkCallback<Boolean> ) |
|